
I had only a little time tonight to spend in the shop, but managed to get a lot done.
First, I managed to improve the fit of the flap housing sides – this is the problem I mentioned in my last post. These things are very thin aluminum and aren’t at all structural, so I enlarged some of the screw holes to allow the part to “float” a bit when all the fasteners are in place…seems to work fine. Sorry, I didn’t take any pictures of them after reinstallation.
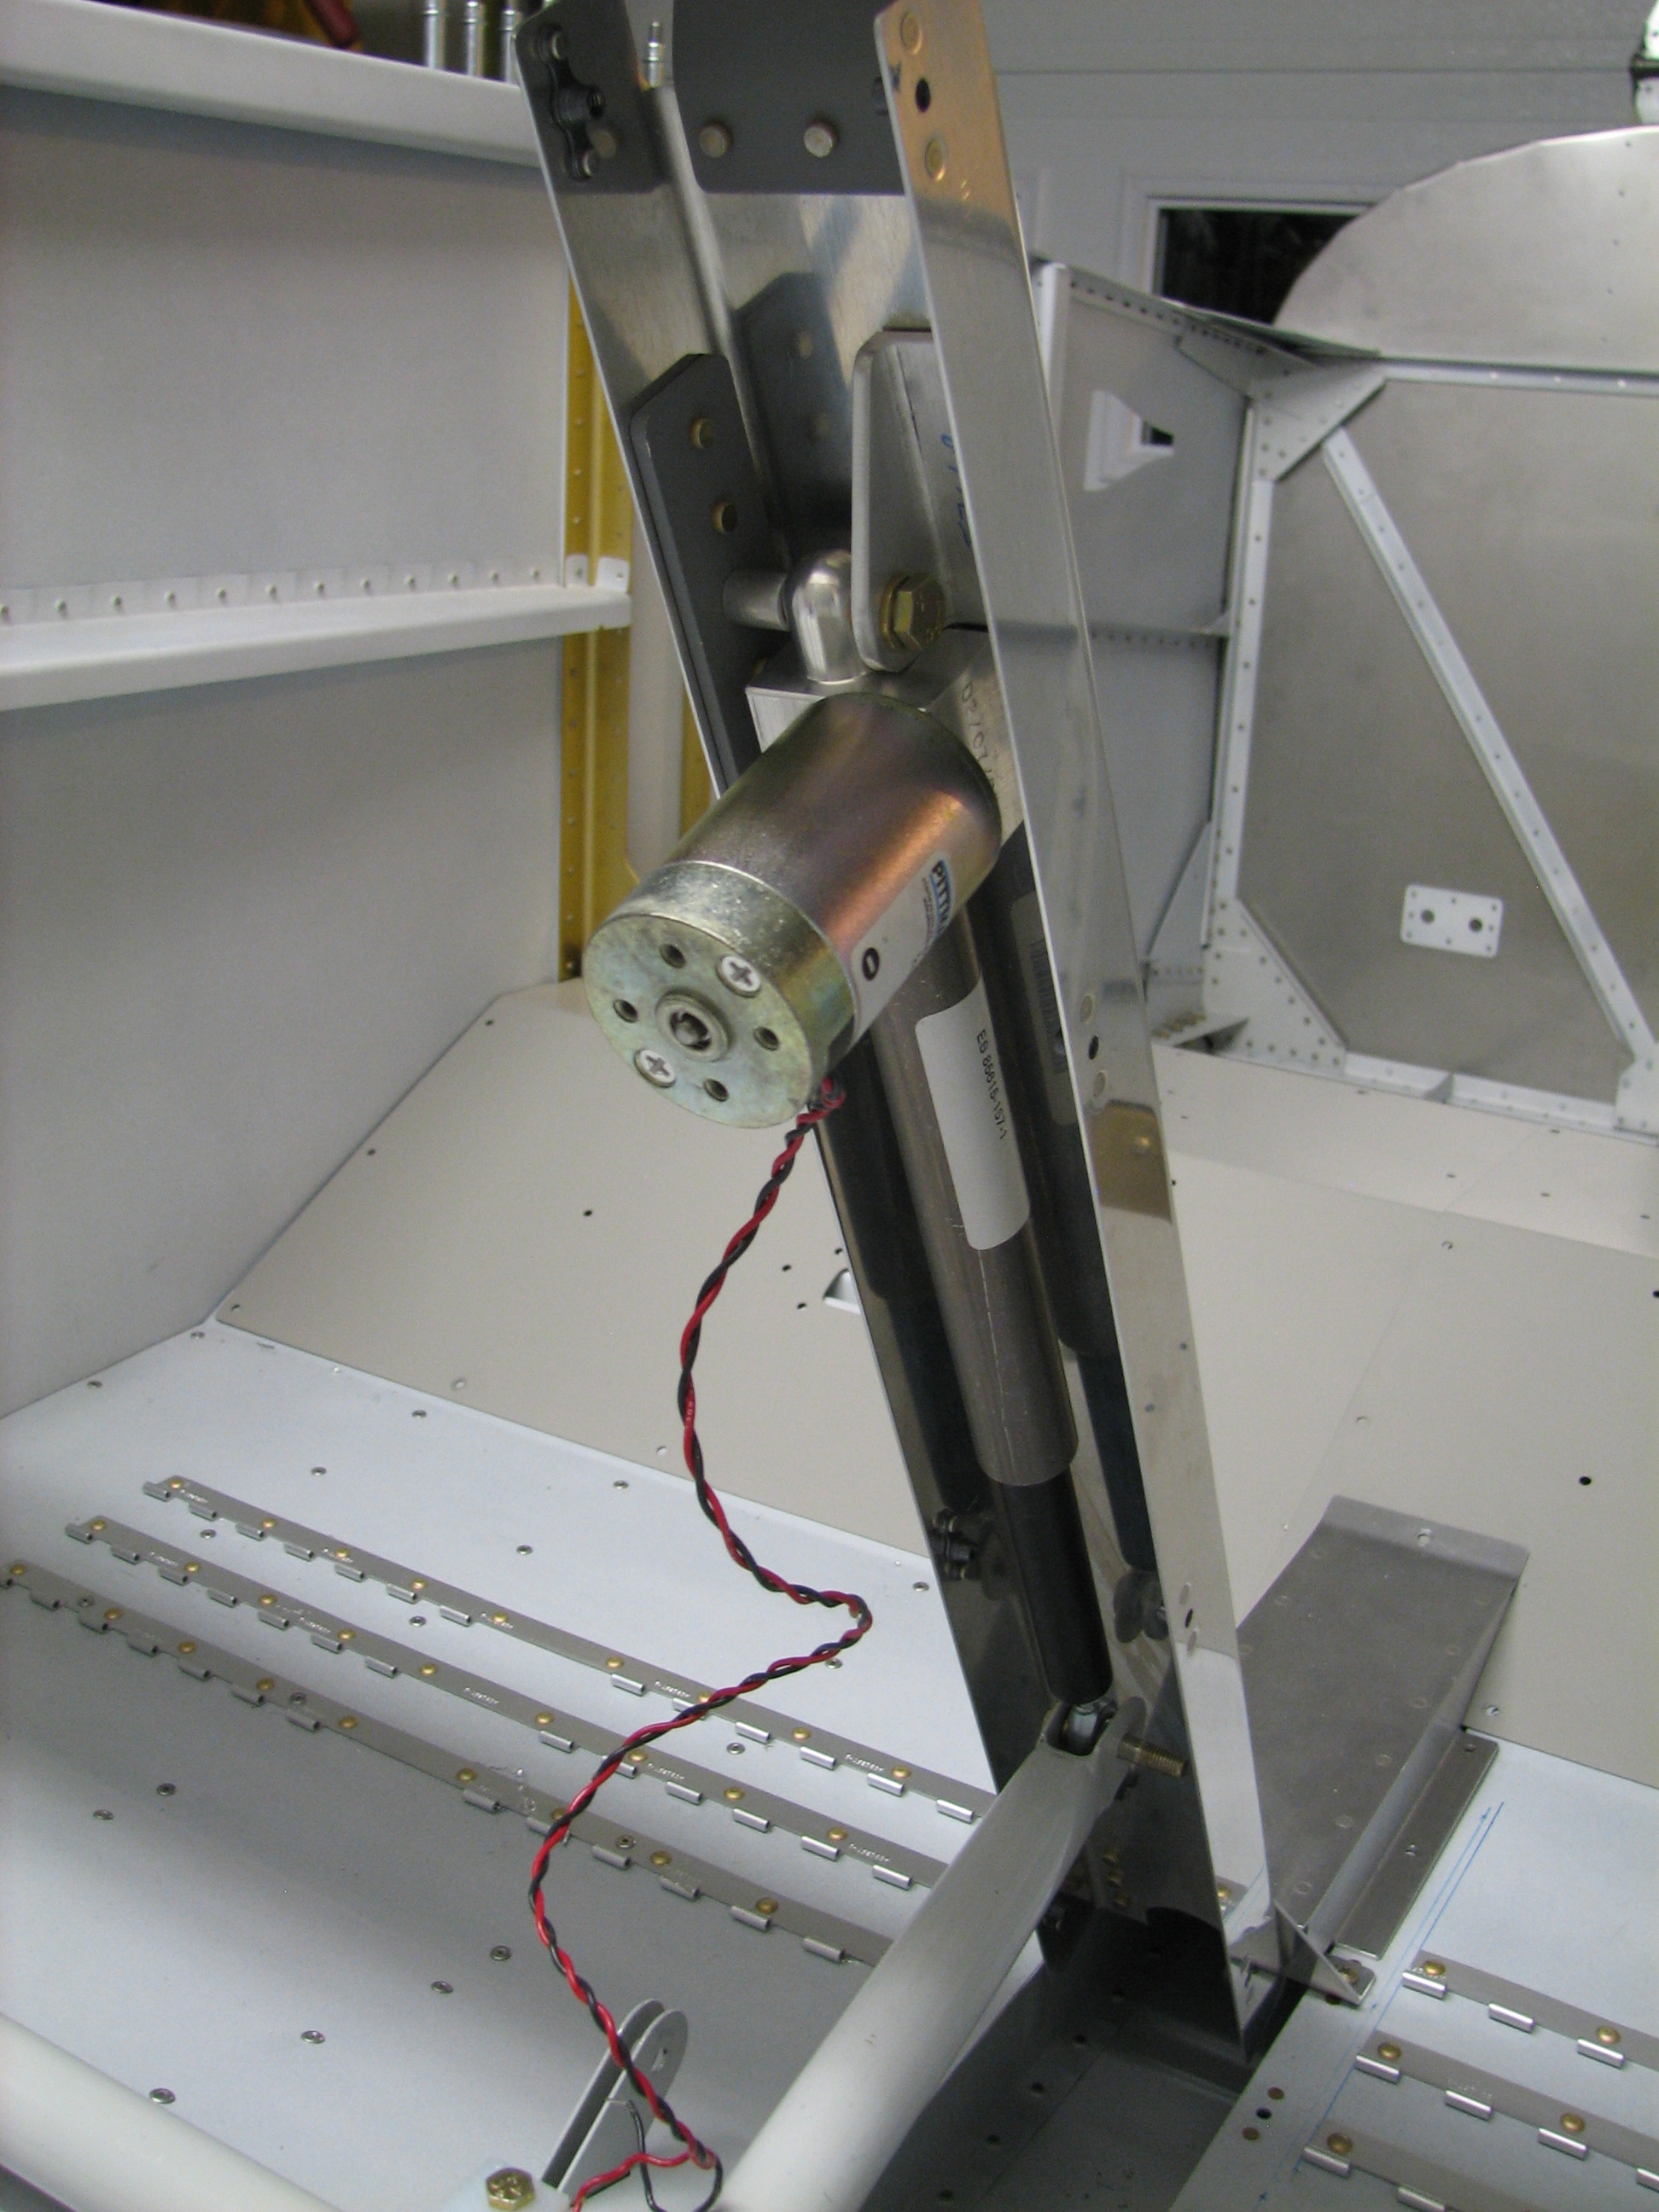 Second, and more importantly, I temporarily mounted the flap actuator to its housing. There’s one aluminum angle supporting the flap actuator that still needs to be mach-drilled to the forward brace – you can see the angle above and very slightly to the right of the actuator motor (for all you non-RVers, it’s the cylindrical thing with screws on the end).
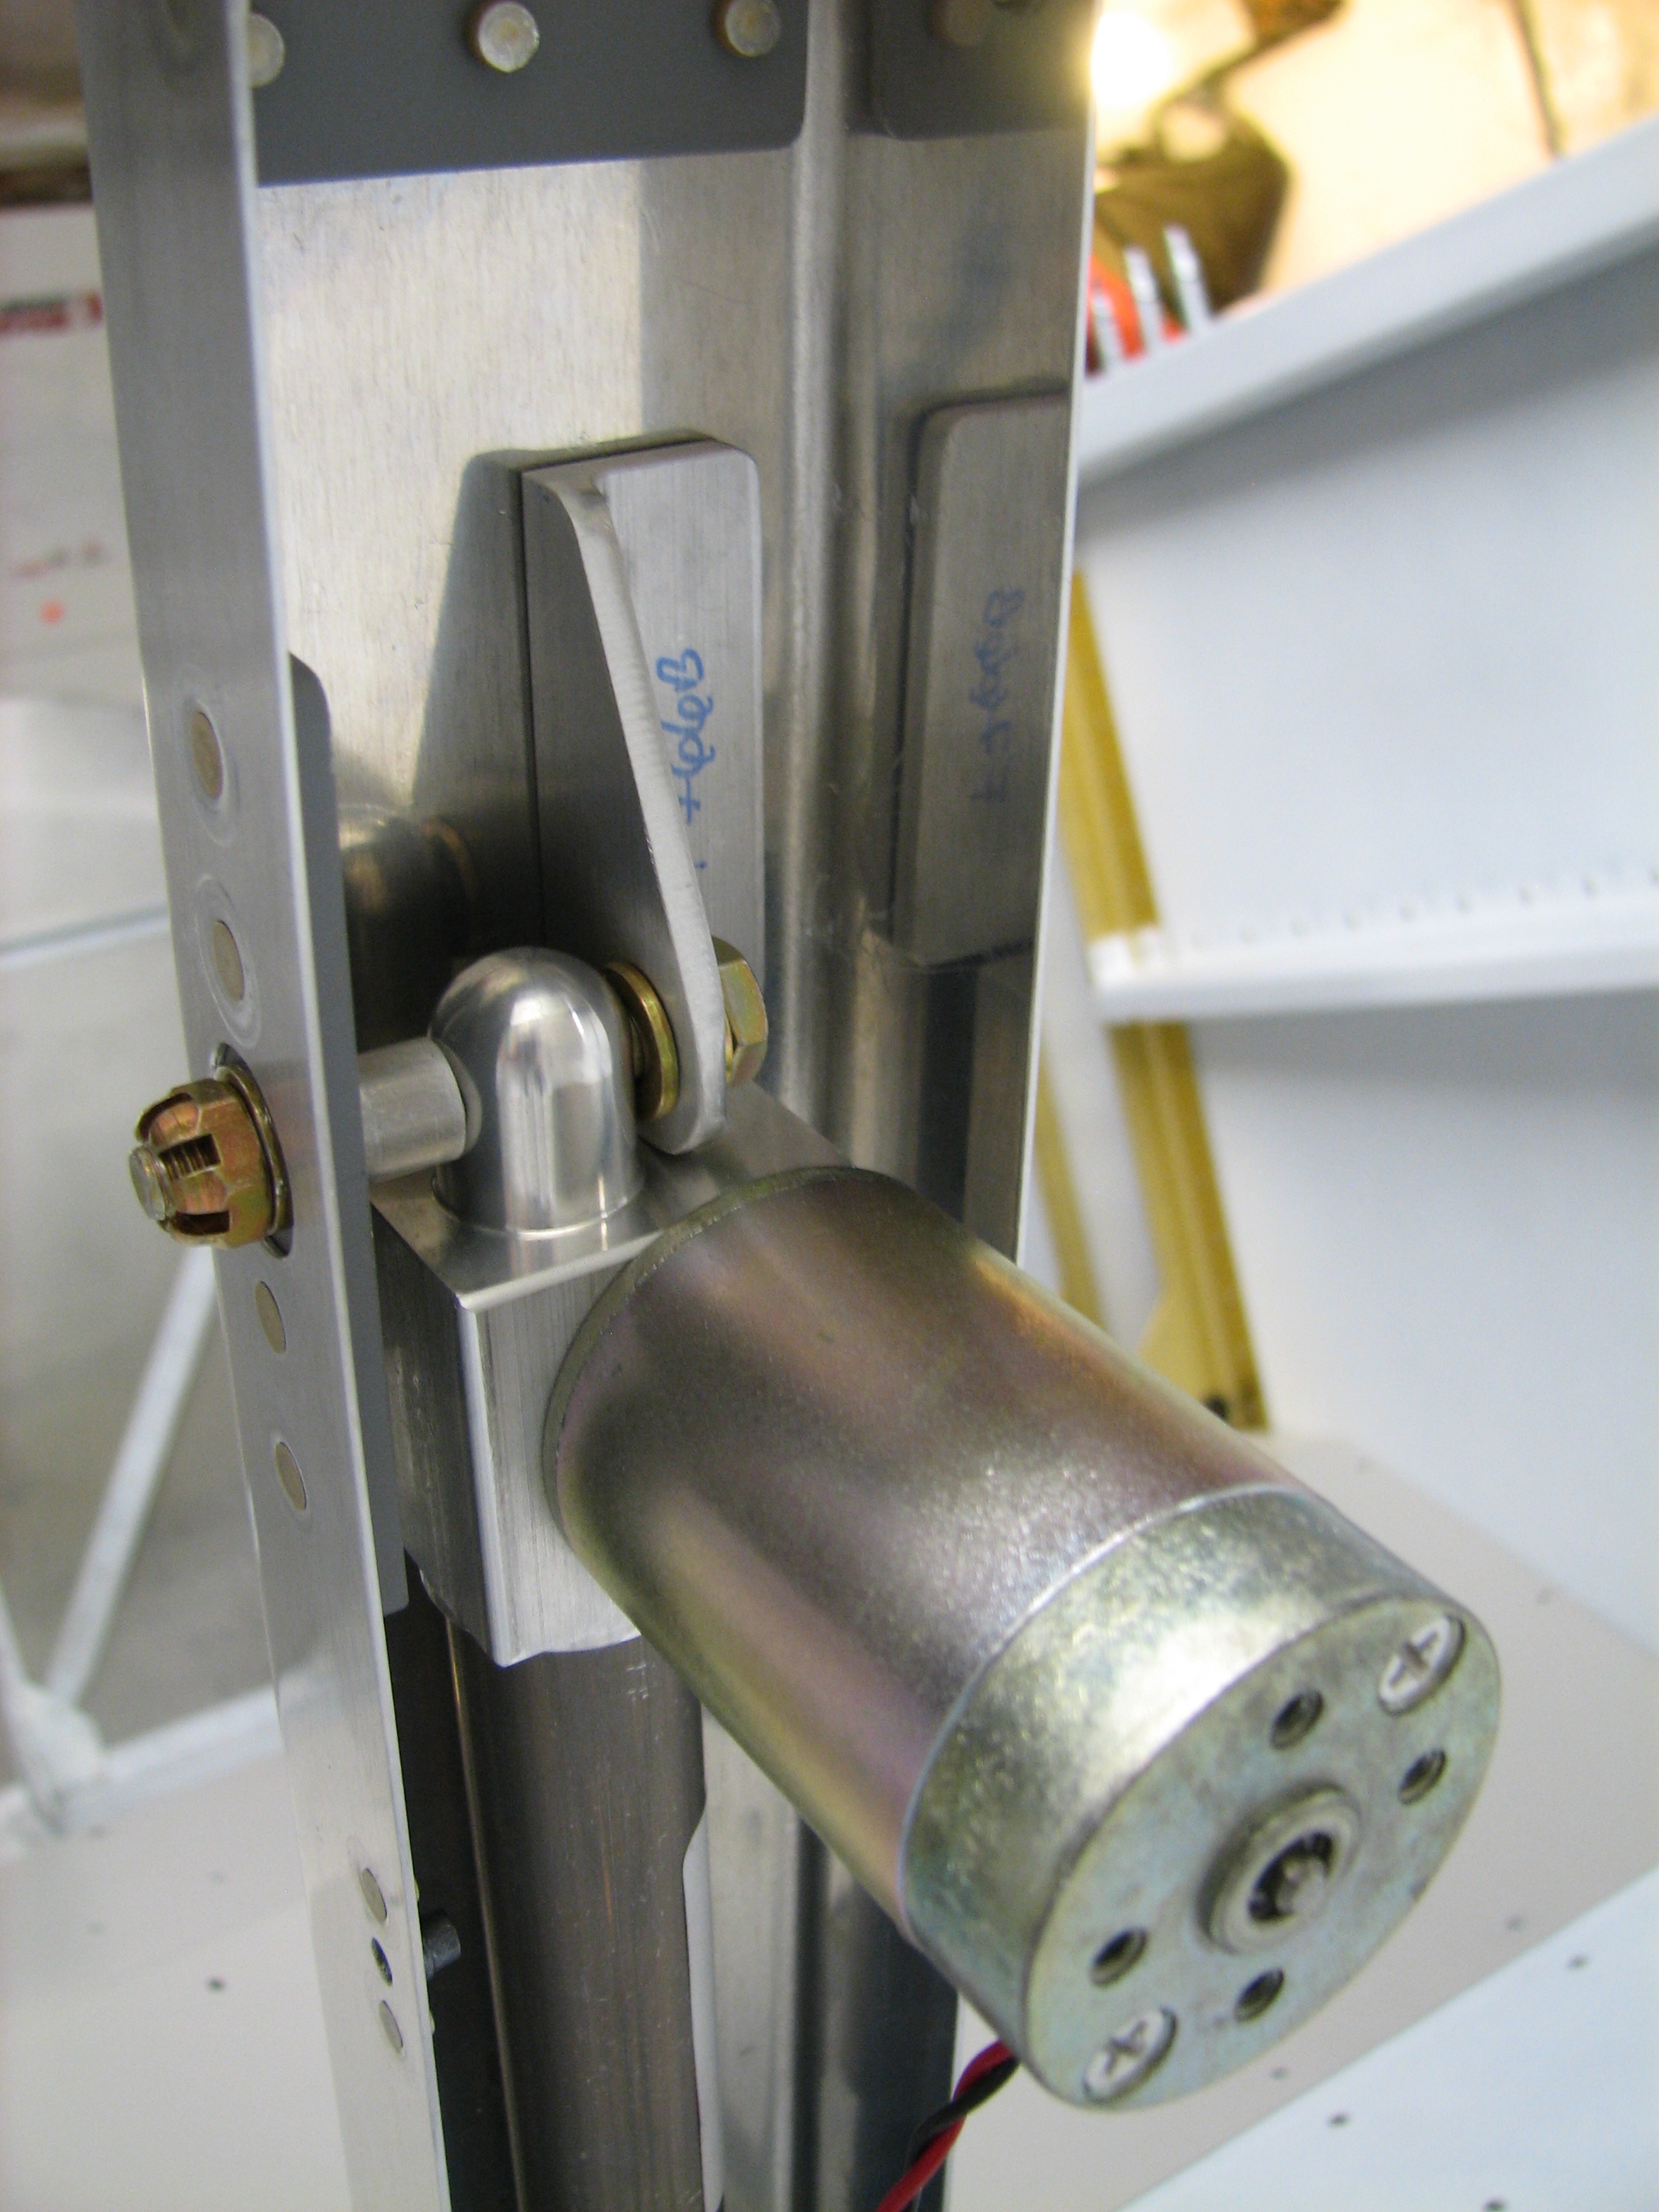 Here’s a closeup of the angle. One of the cool parts of this process is powering up the actuator with a battery to run out the actuator arm so it can be bolted to the flap arm. The flap motor hasn’t been run in five years, but it worked fine.
With the whole angle/actuator/brace assembly in place, and with judicious application of a clamp to the angle, I’ll match-drill the angle and brace…but not tonight. I’m whipped and it’s bedtime.