Bend, fit, repeat

One of the least enjoyable and most time-consuming parts of this project is bending fuel line tubing. With the fuse interior painted it’s time to install interior fuel vent and feed lines, and that means making a lot of tubing bends.

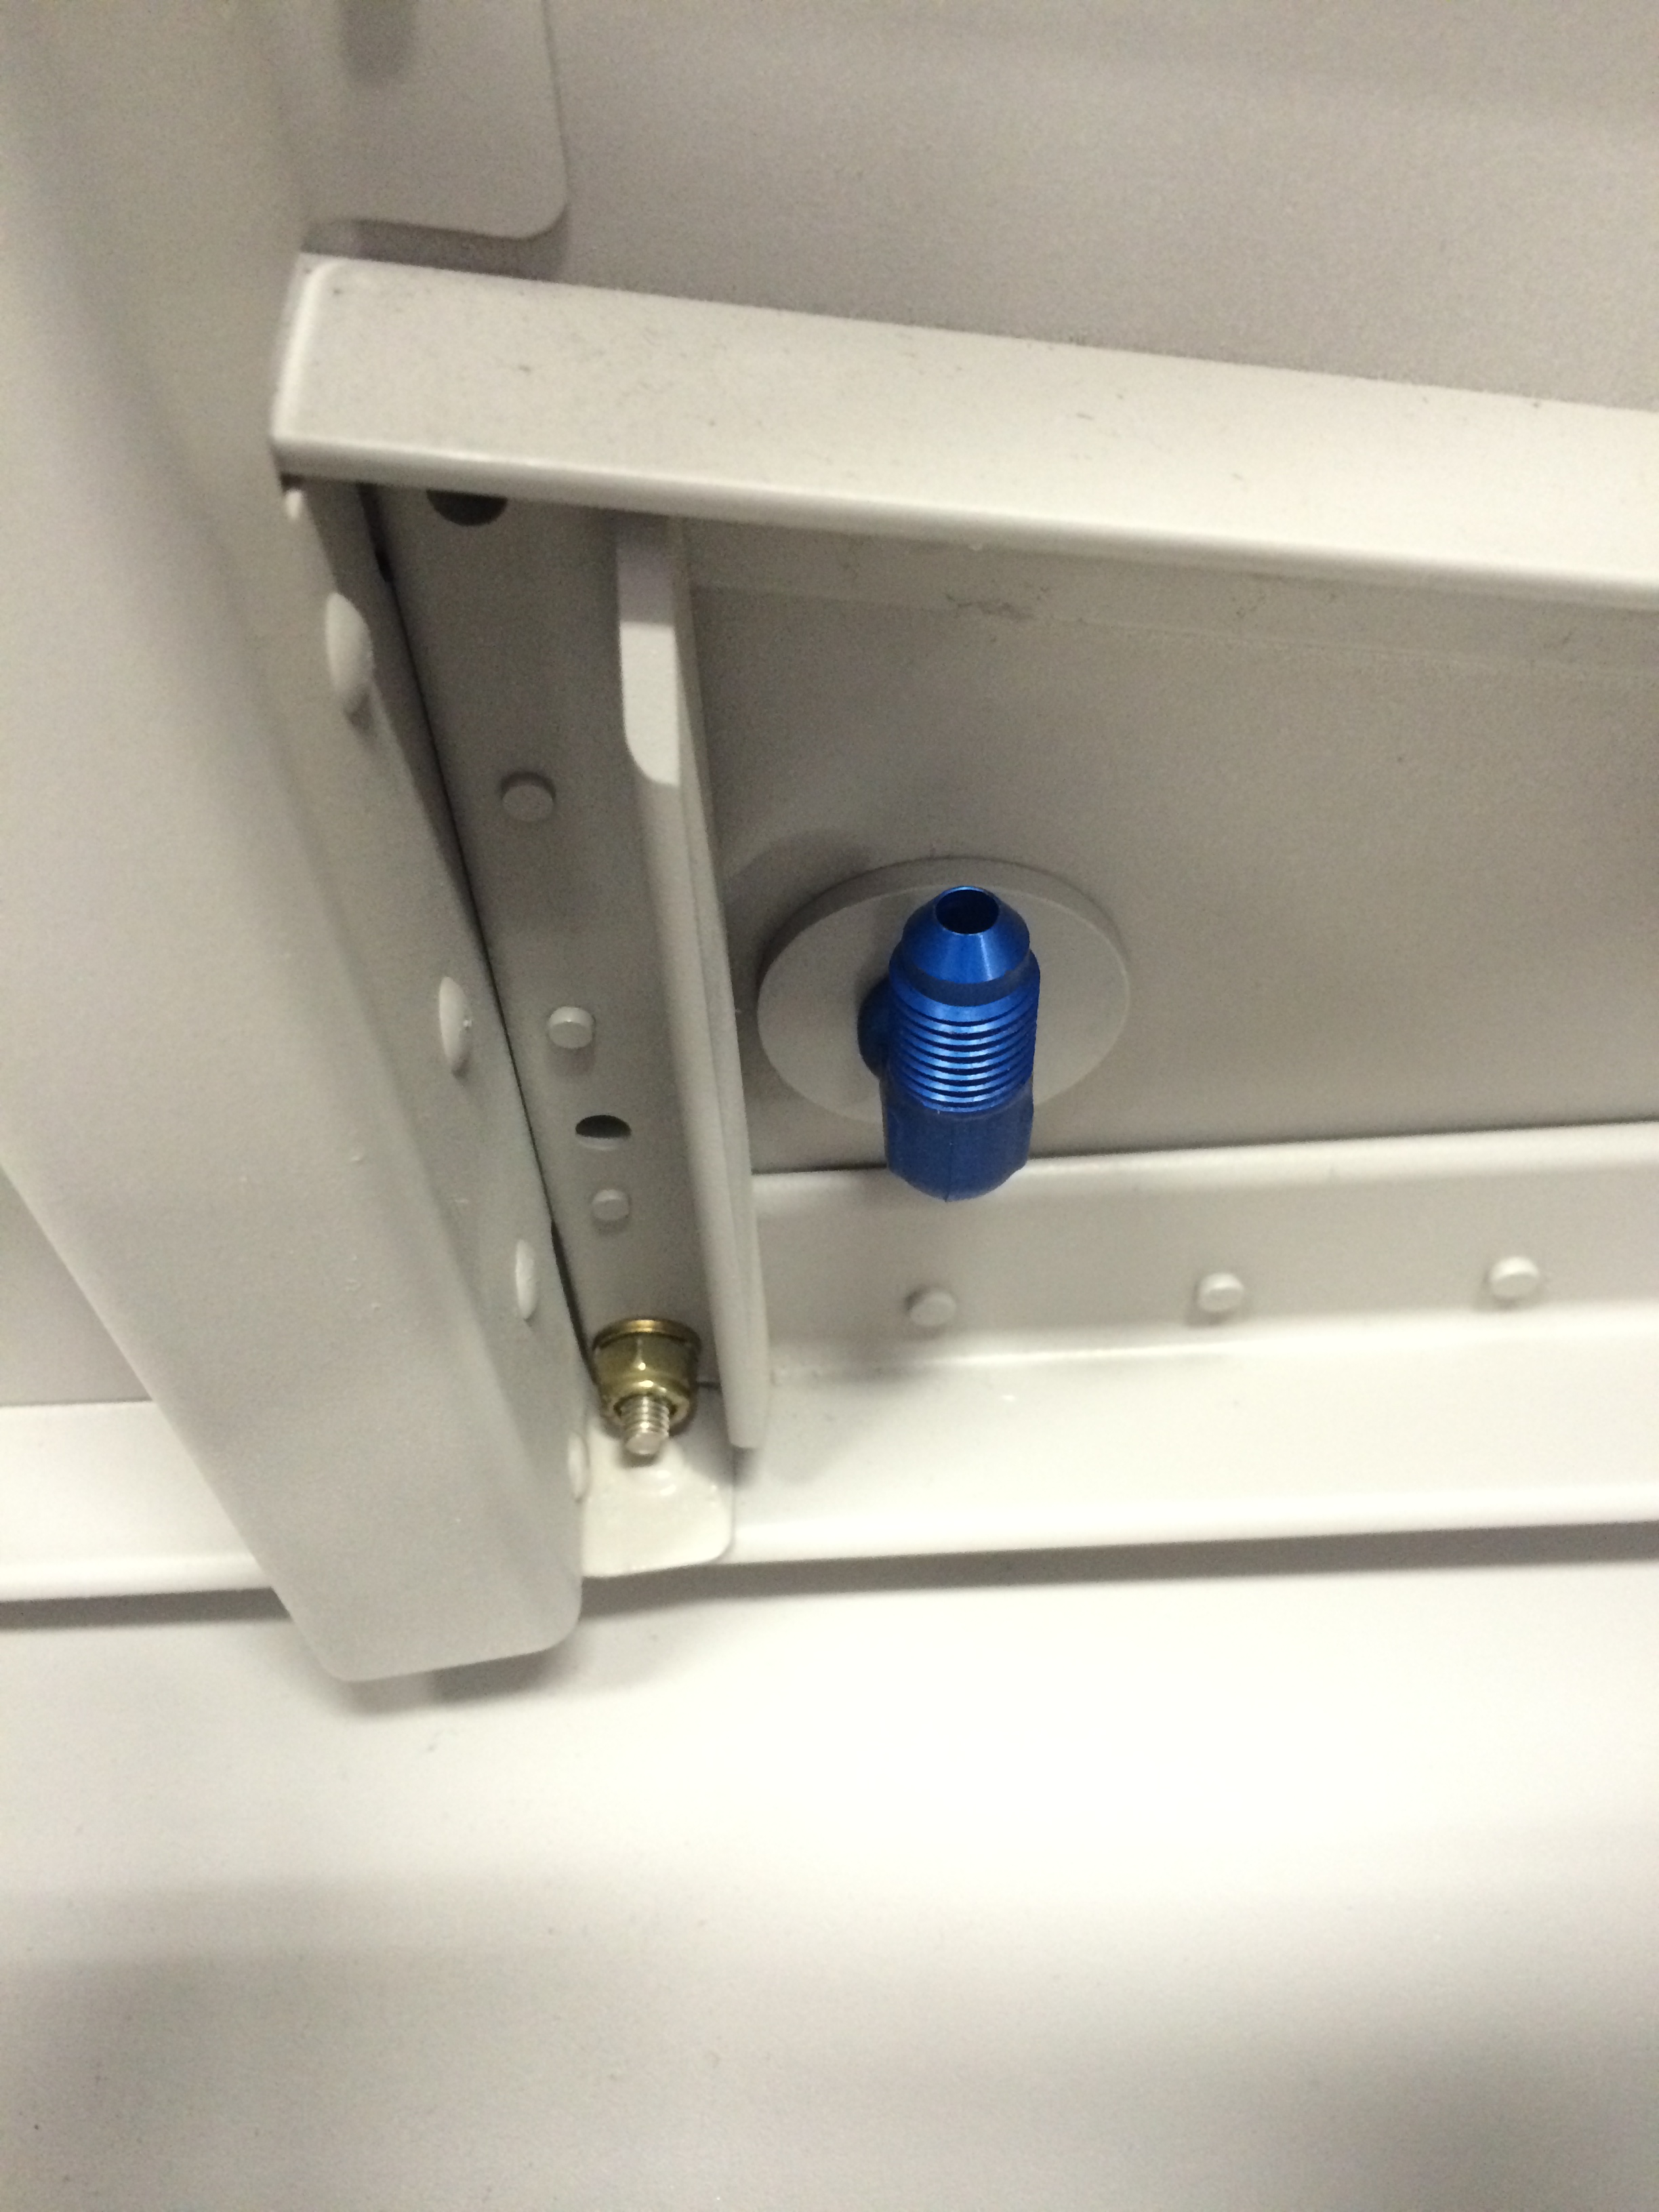
The fuel vent lines are (I hope) the hardest to form.  They connect the vent fittings I fabricated a couple of days ago to their respective bulkhead fittings on each side of the fuselage, where an additional external line will connect with vent lines installed in each tank.  They’re formed in a U-shape so that fuel won’t siphon out of the tanks. And it’s the U-shape that makes them hard to form.

Fitting the vent line

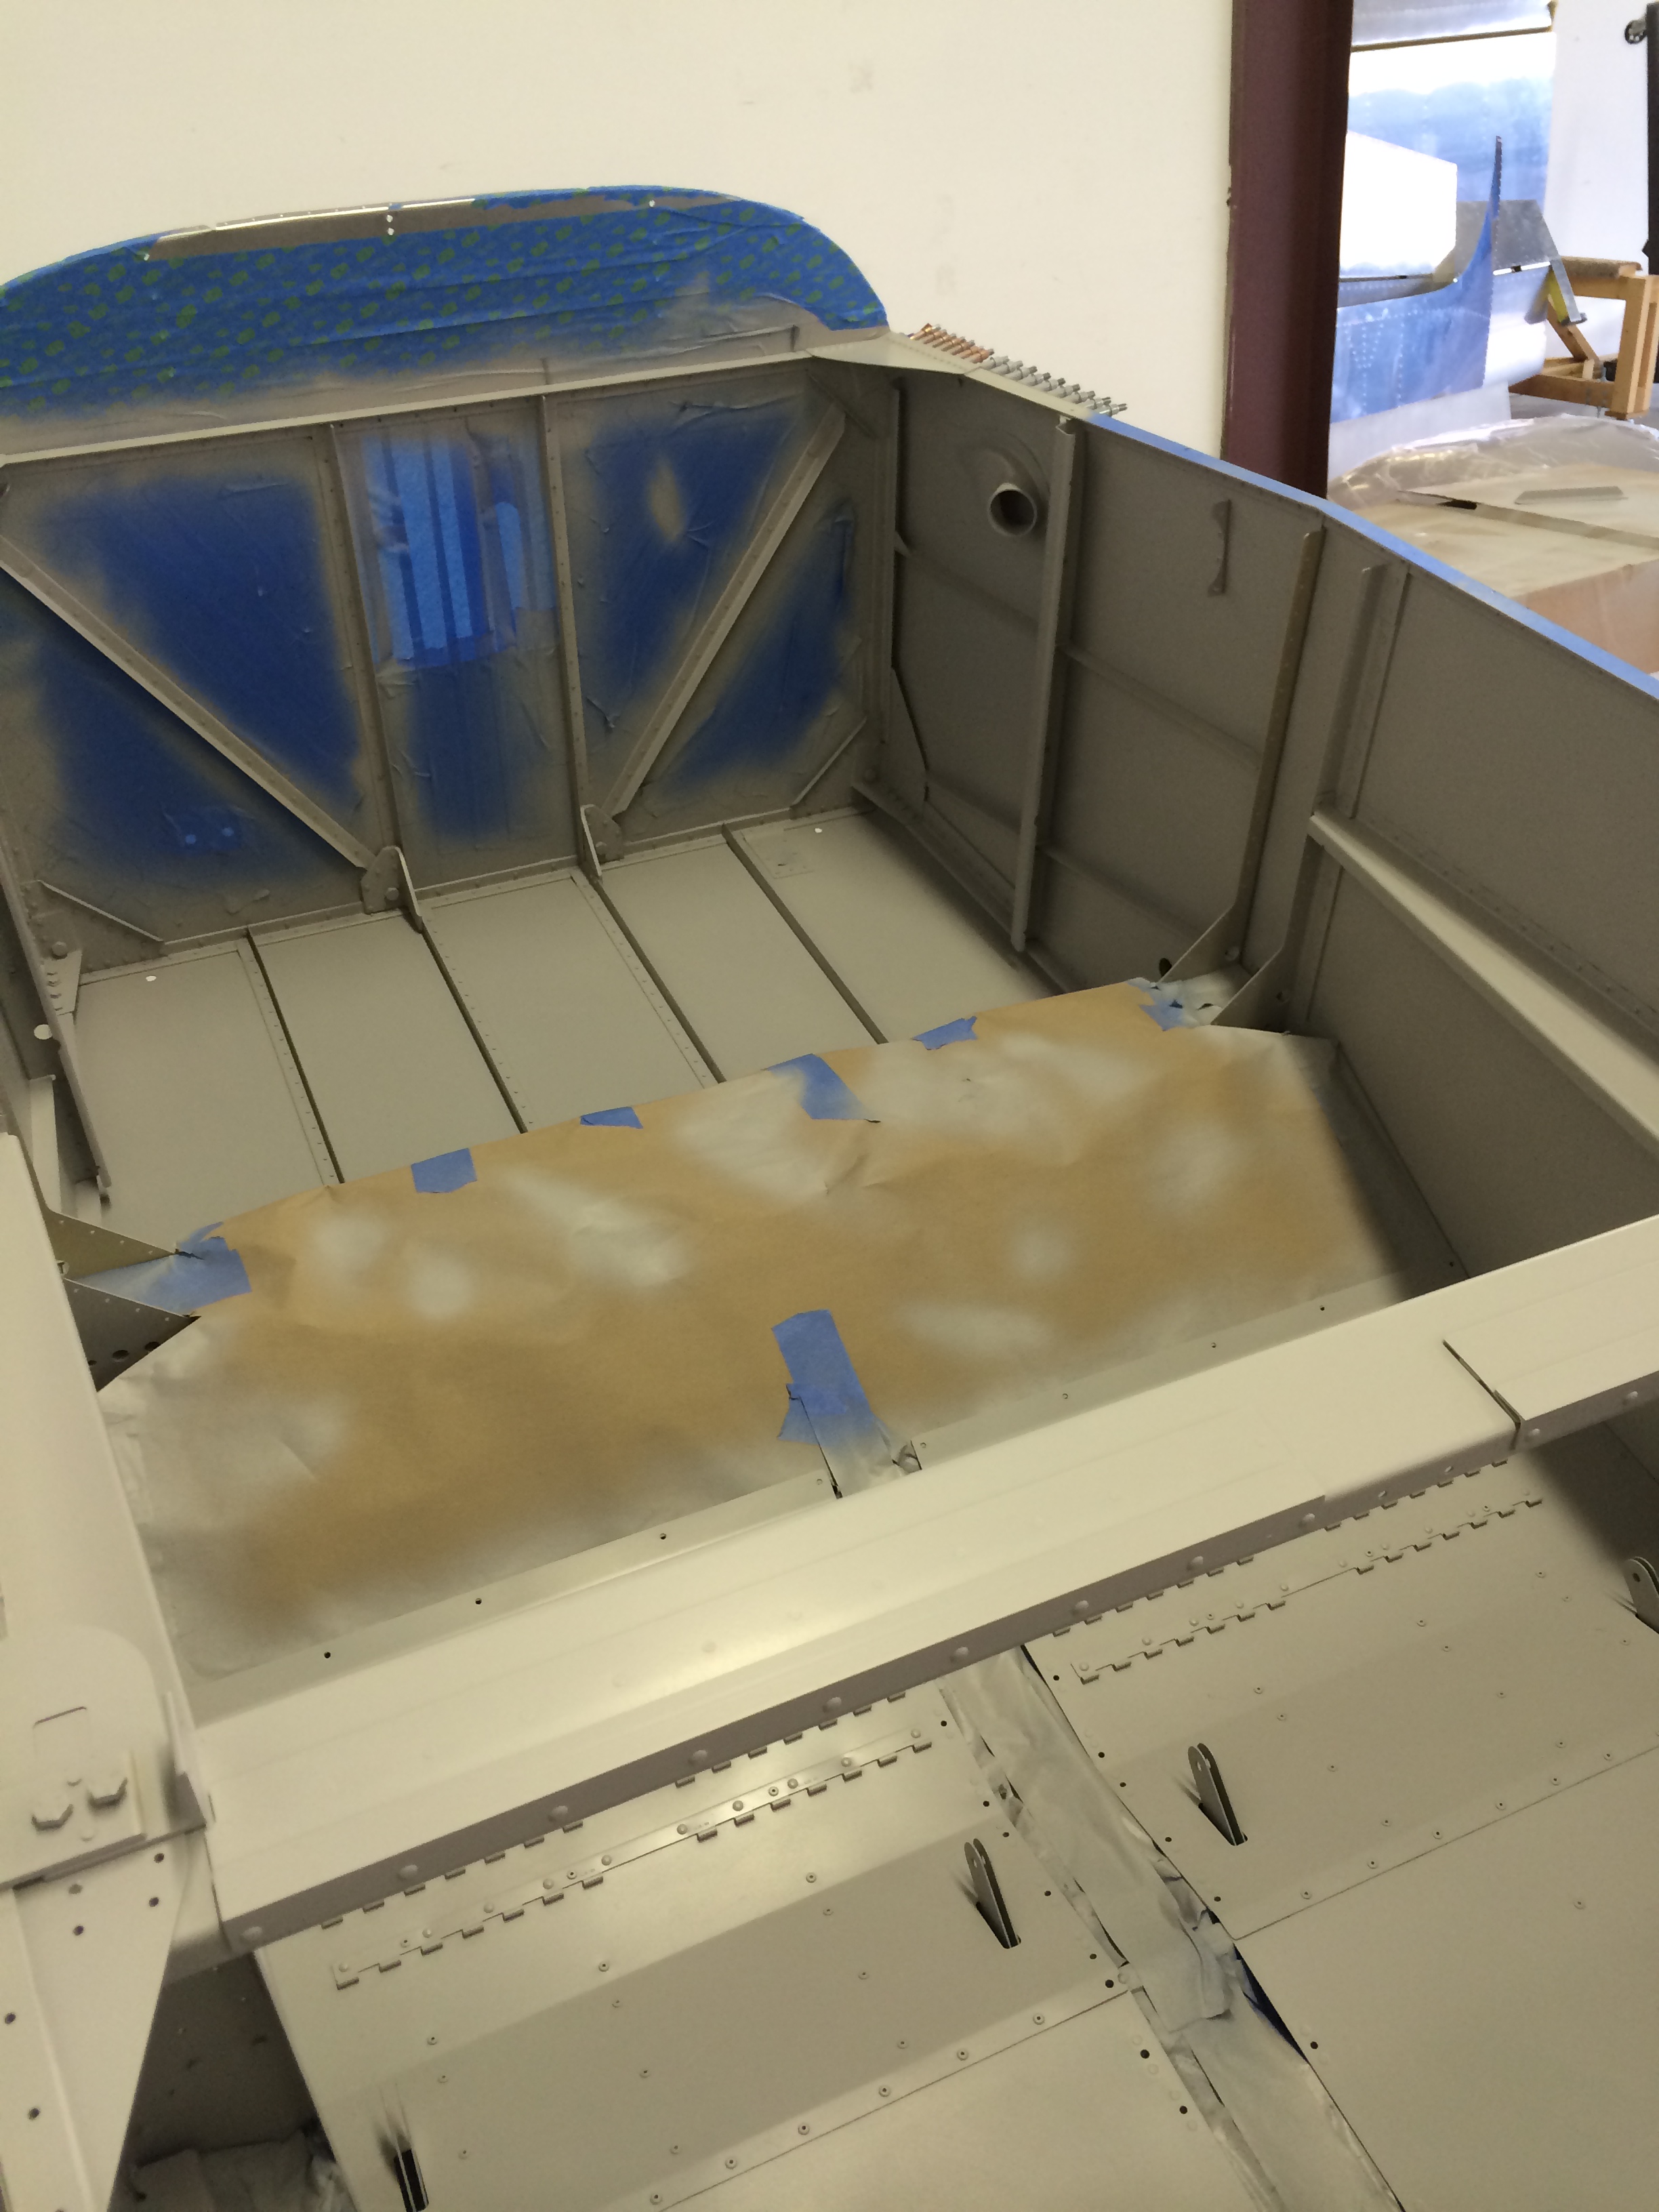
I didn’t take any pictures of forming the complex bend at the lower left but it was a pain in the tuchas, and took three attempts to get it right. After that end of the tube was complete, it was a matter of figuring out where the next bend should be, making it, fitting it to the fuselage and making adjustments, then moving on to the next bend.  It took a few hours, but the end result was good…

Fabricated vent tube
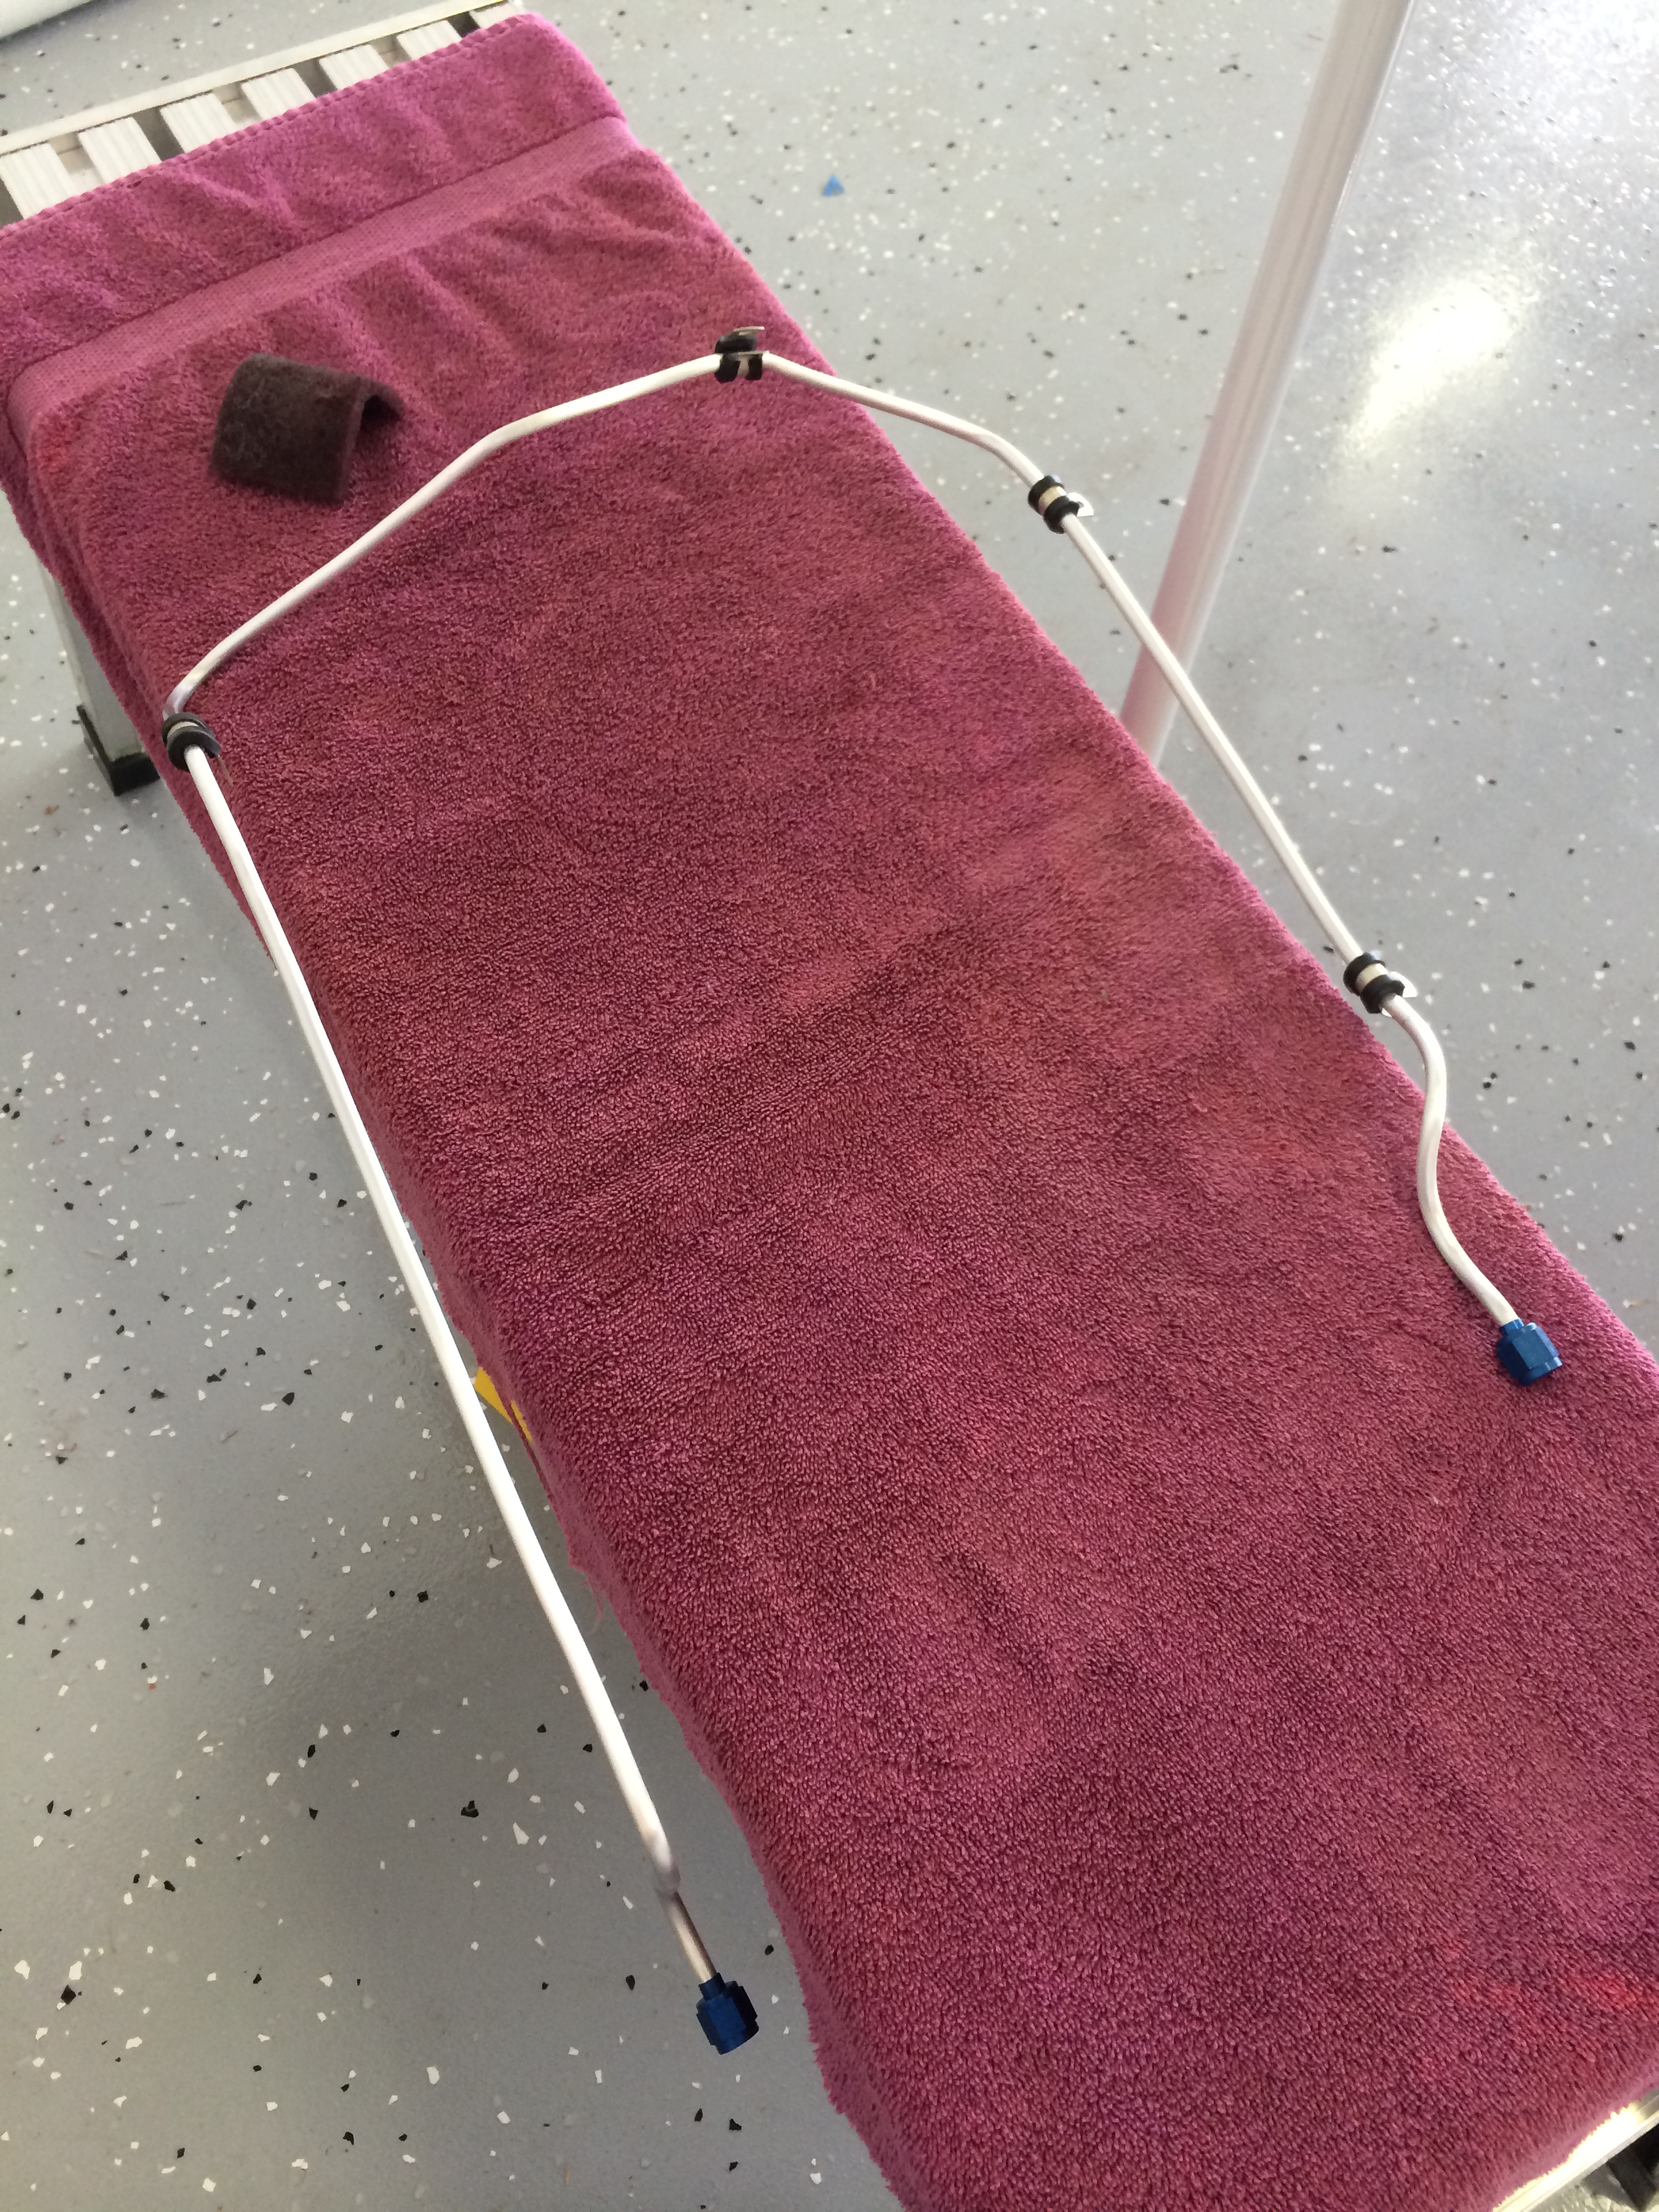
And here it is, installed in the fuselage. The fittings still need to be torqued, but it’s in the fuselage to stay…

Left vent tube installed

I hope the right vent line won’t take so long…

Band-Aid? I don’t need no stinkin’ Band-Aid!

I spent most of the day at the hangar, and realized after I cut myself that one thing I forgot to bring from the house was some bandaids. But I have plenty of blue painter’s tape and lots of paper shop towels…

2014-05-23 16.33.45And this is what I cut myself on – a jury-rigged low-profile nut driver, made by grinding down a random 3/8″ driver I found in the tool box…

A jury-rigged nut driver

And why would I need a low-profile nut driver? I knew you’d want to know…

Pesky nut

See that AN365 nut in the bottom center of the picture? There’s not enough space to get a regular socket on it, hence the ground-down nut driver.  Worked great, if I do say so myself…and I do.

Next to it is an AN bulkhead elbow fitting for the left fuel tank vent line.  I spent most of the day getting fittings prepped for the vent lines, including making the vents themselves out of other AN fittings –

Vent fittings

These are relatively straightforward to make from standard bulkhead fittings, I just wrapped the not-to-be-modified ends with duct tape and chucked them in the drill press.  The portion that’s bright metal in the picture originally had threads, but I removed them with a vixen file while the drill press spun the fitting around (thanks for the idea, Mike!). I cut the finished ends to a 45-degree angle with the band saw, and cleaned them up with sandpaper and scotchbrite.

Vans recommends that the scarfed ends be protected by a screen to keep bugs and other  stuff from blocking the fuel vents, so I bought some window screen patches from Home Despot and broke out the JB Weld epoxy…

Vents with screens attachedAfter the JB Weld cures – hopefully by tomorrow – I’ll trim away the excess screen and install the vents in the lower fuselage.

A mostly-successful painting day

I’ve been waiting to paint the interior until the fuse is in the hangar and I have a little space to work. My hangar partners had their Archer outside for awhile, so now was a good time for painting.

Interior painted

I spent a lot of time masking and prepping the interior, then thinned some JetFlex WR interior paint and started shooting. I can’t say I’m 100 percent happy with how the JetFlex came out – there are some areas where the finish is a little rough – but it’s not bad enough to justify stripping it and reshooting.

Seats and paint

Once done, I pulled the fuse outside and set our seats and shoulder harnesses in the cockpit to get an idea of how the colors match in bright light. Everything looks good.

Hangar mates