Baby steps toward the Big Cut

Cutting the canopy isn’t something to rush. I read and re-read Vans’ instructions, and researched other builders’ websites, to get a good idea of how to trim the canopy without damaging it. A replacement canopy is more than $1000, so cracks are something to be avoided.

I started this part of the project a few weeks later than I wanted to…my hope was to get the canopy cut and installed in August while the temperatures are still warm enough to not keep the hangar heat turned up. Fortunately, September has been fairly warm so not too much hangar heating has been required.

Prepping the OR for surgery

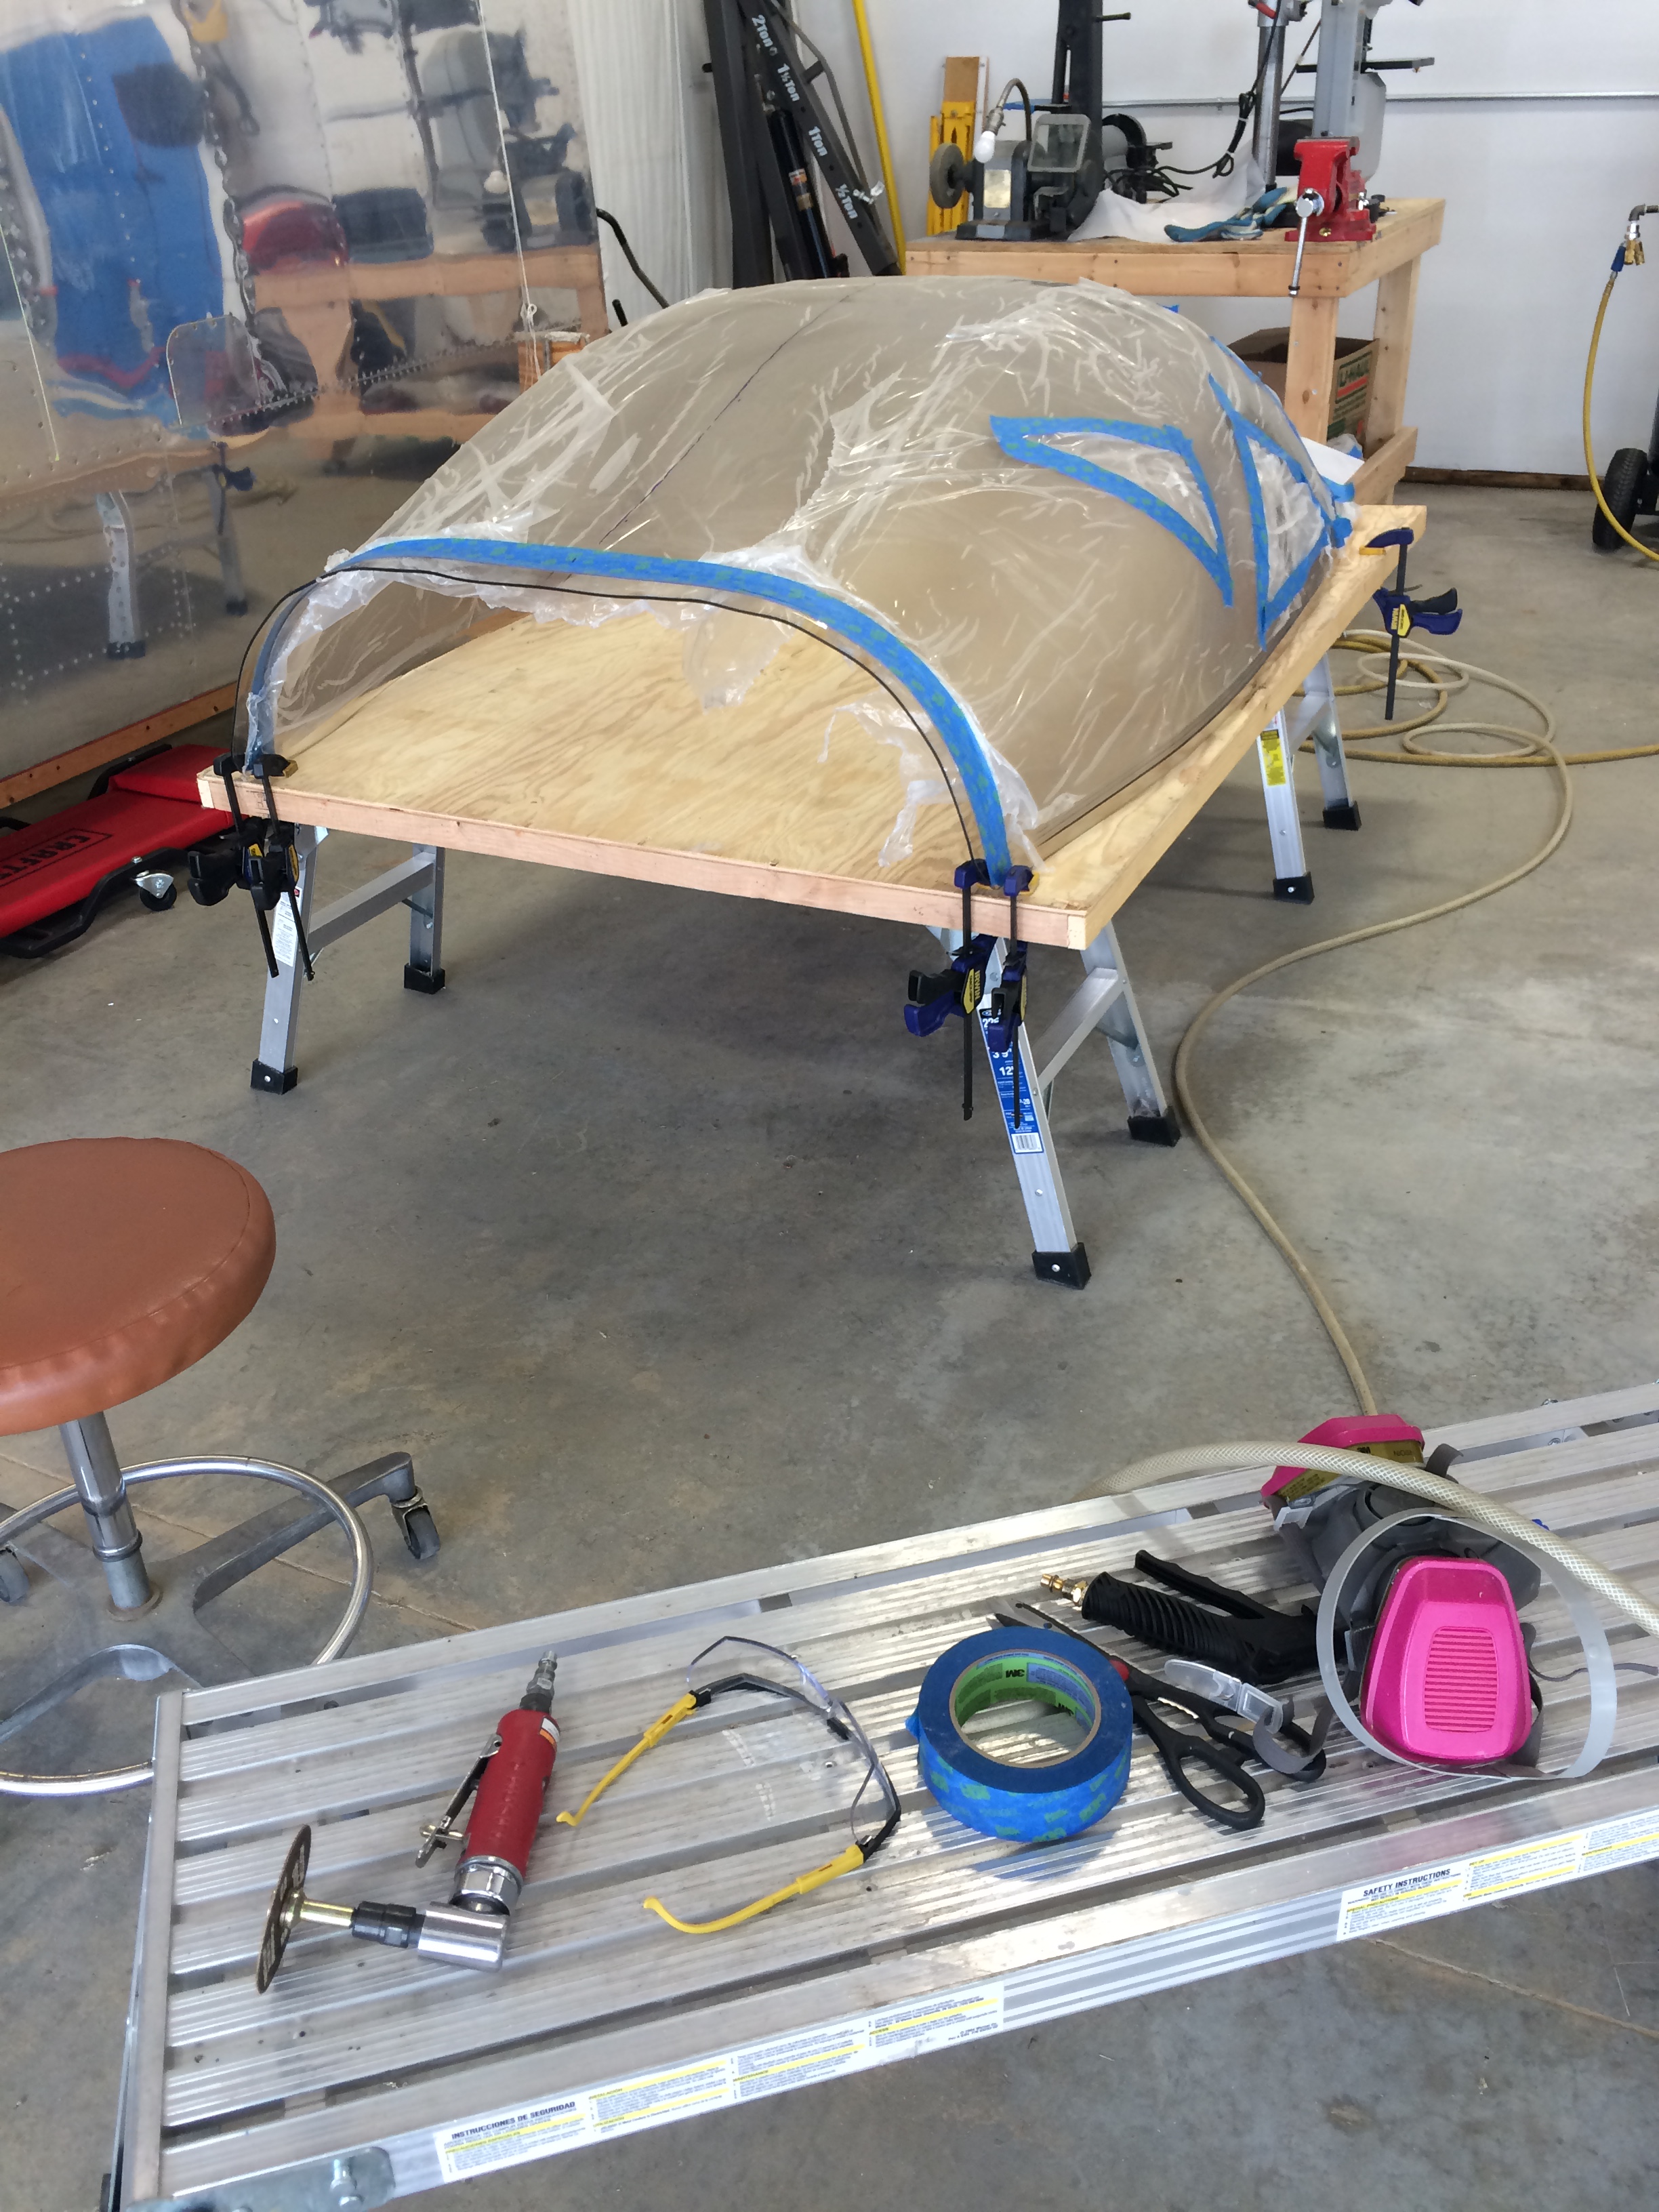
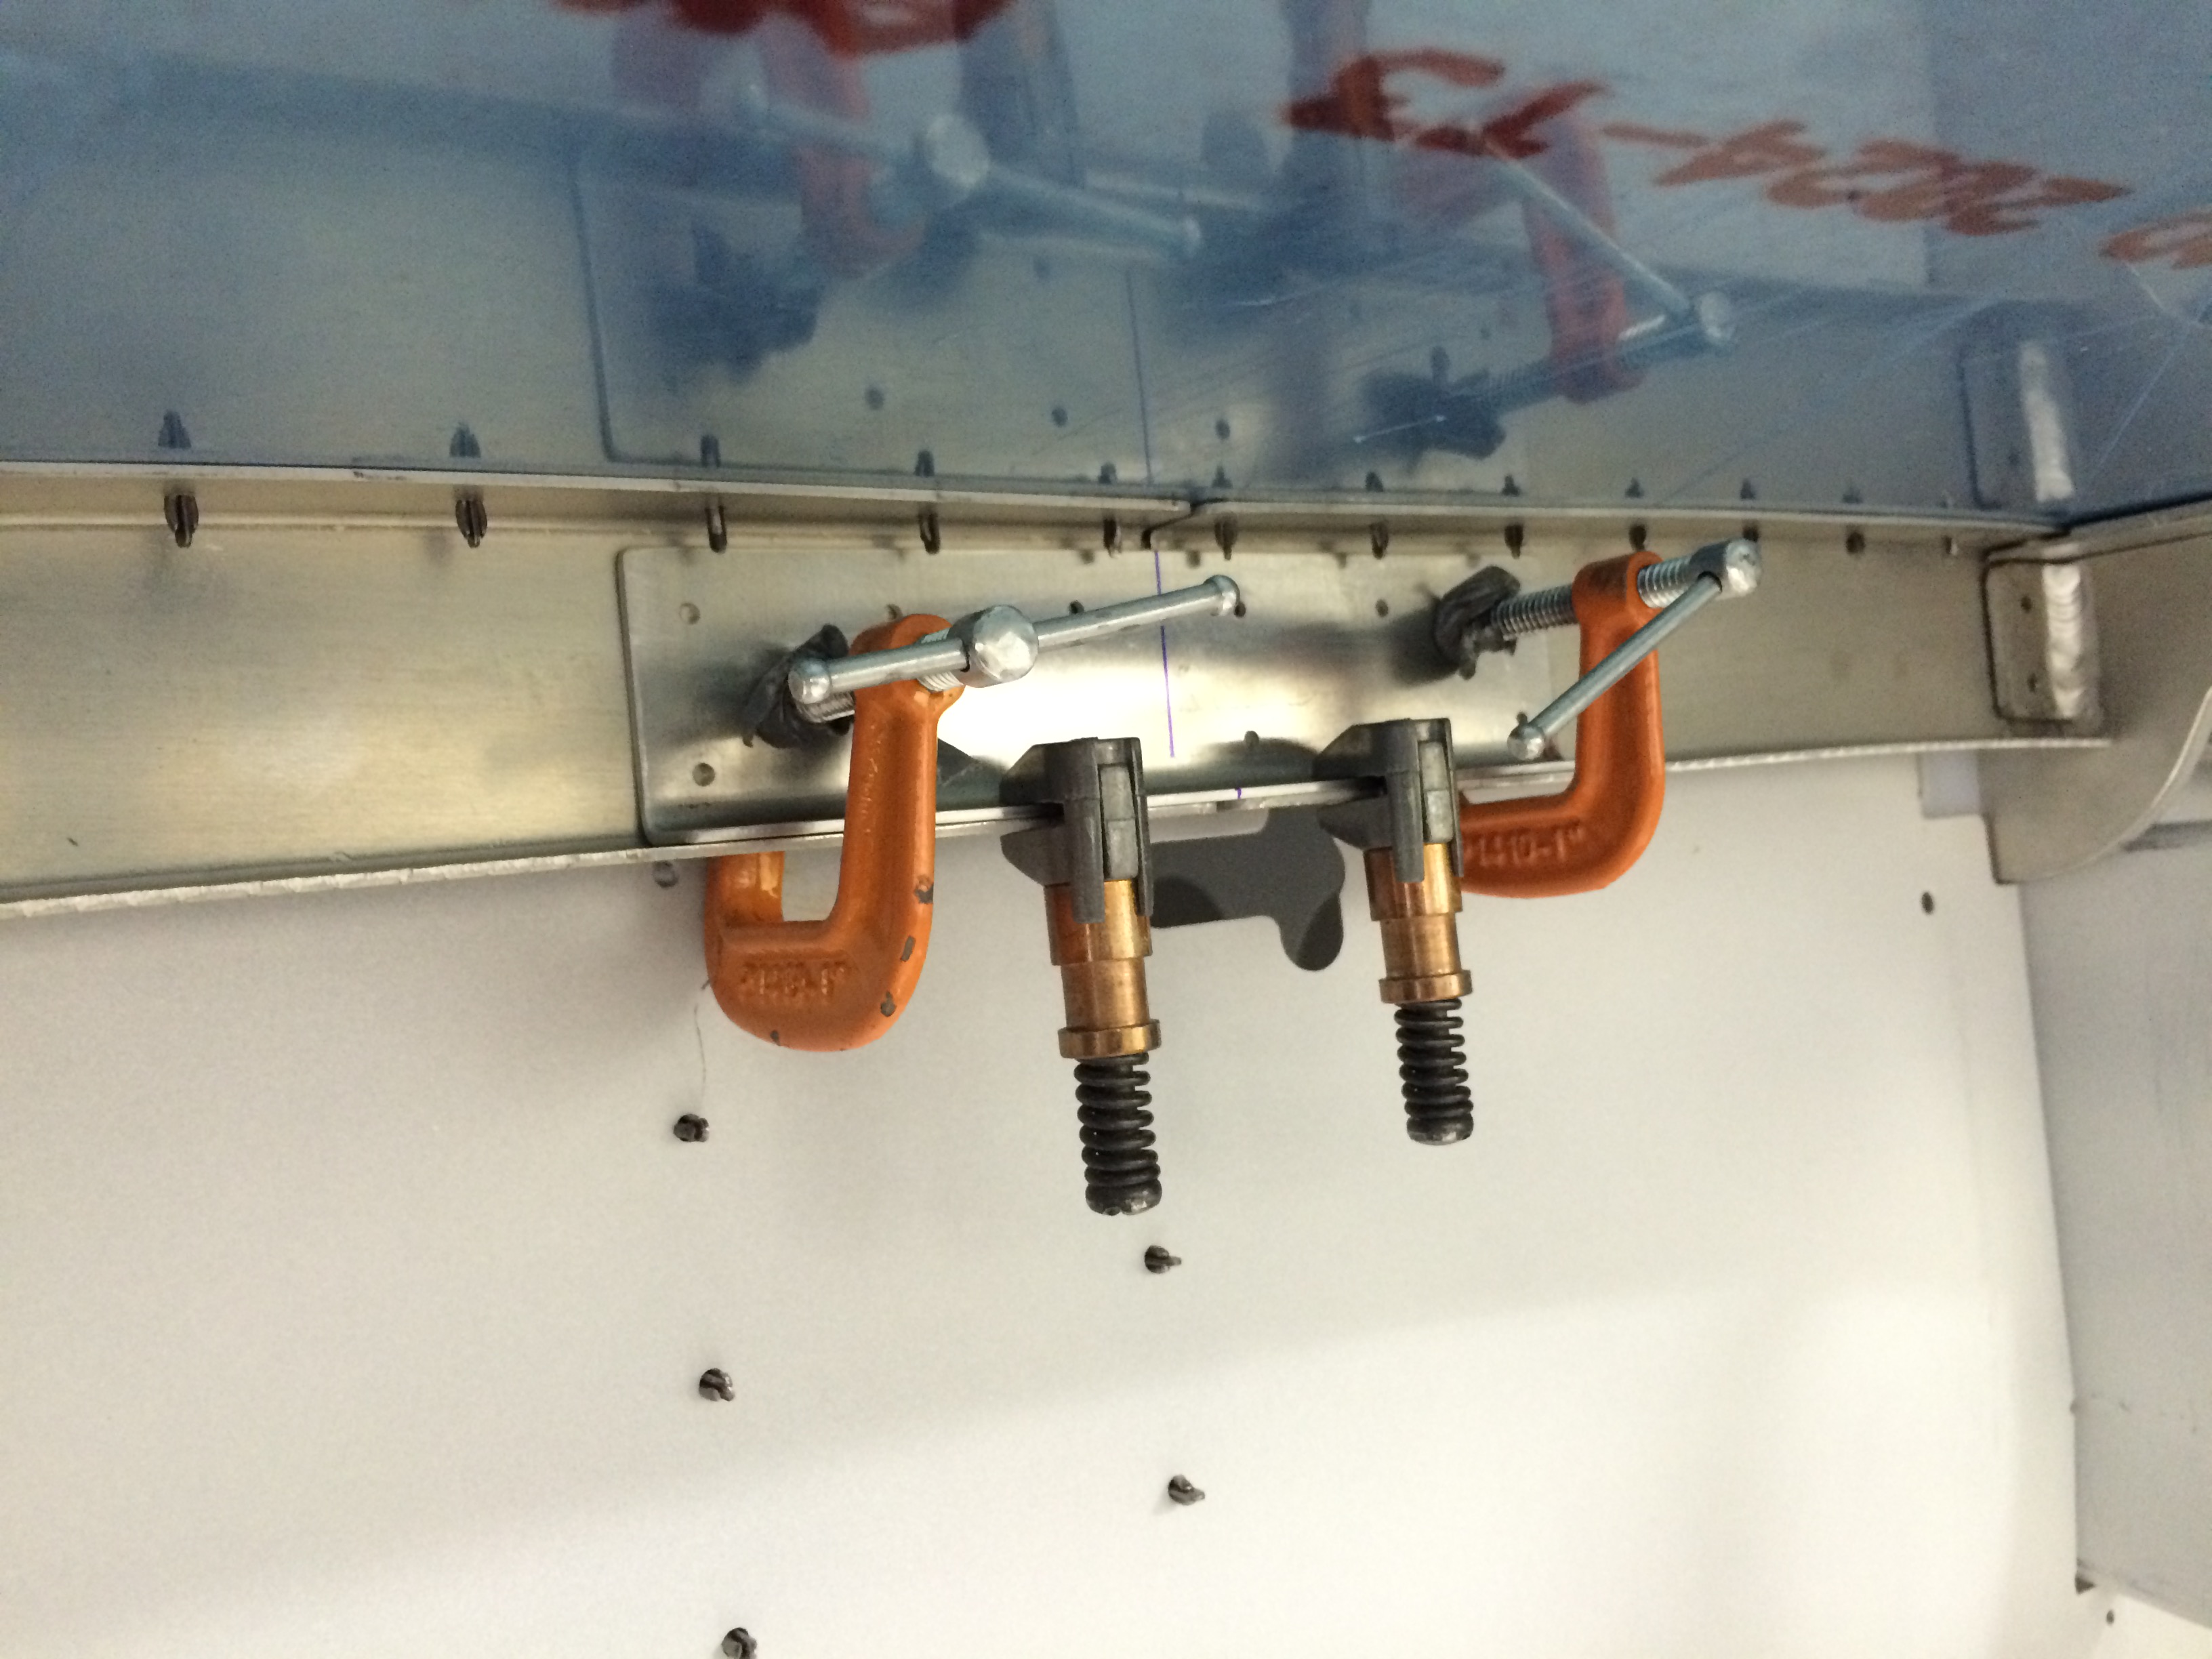
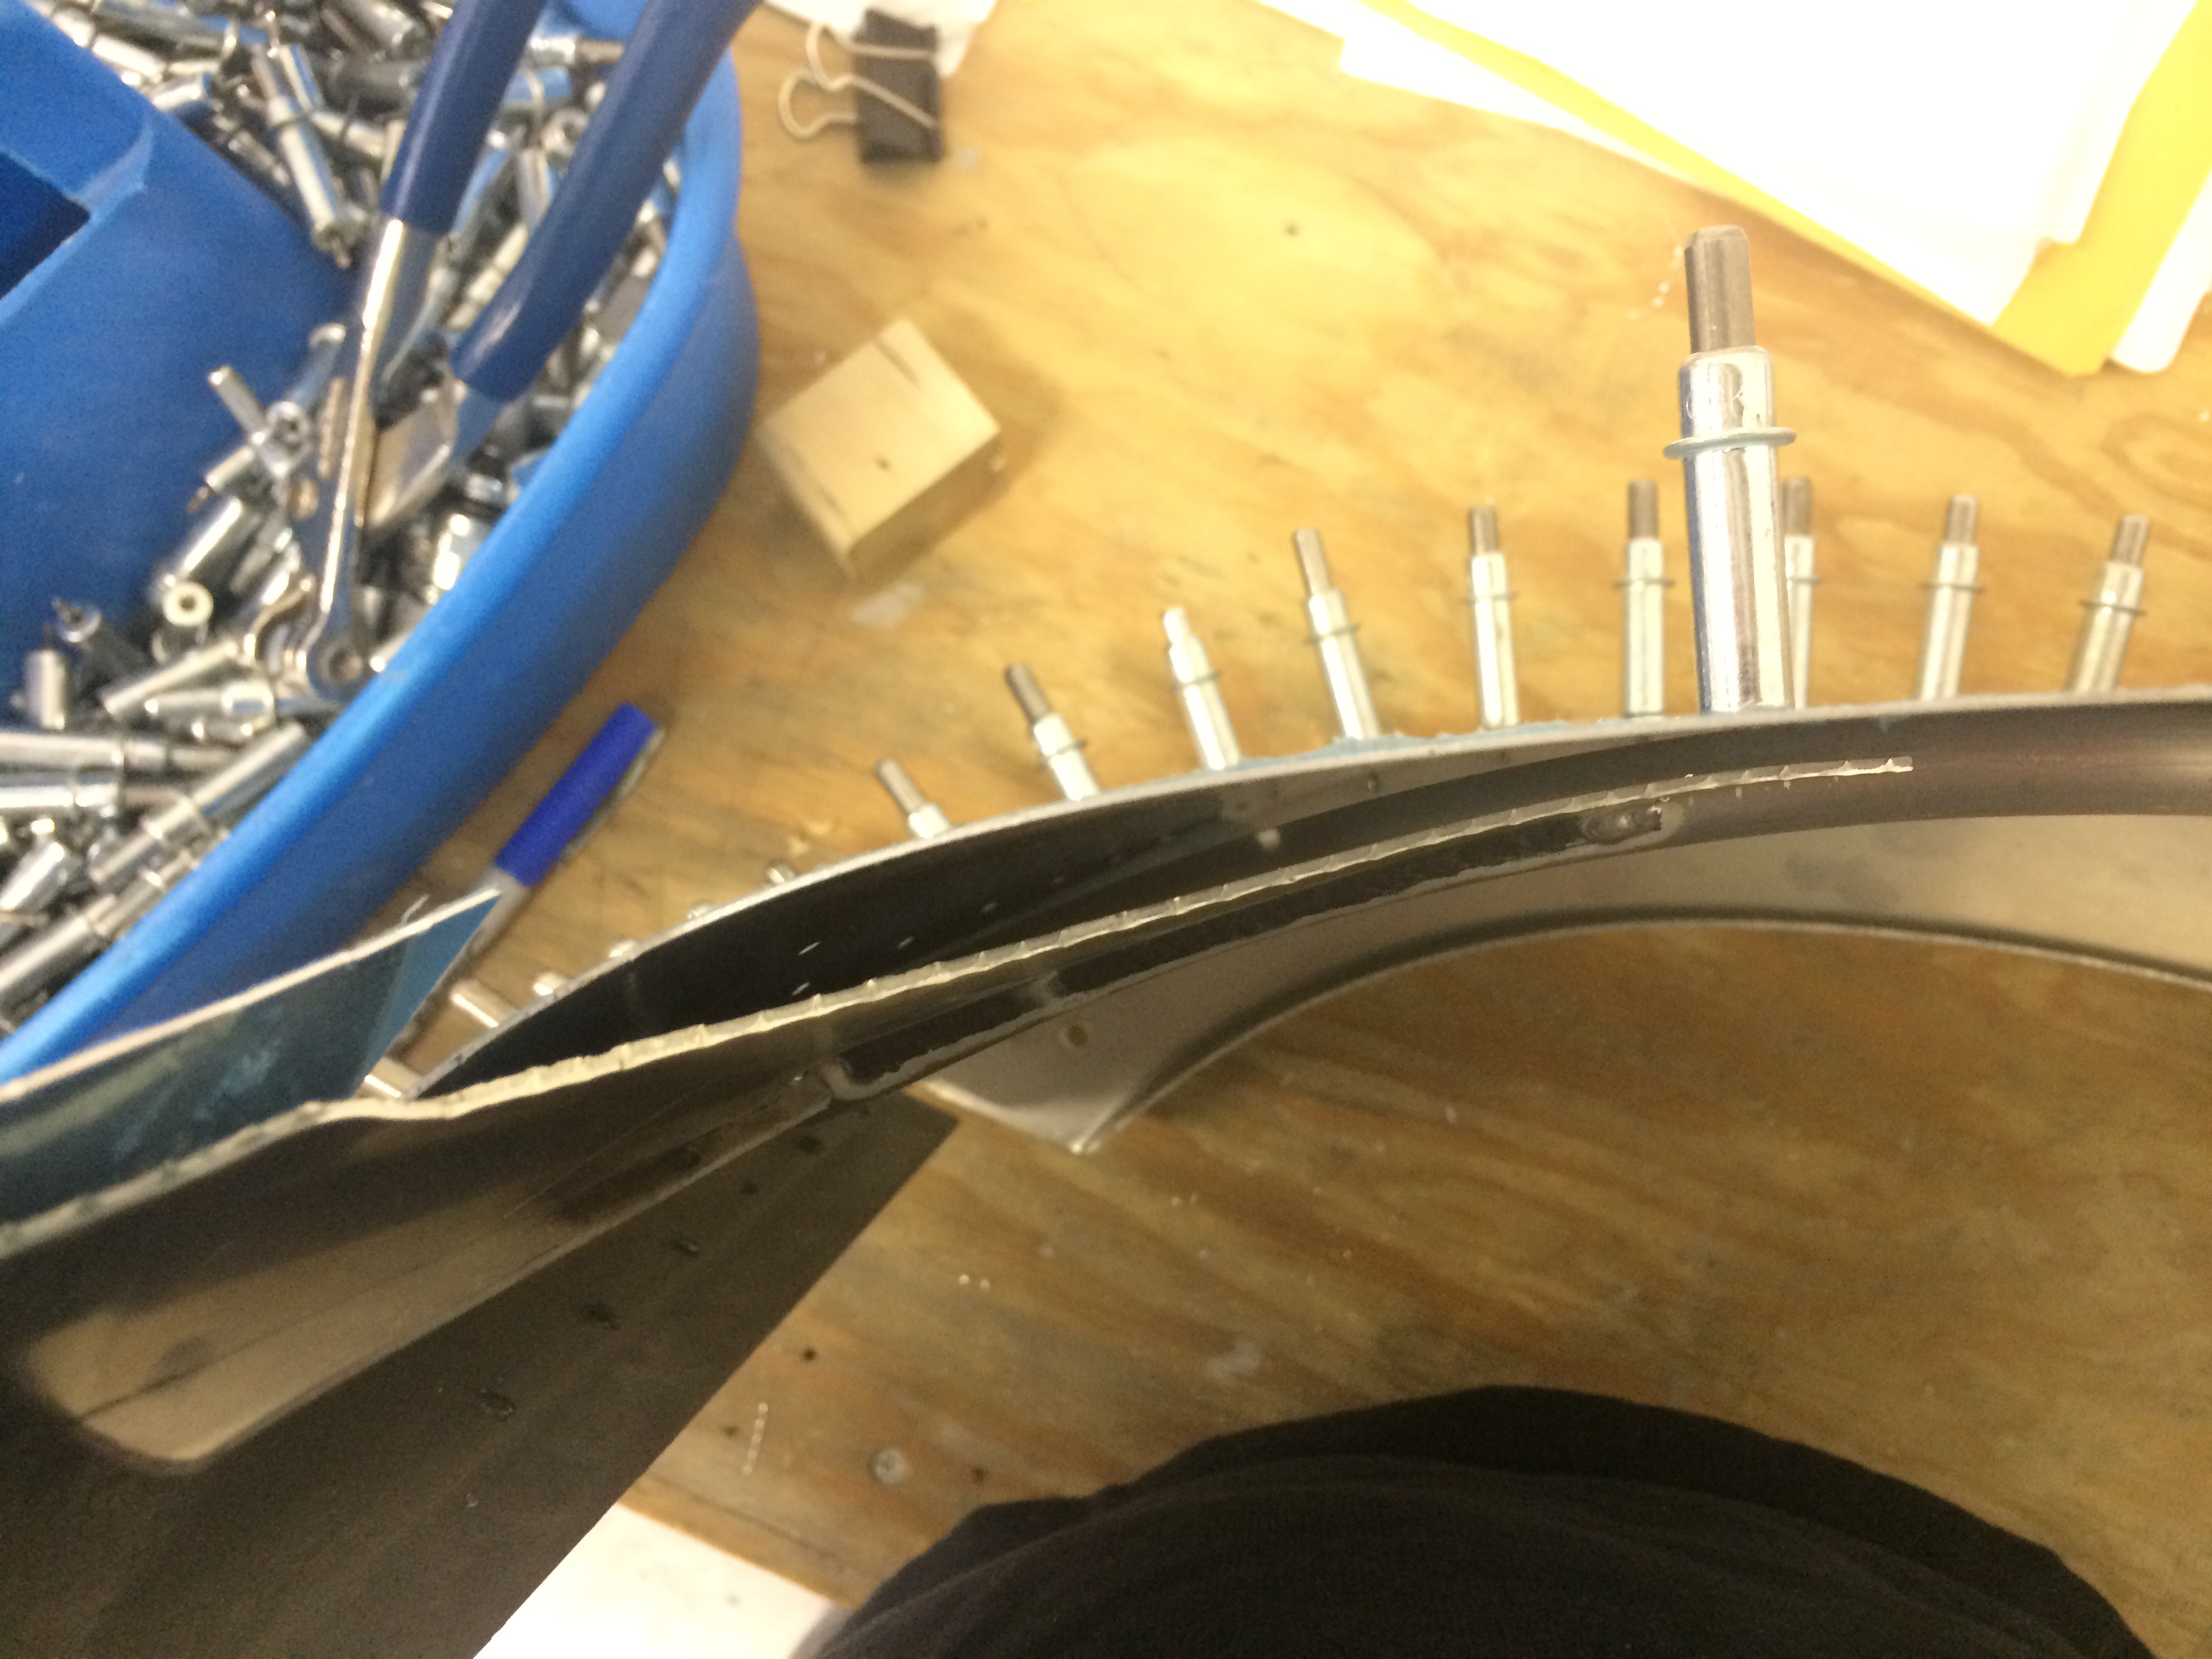
I set up everything needed to start trimming.  Per the instructions, I first cut off the portions the canopy where it was clamped in place for molding.  The back of the canopy was the first to go…

The first canopy cut

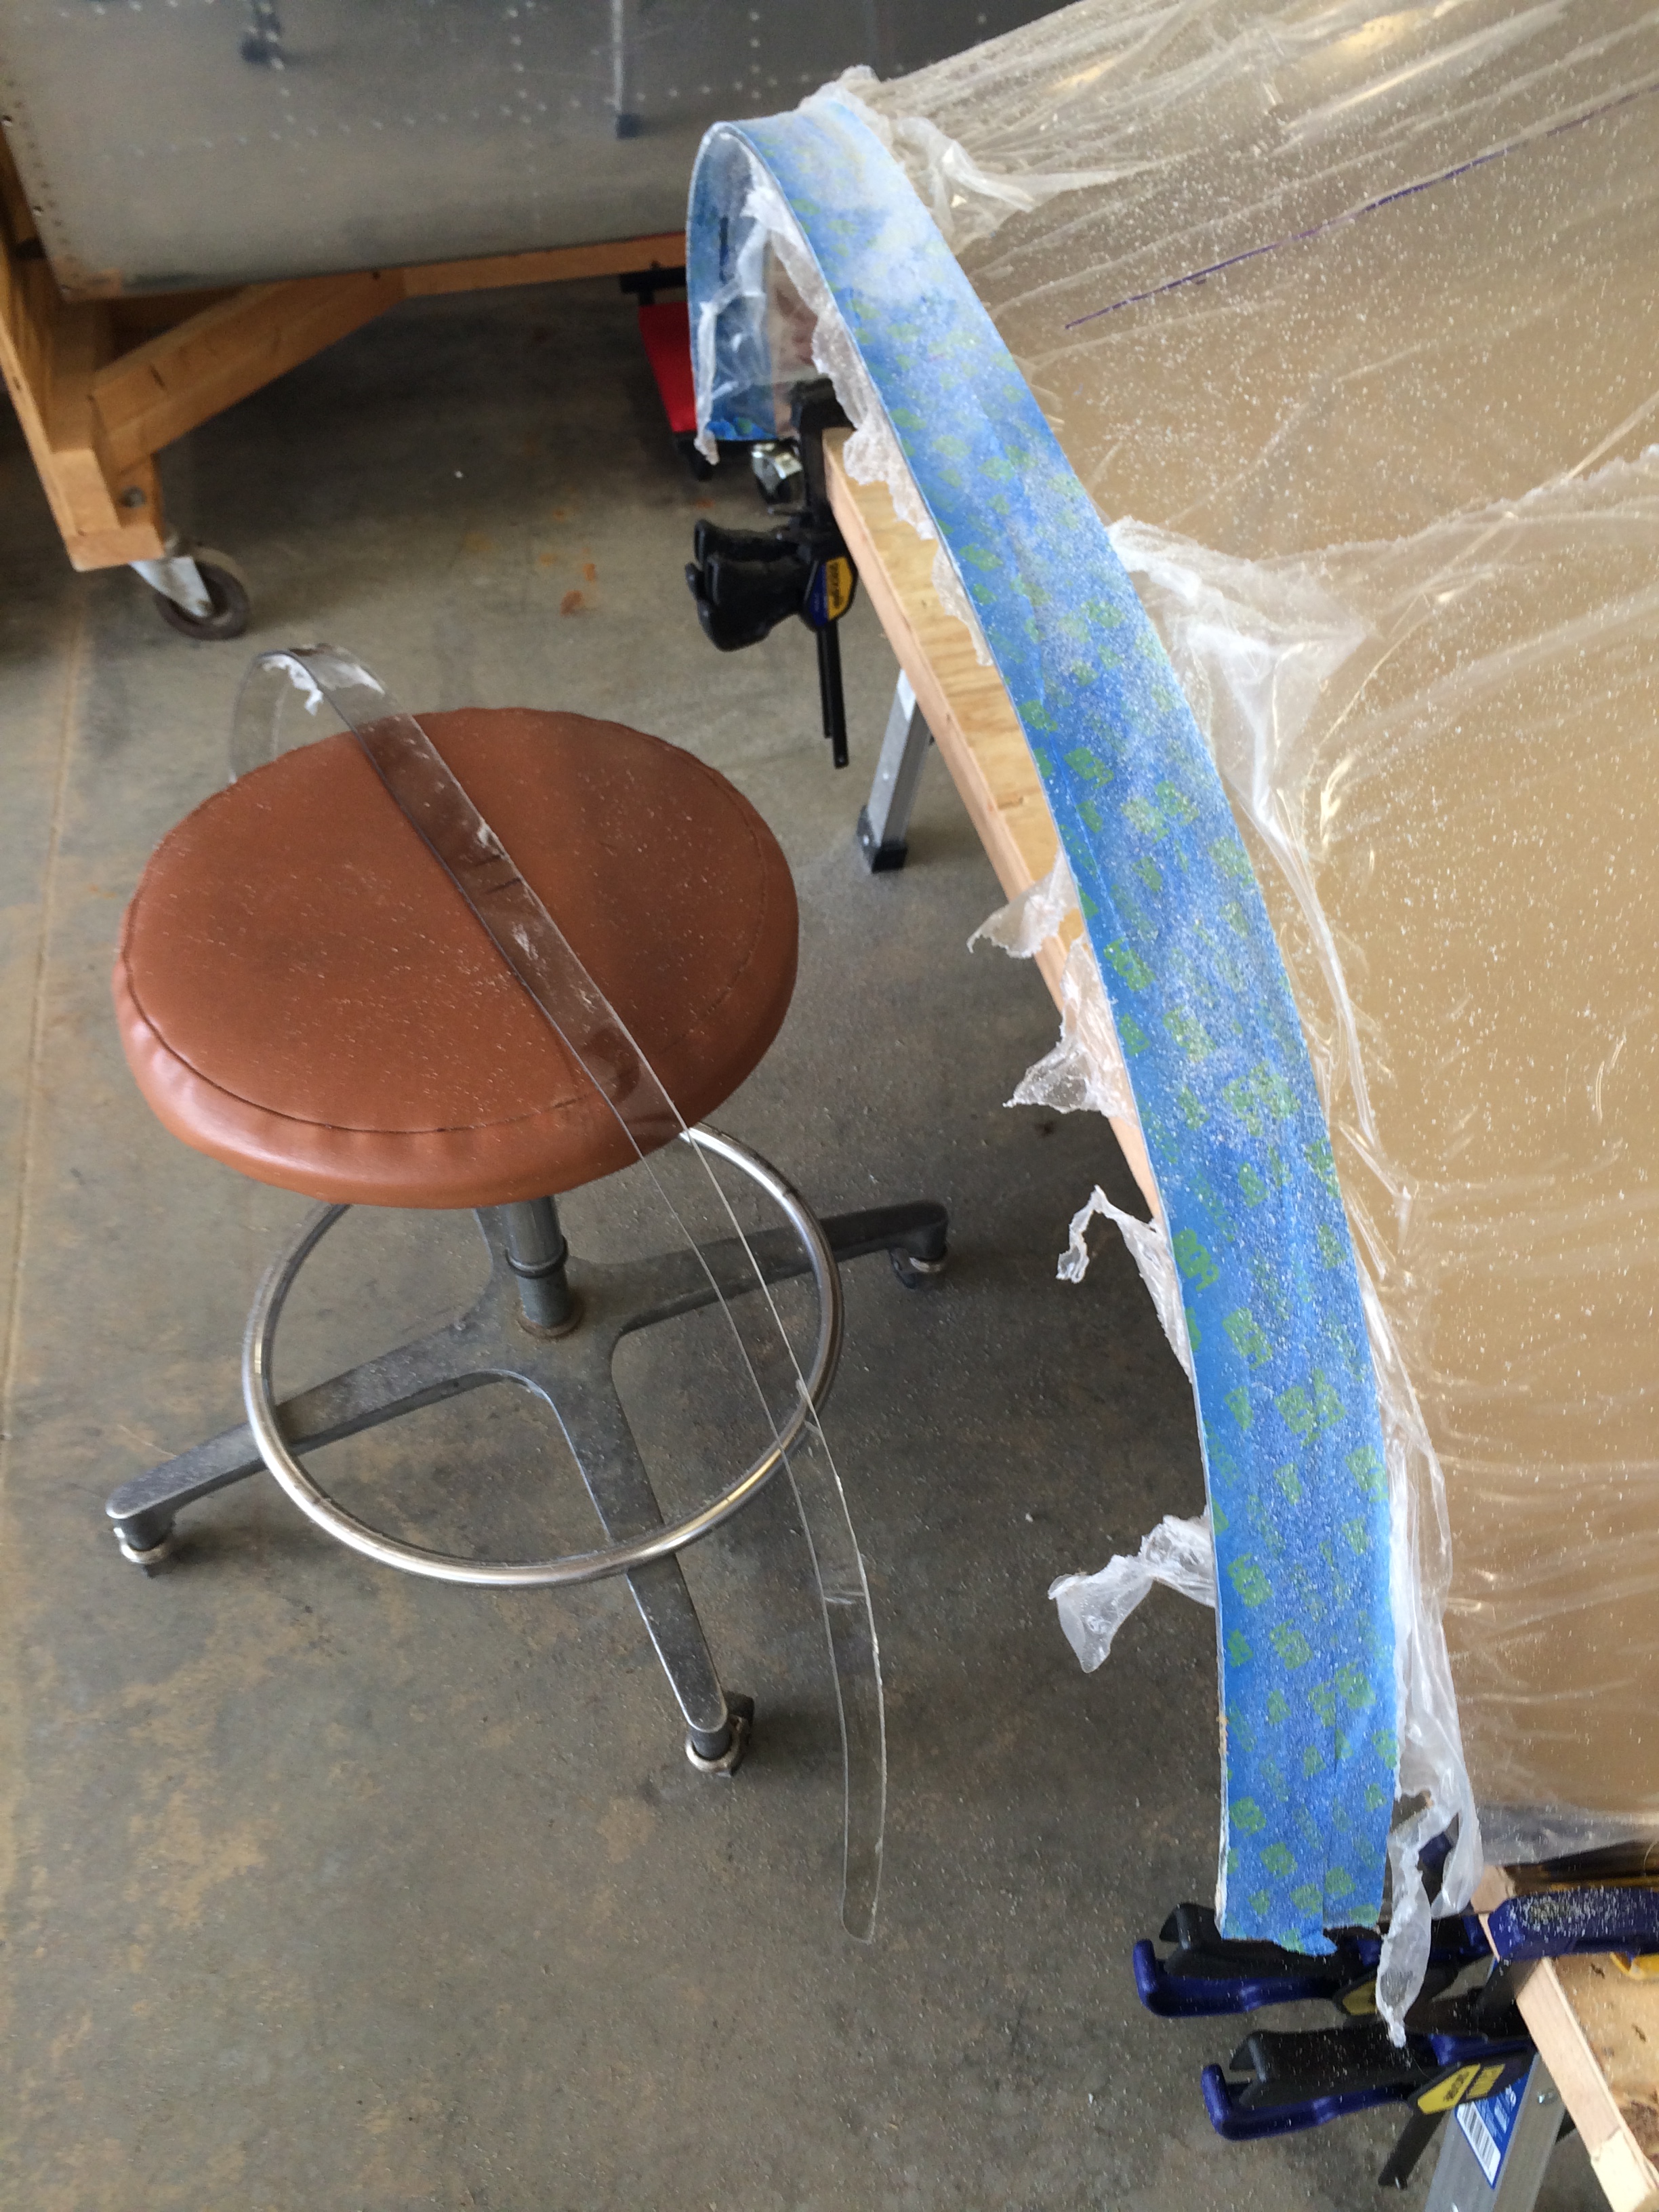
…and trimming turned out to be a little easier than I thought, but some care is required to get close to the cut line marked by the tape.

Plexiglass snow

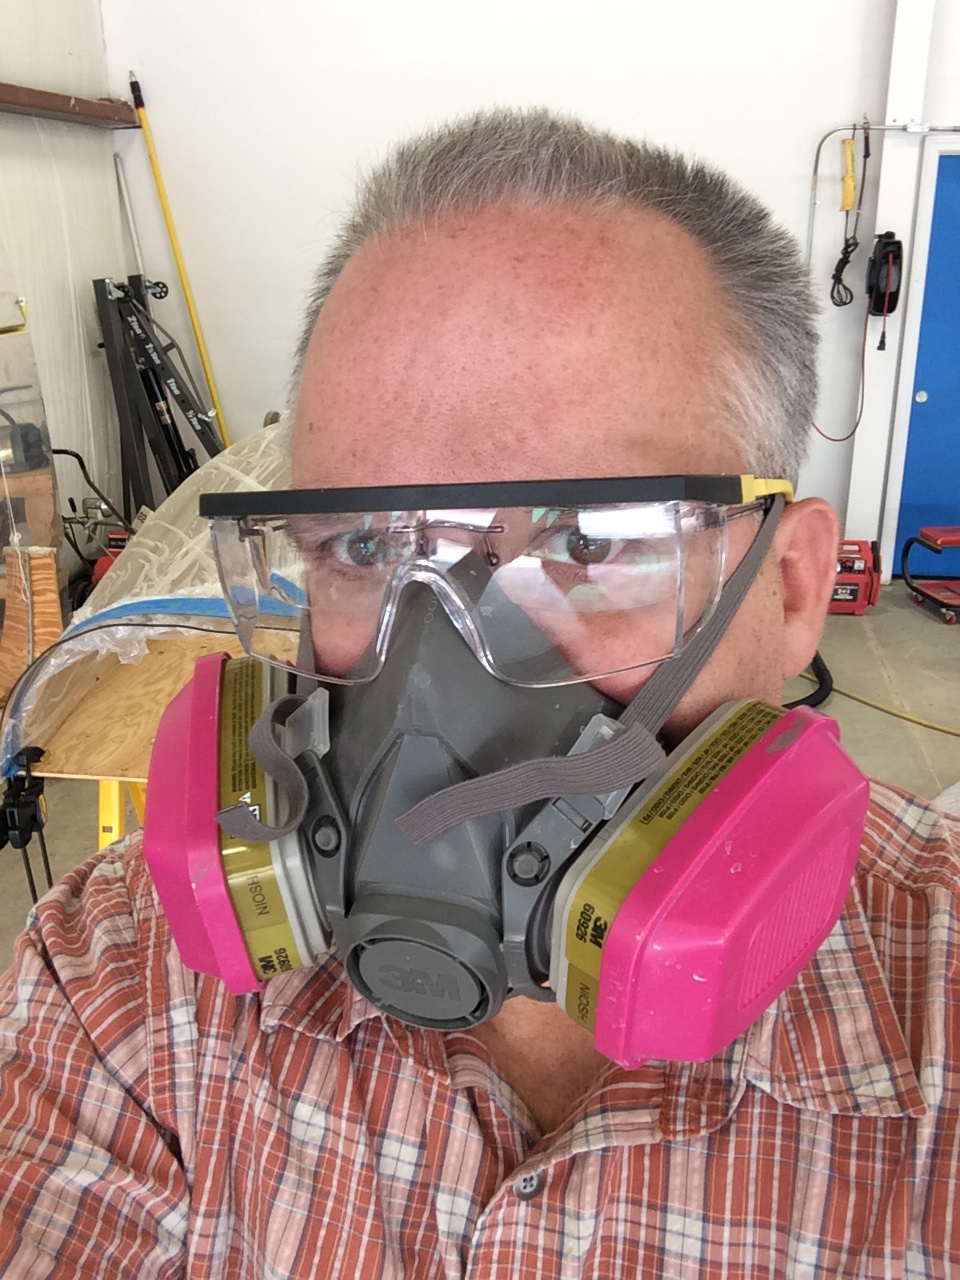
The cutoff wheel creates a lot of plexiglass “snow” particles as it works, except that this snow can be uncomfortably hot when it hits your skin. I didn’t want any of that crap in my eyes or up my nose, so I wore safety glasses and a respirator…

Even two pairs of glasses weren't enough to protect my eyes 
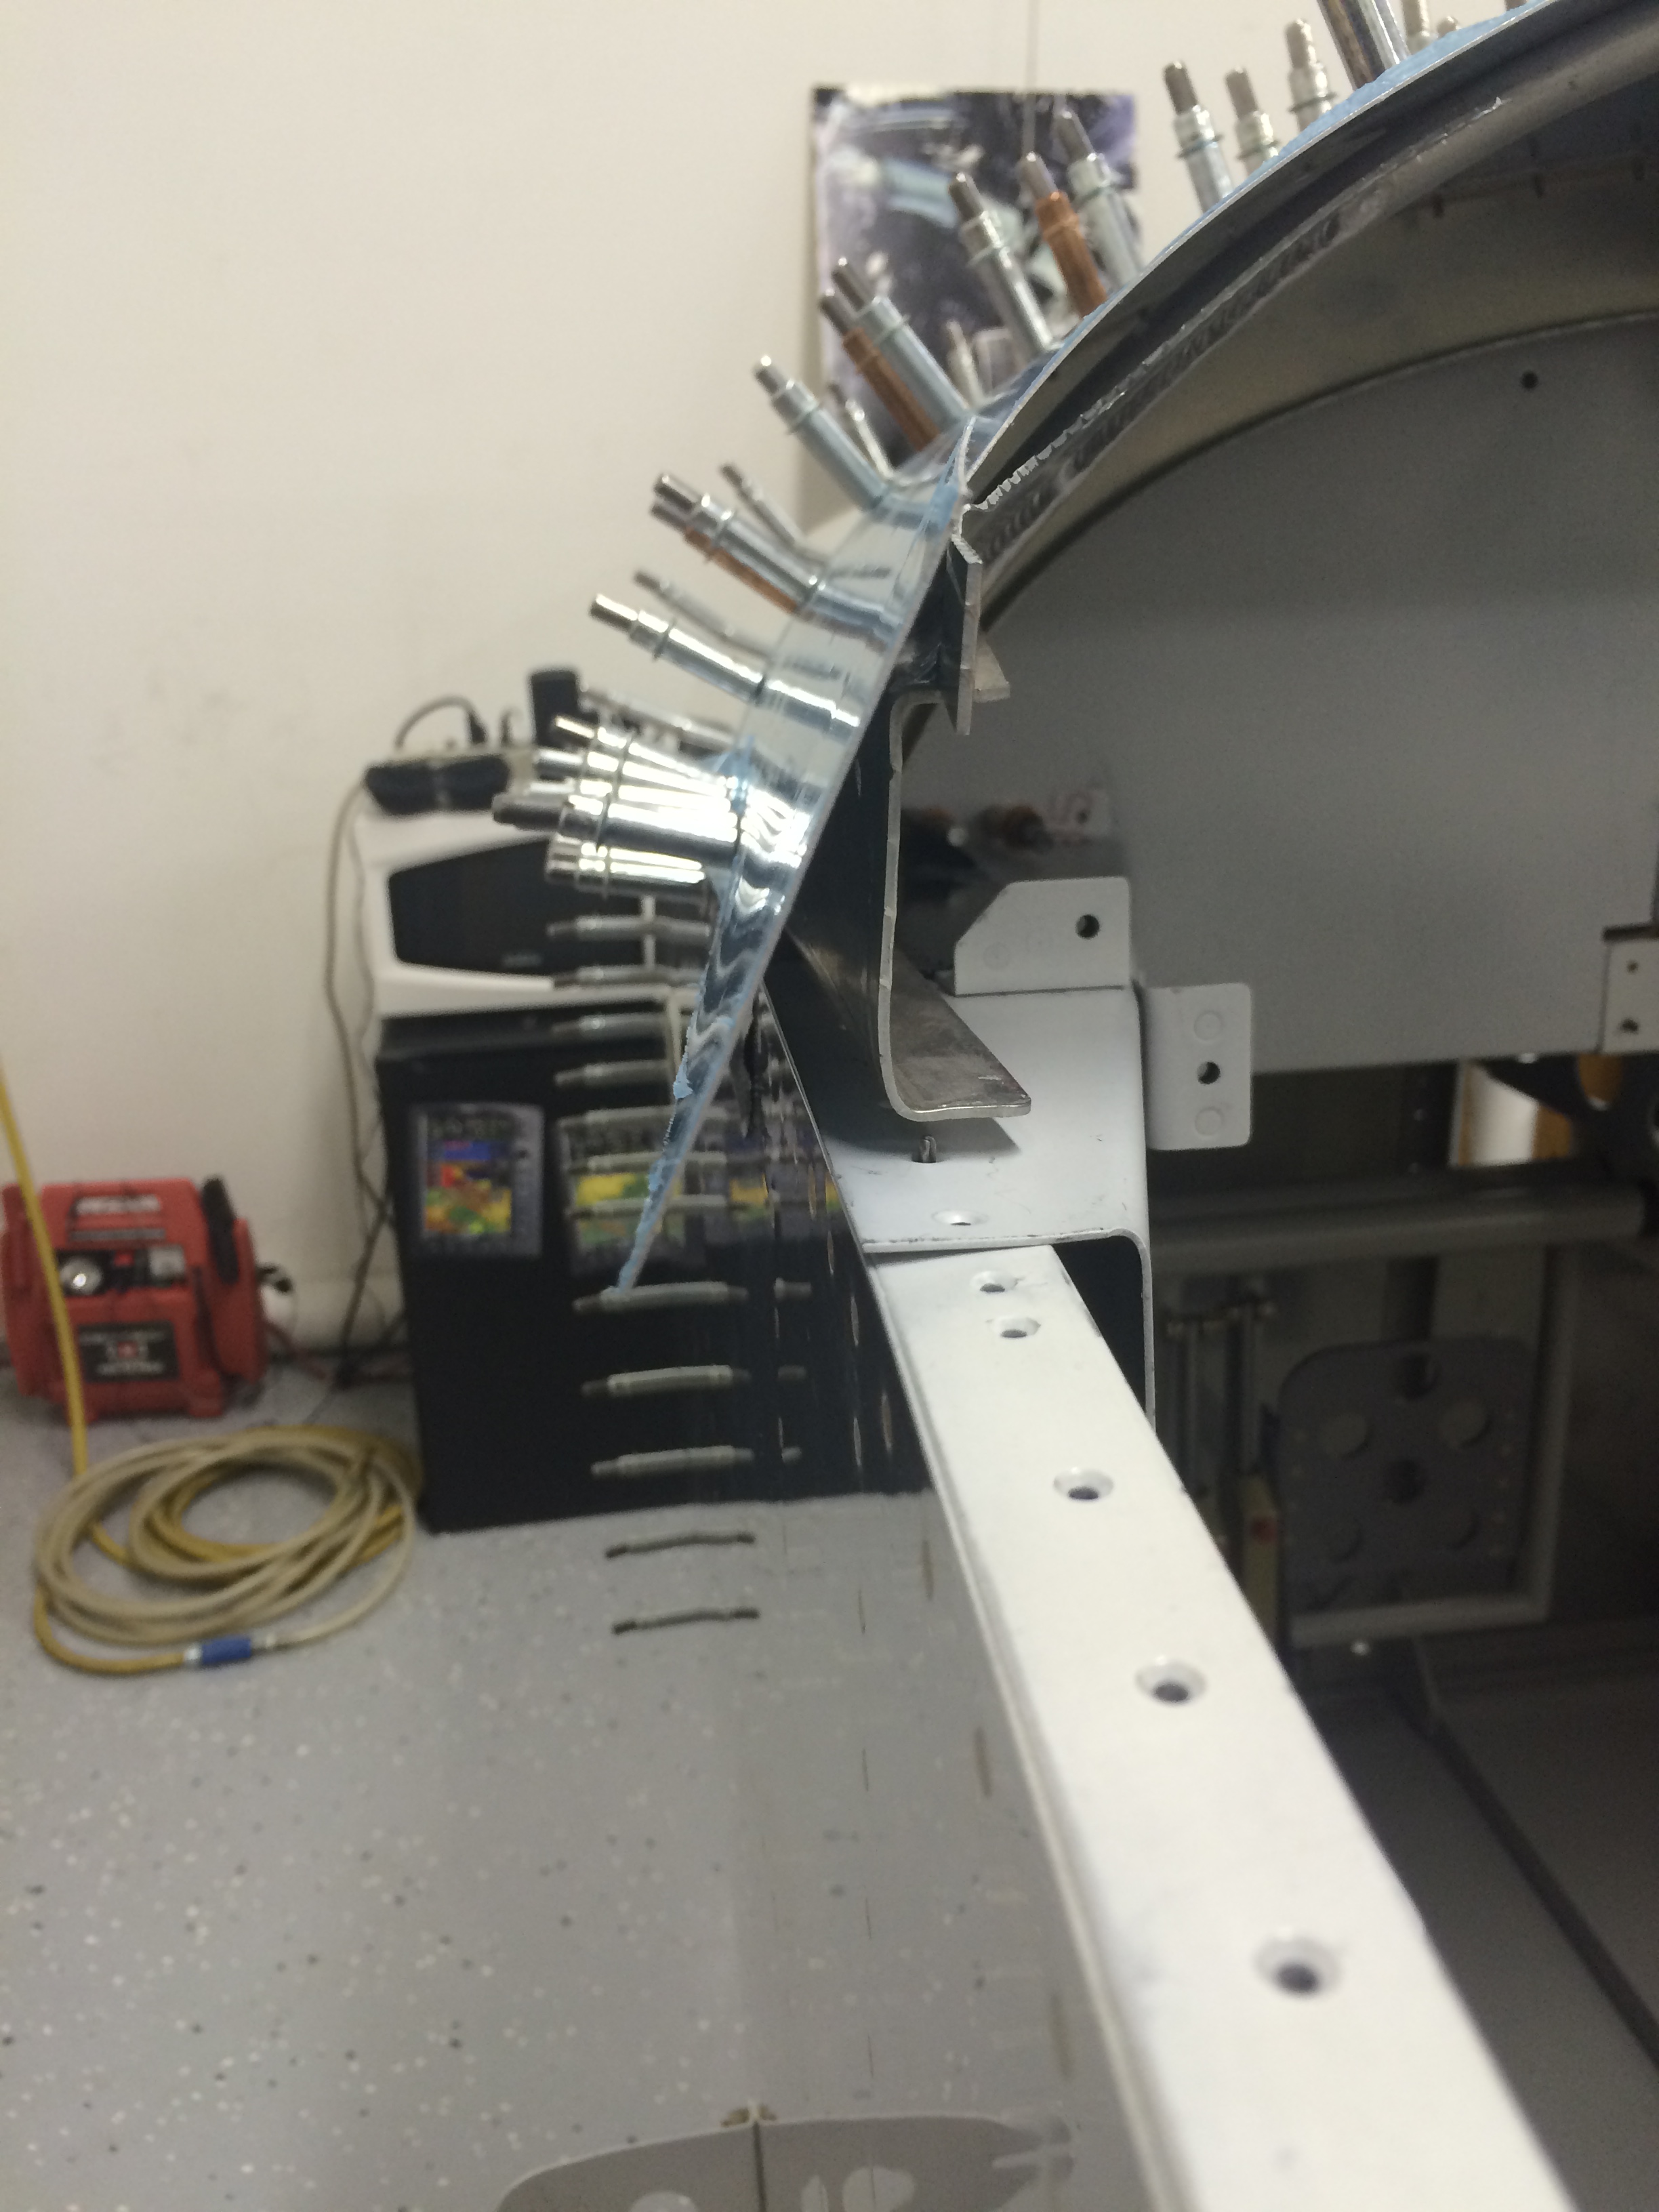
I continued the process around the sides and front.  It was a little difficult to tell where the cut lines should be, especially on the sides.

Prepping to cut the front of the canopy

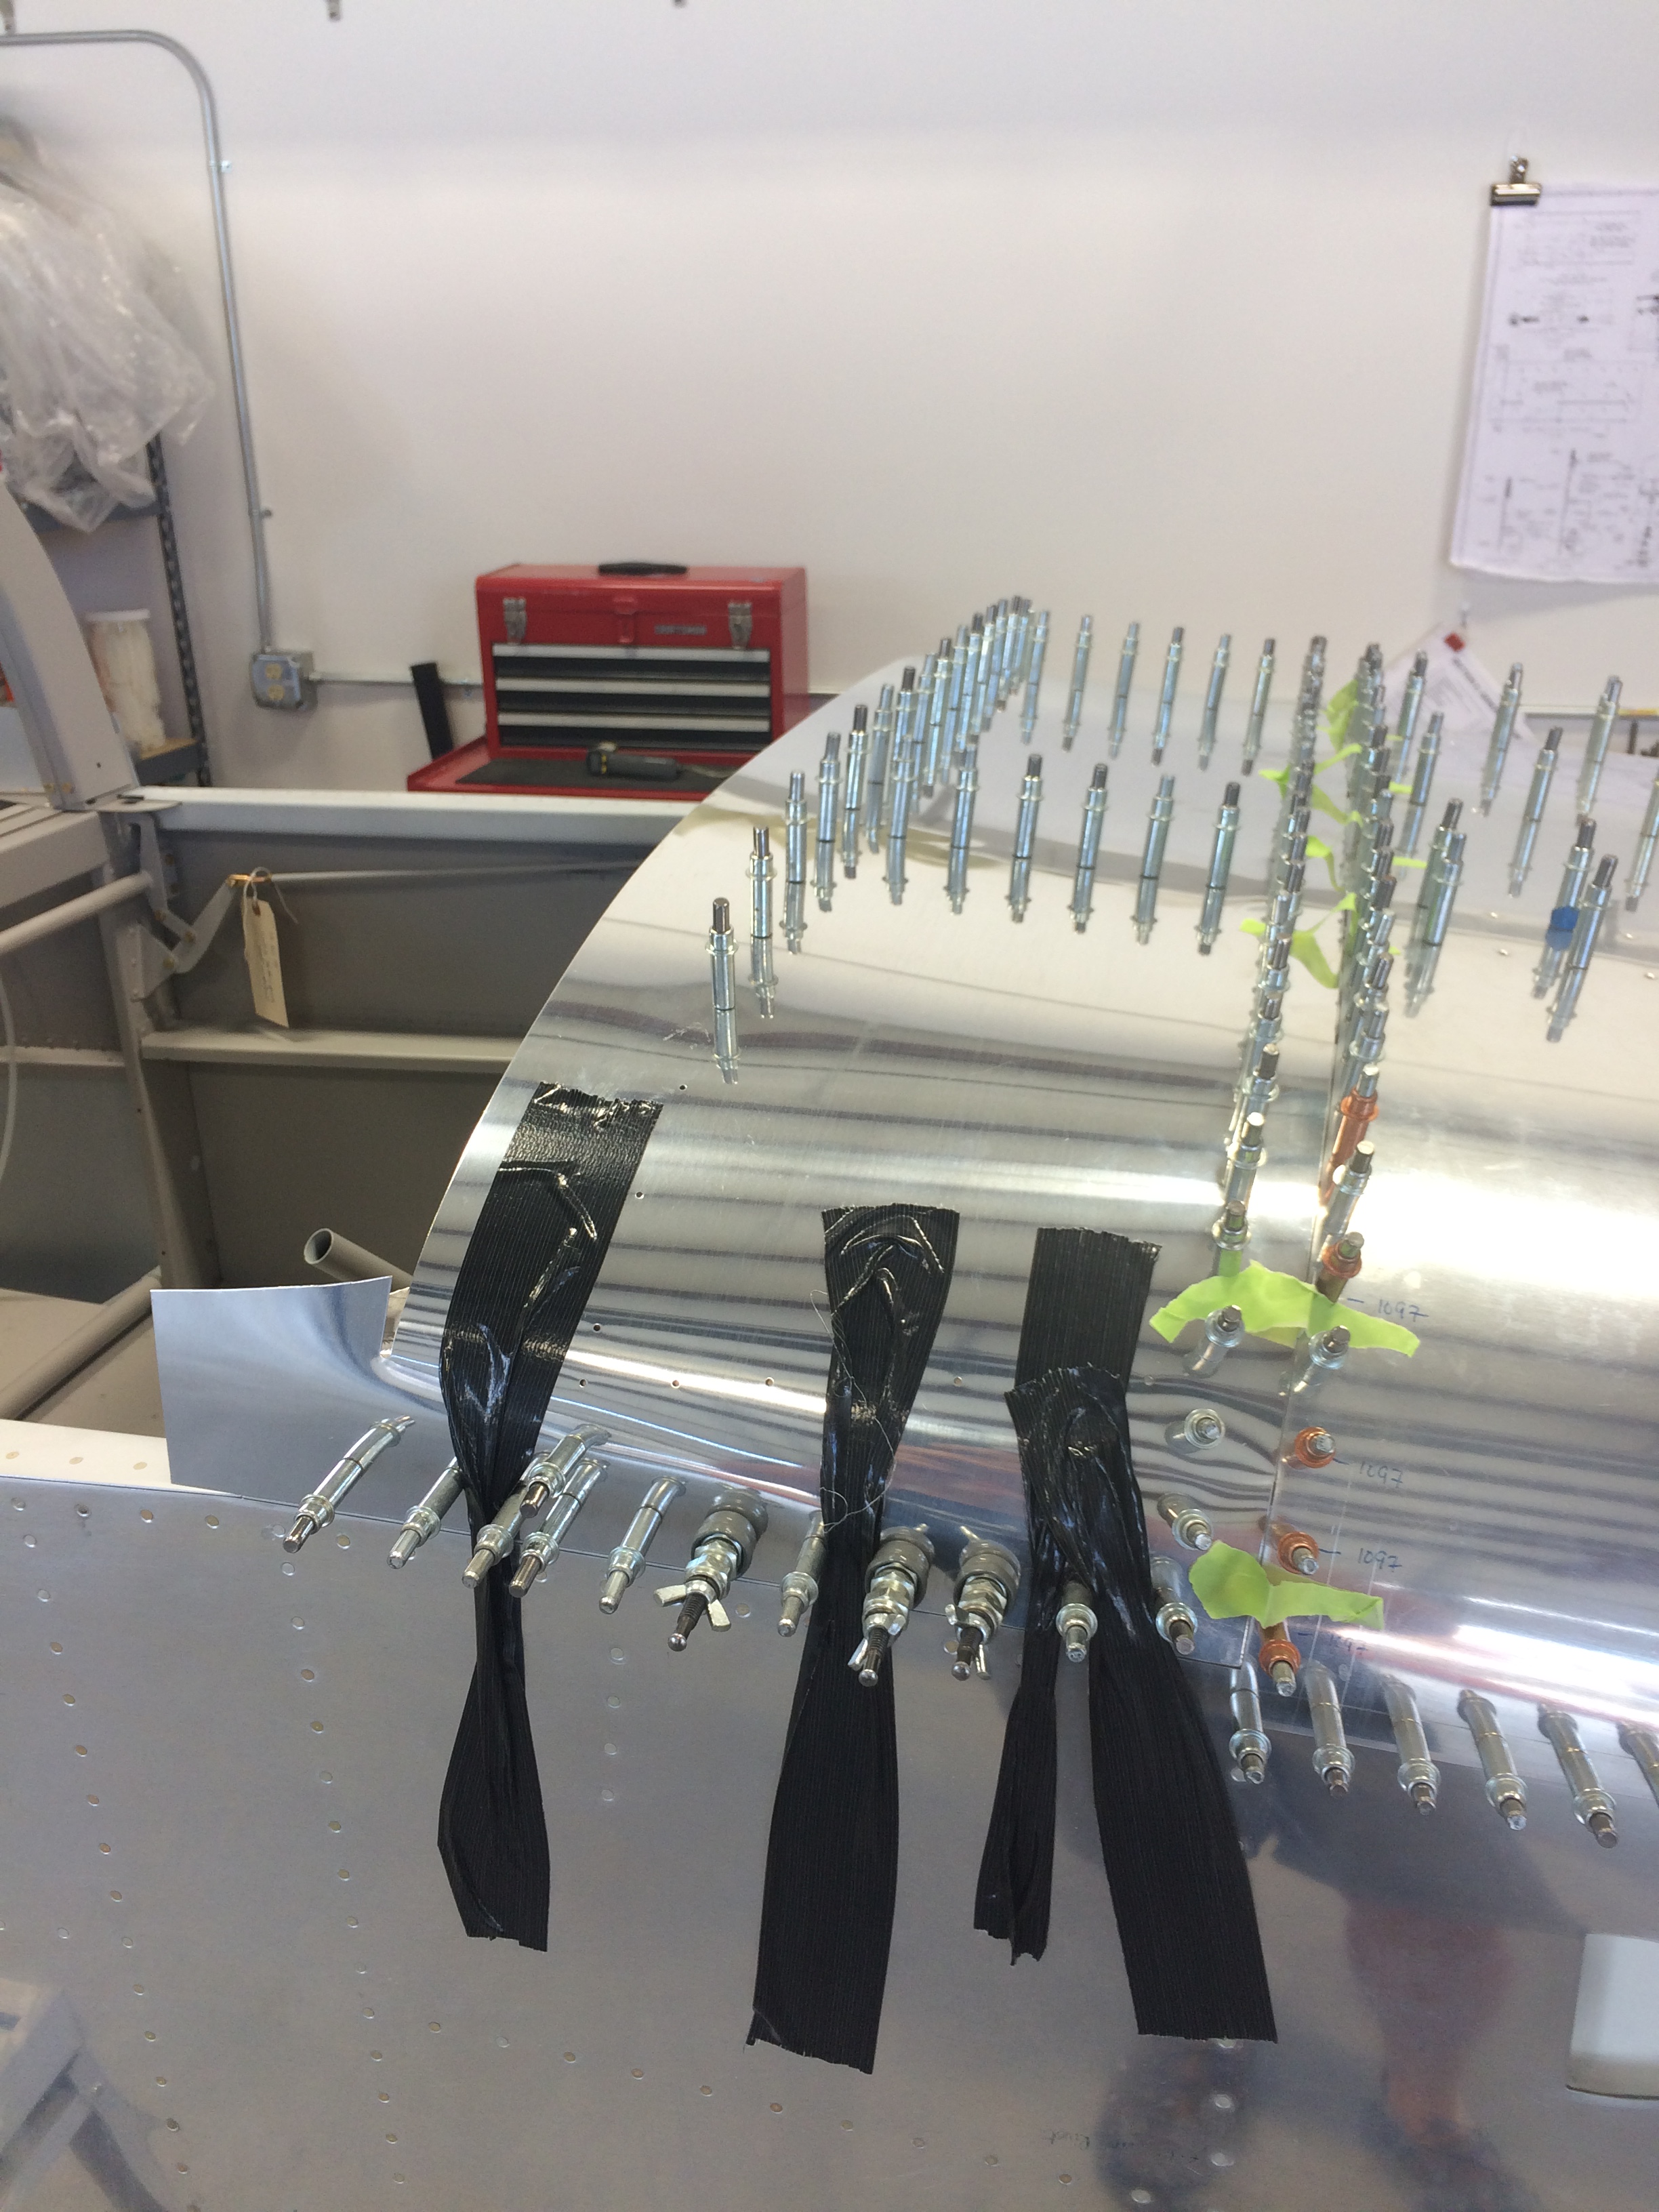
With the clamp marks trimmed off, I marked a centerline on the canopy per Vans’ instructions. This is a little tough to do as it’s hard to accurately place a tape measure around the canopy.  I wound up using a piece of string pulled tight from side to side…mark  the string where it lies on the edges, then double it back on itself and you have the centerline – sort of. I don’t think it was very precise, but it also seems to be close enough.

The canopy on the fuse for the first time

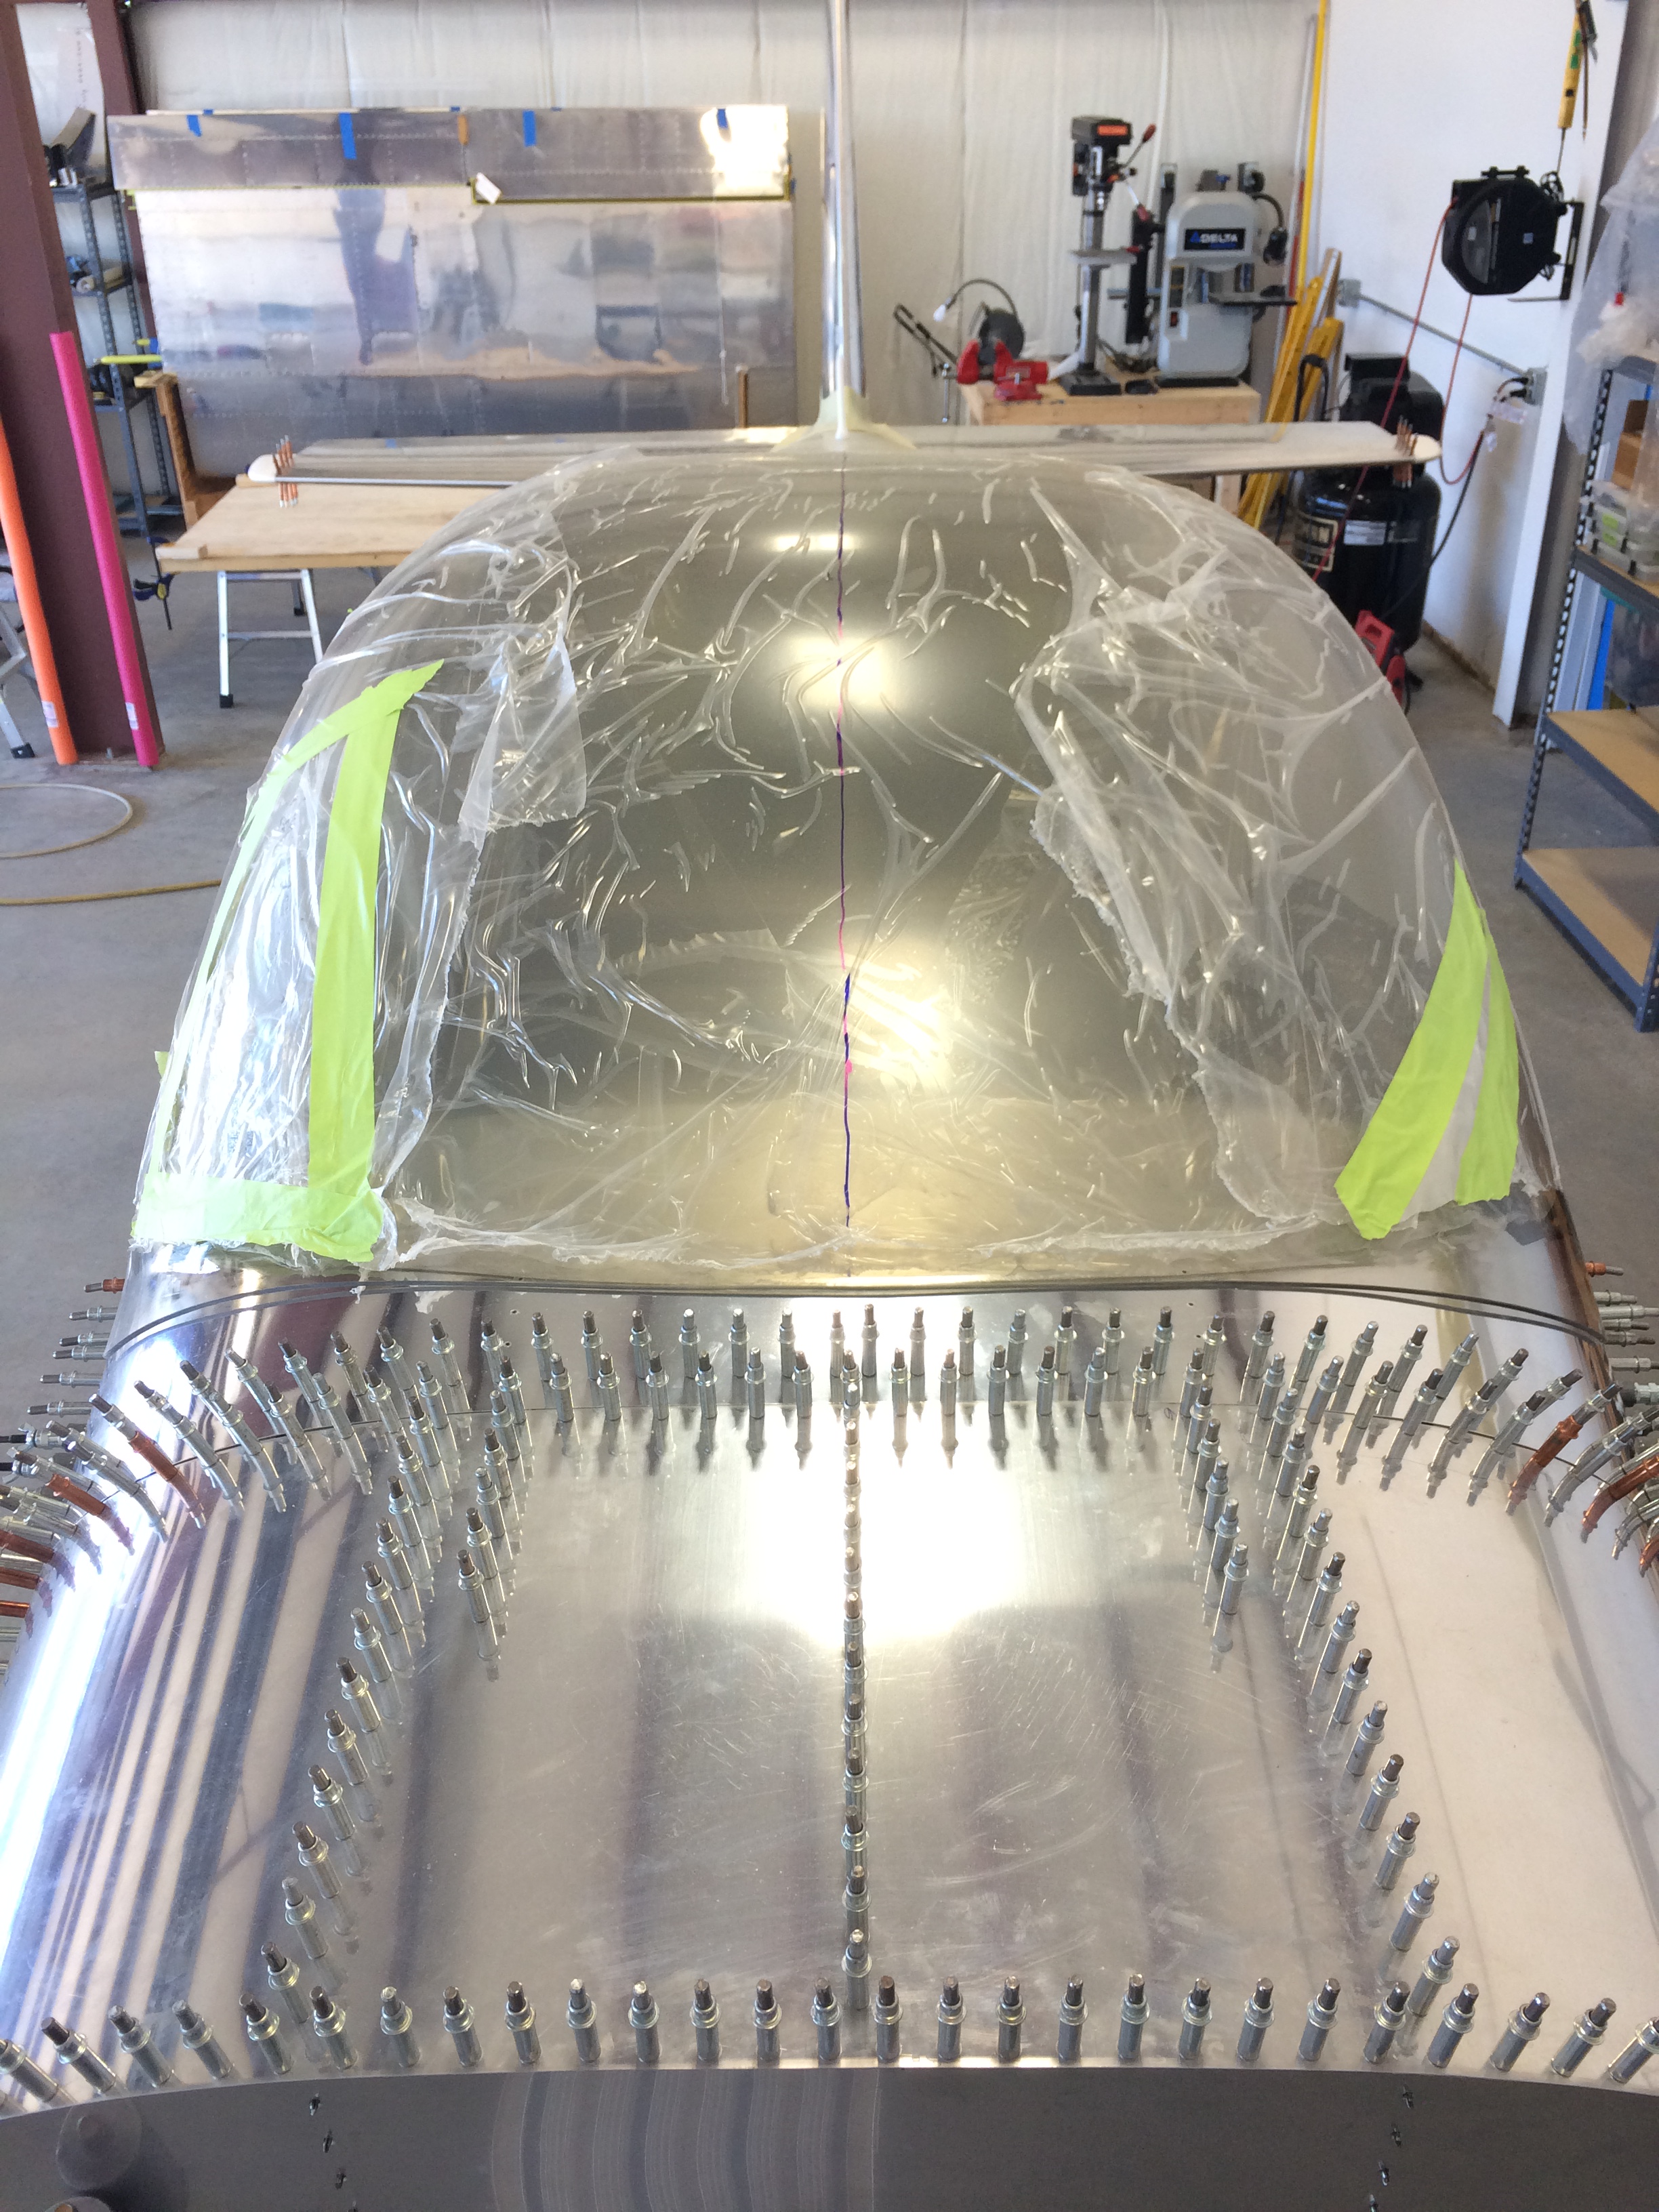
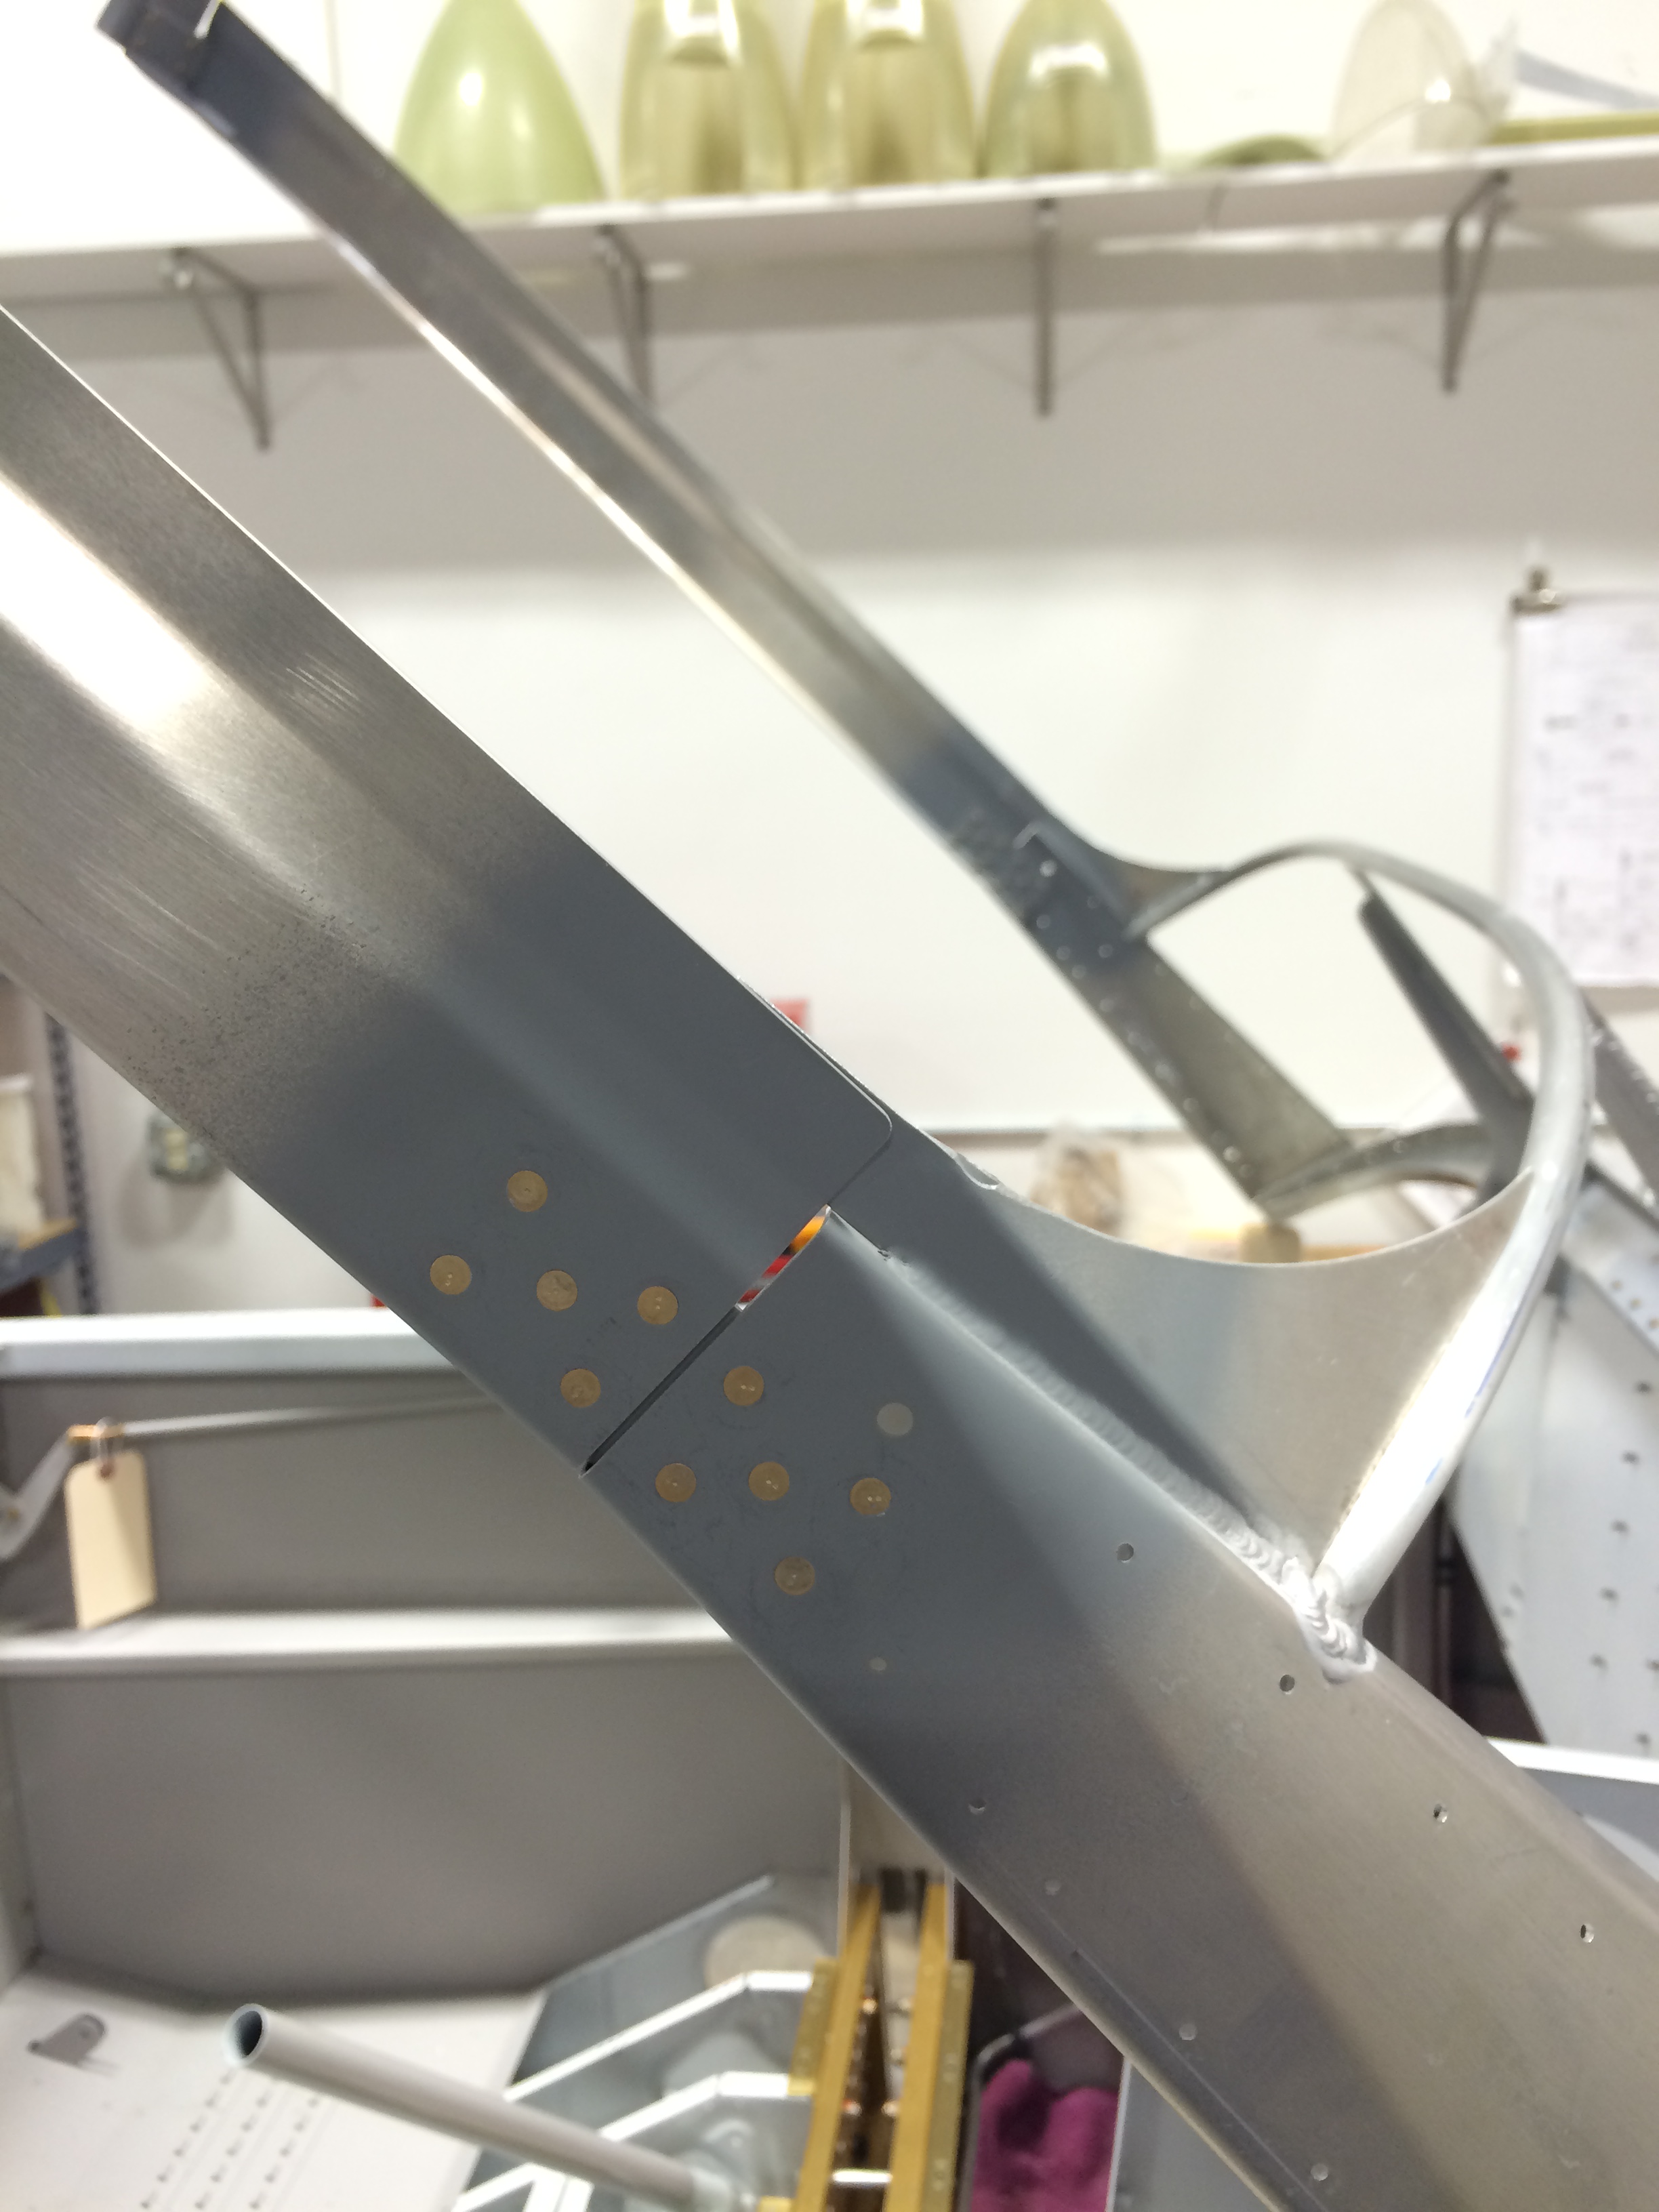
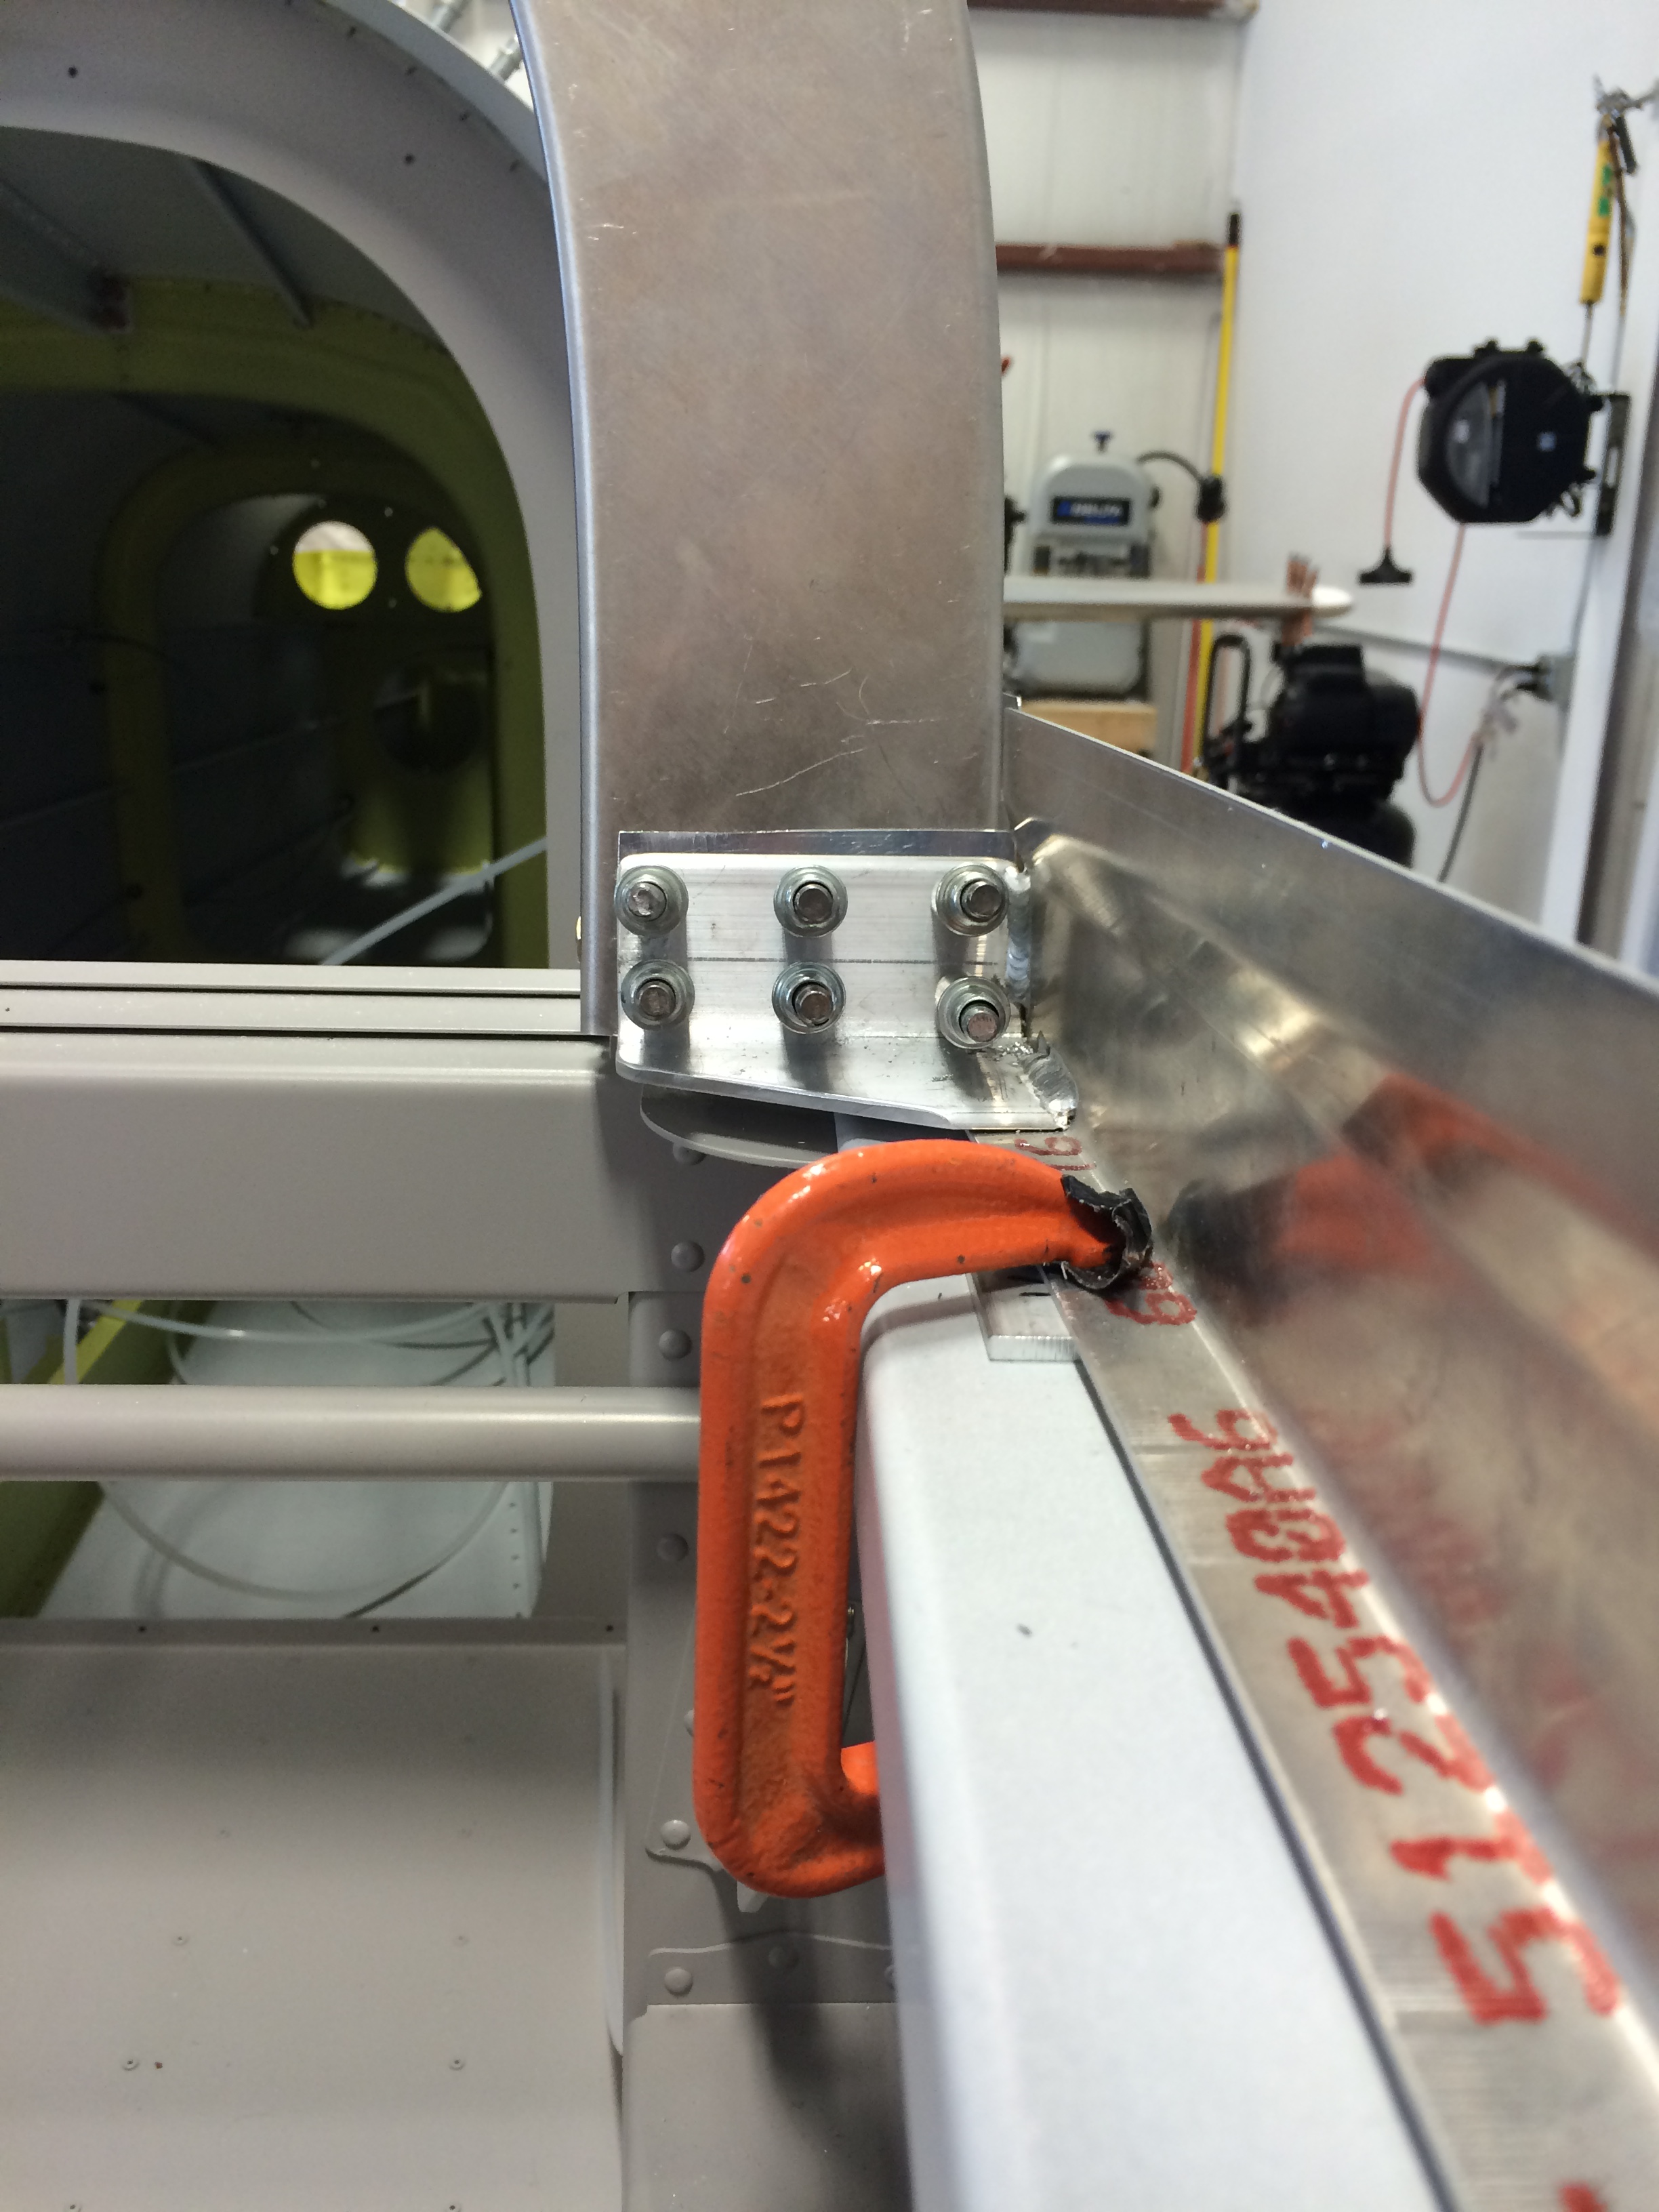
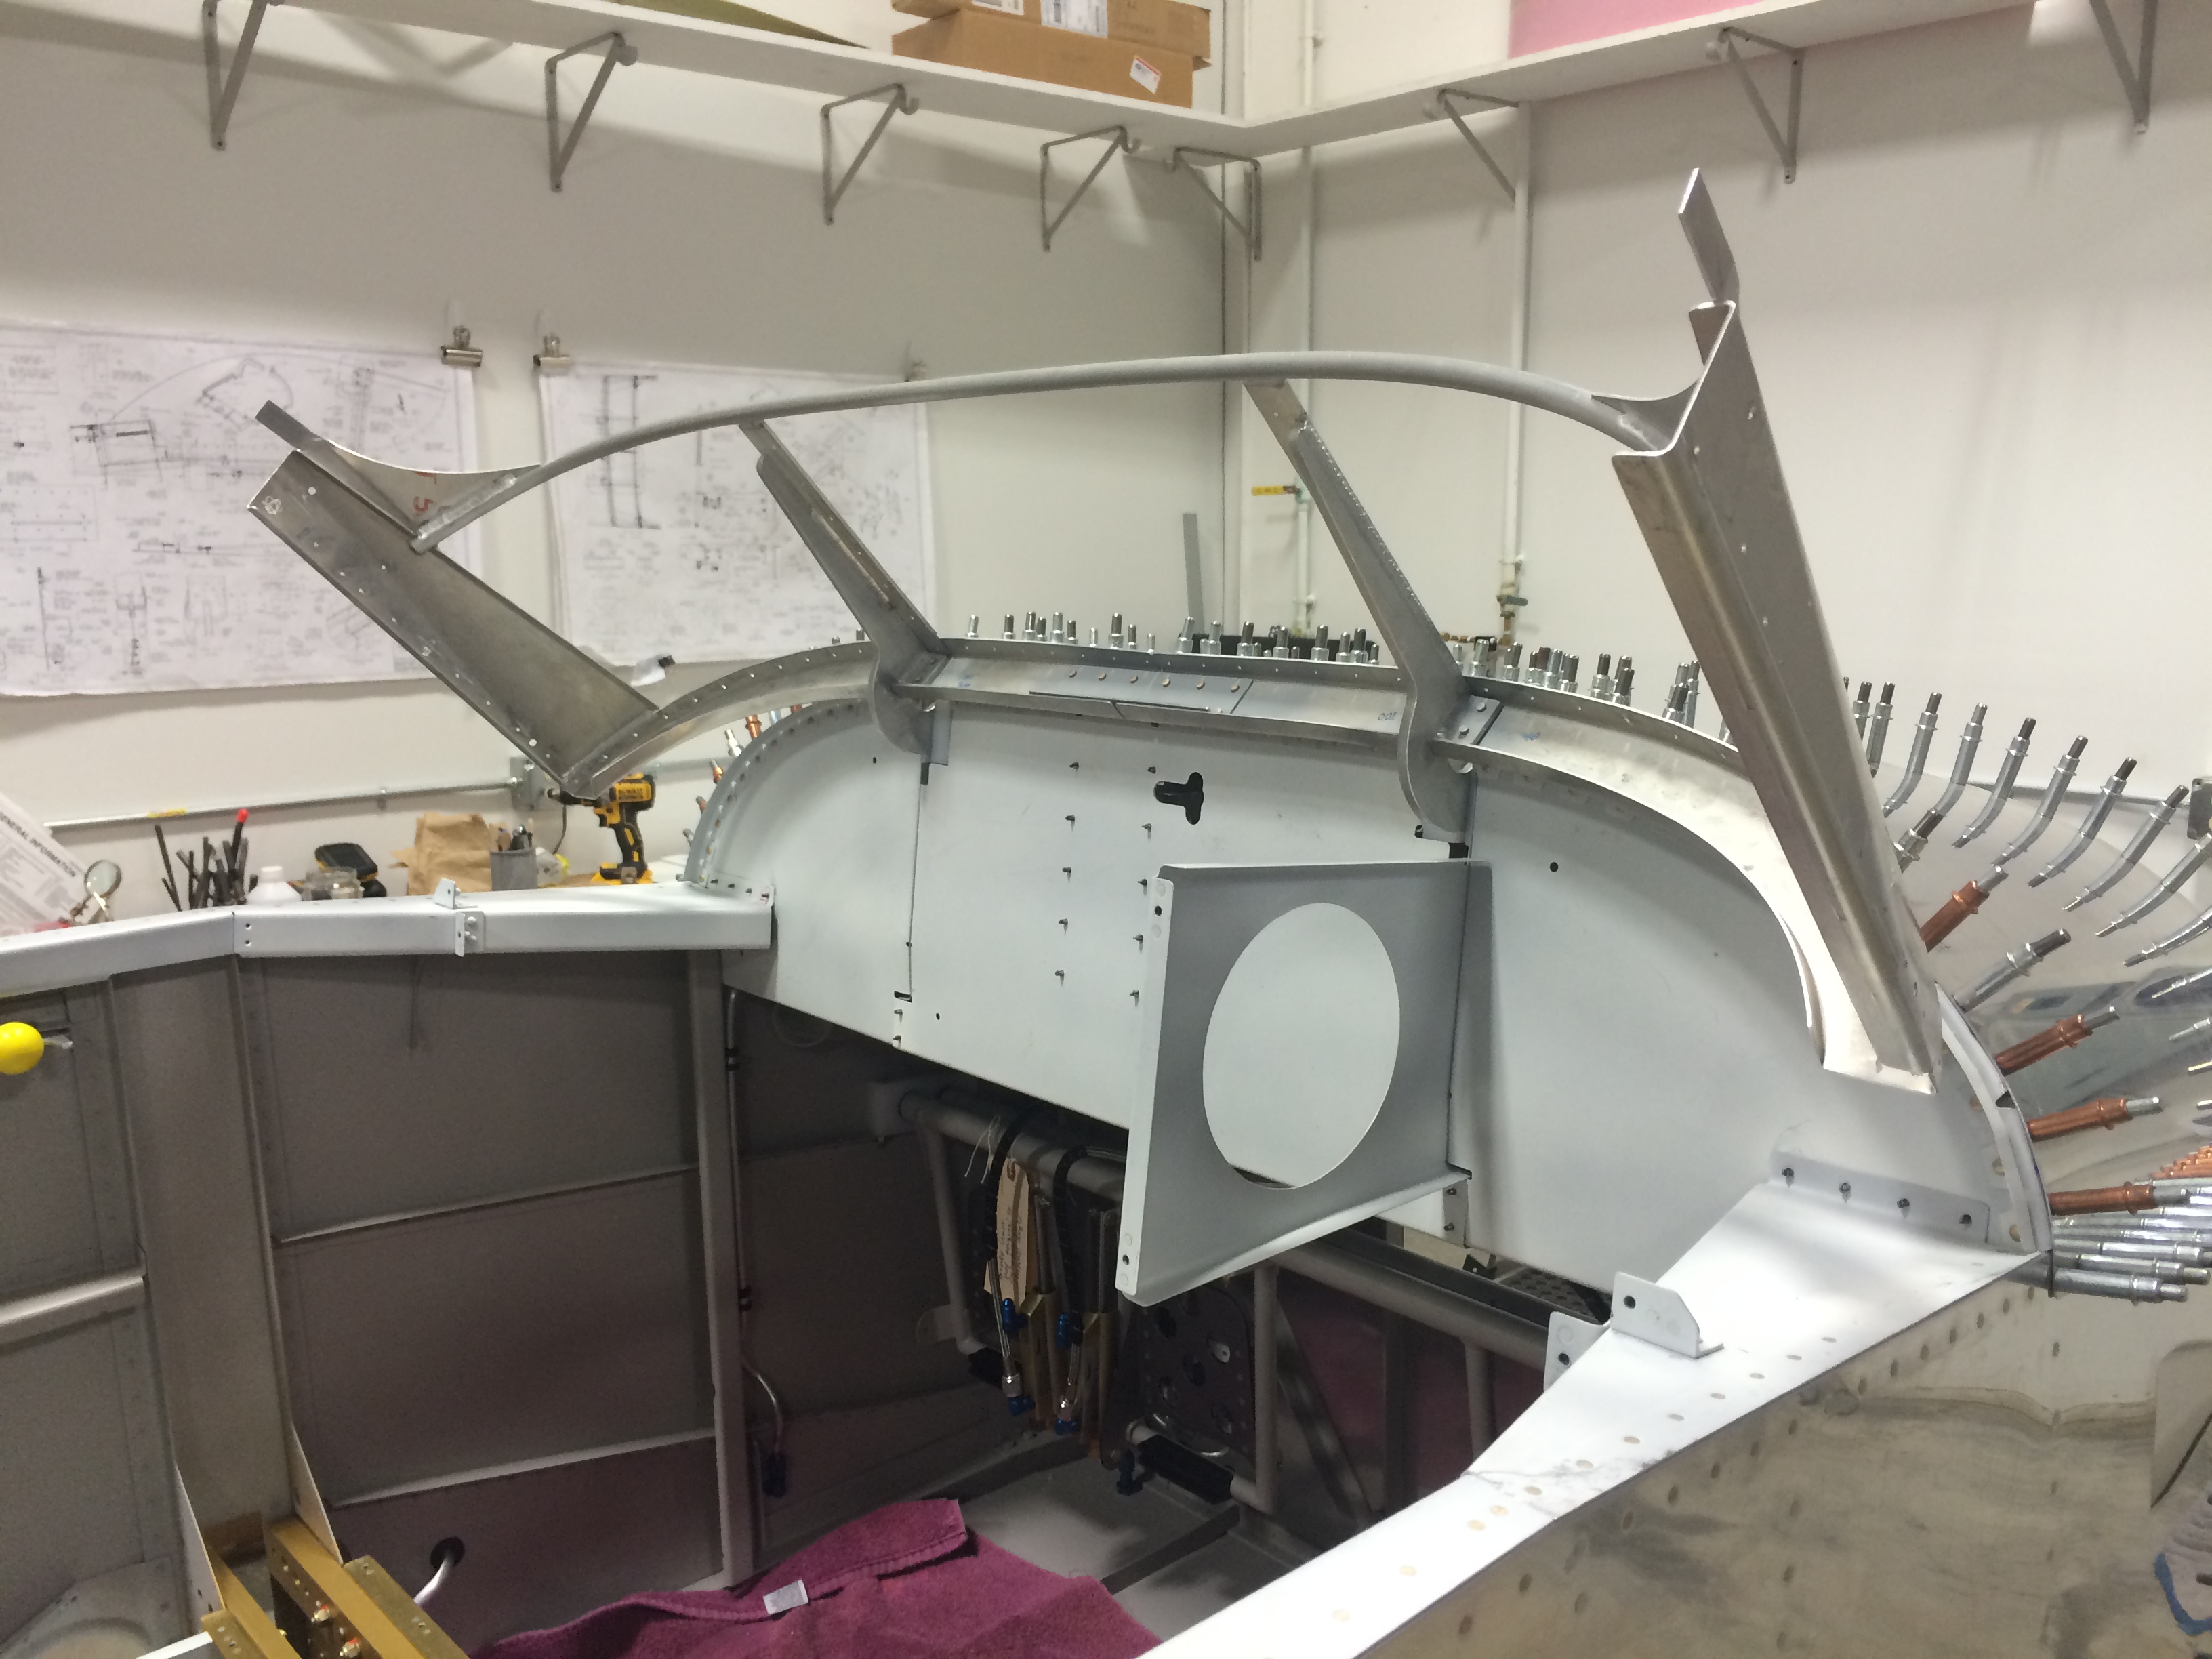
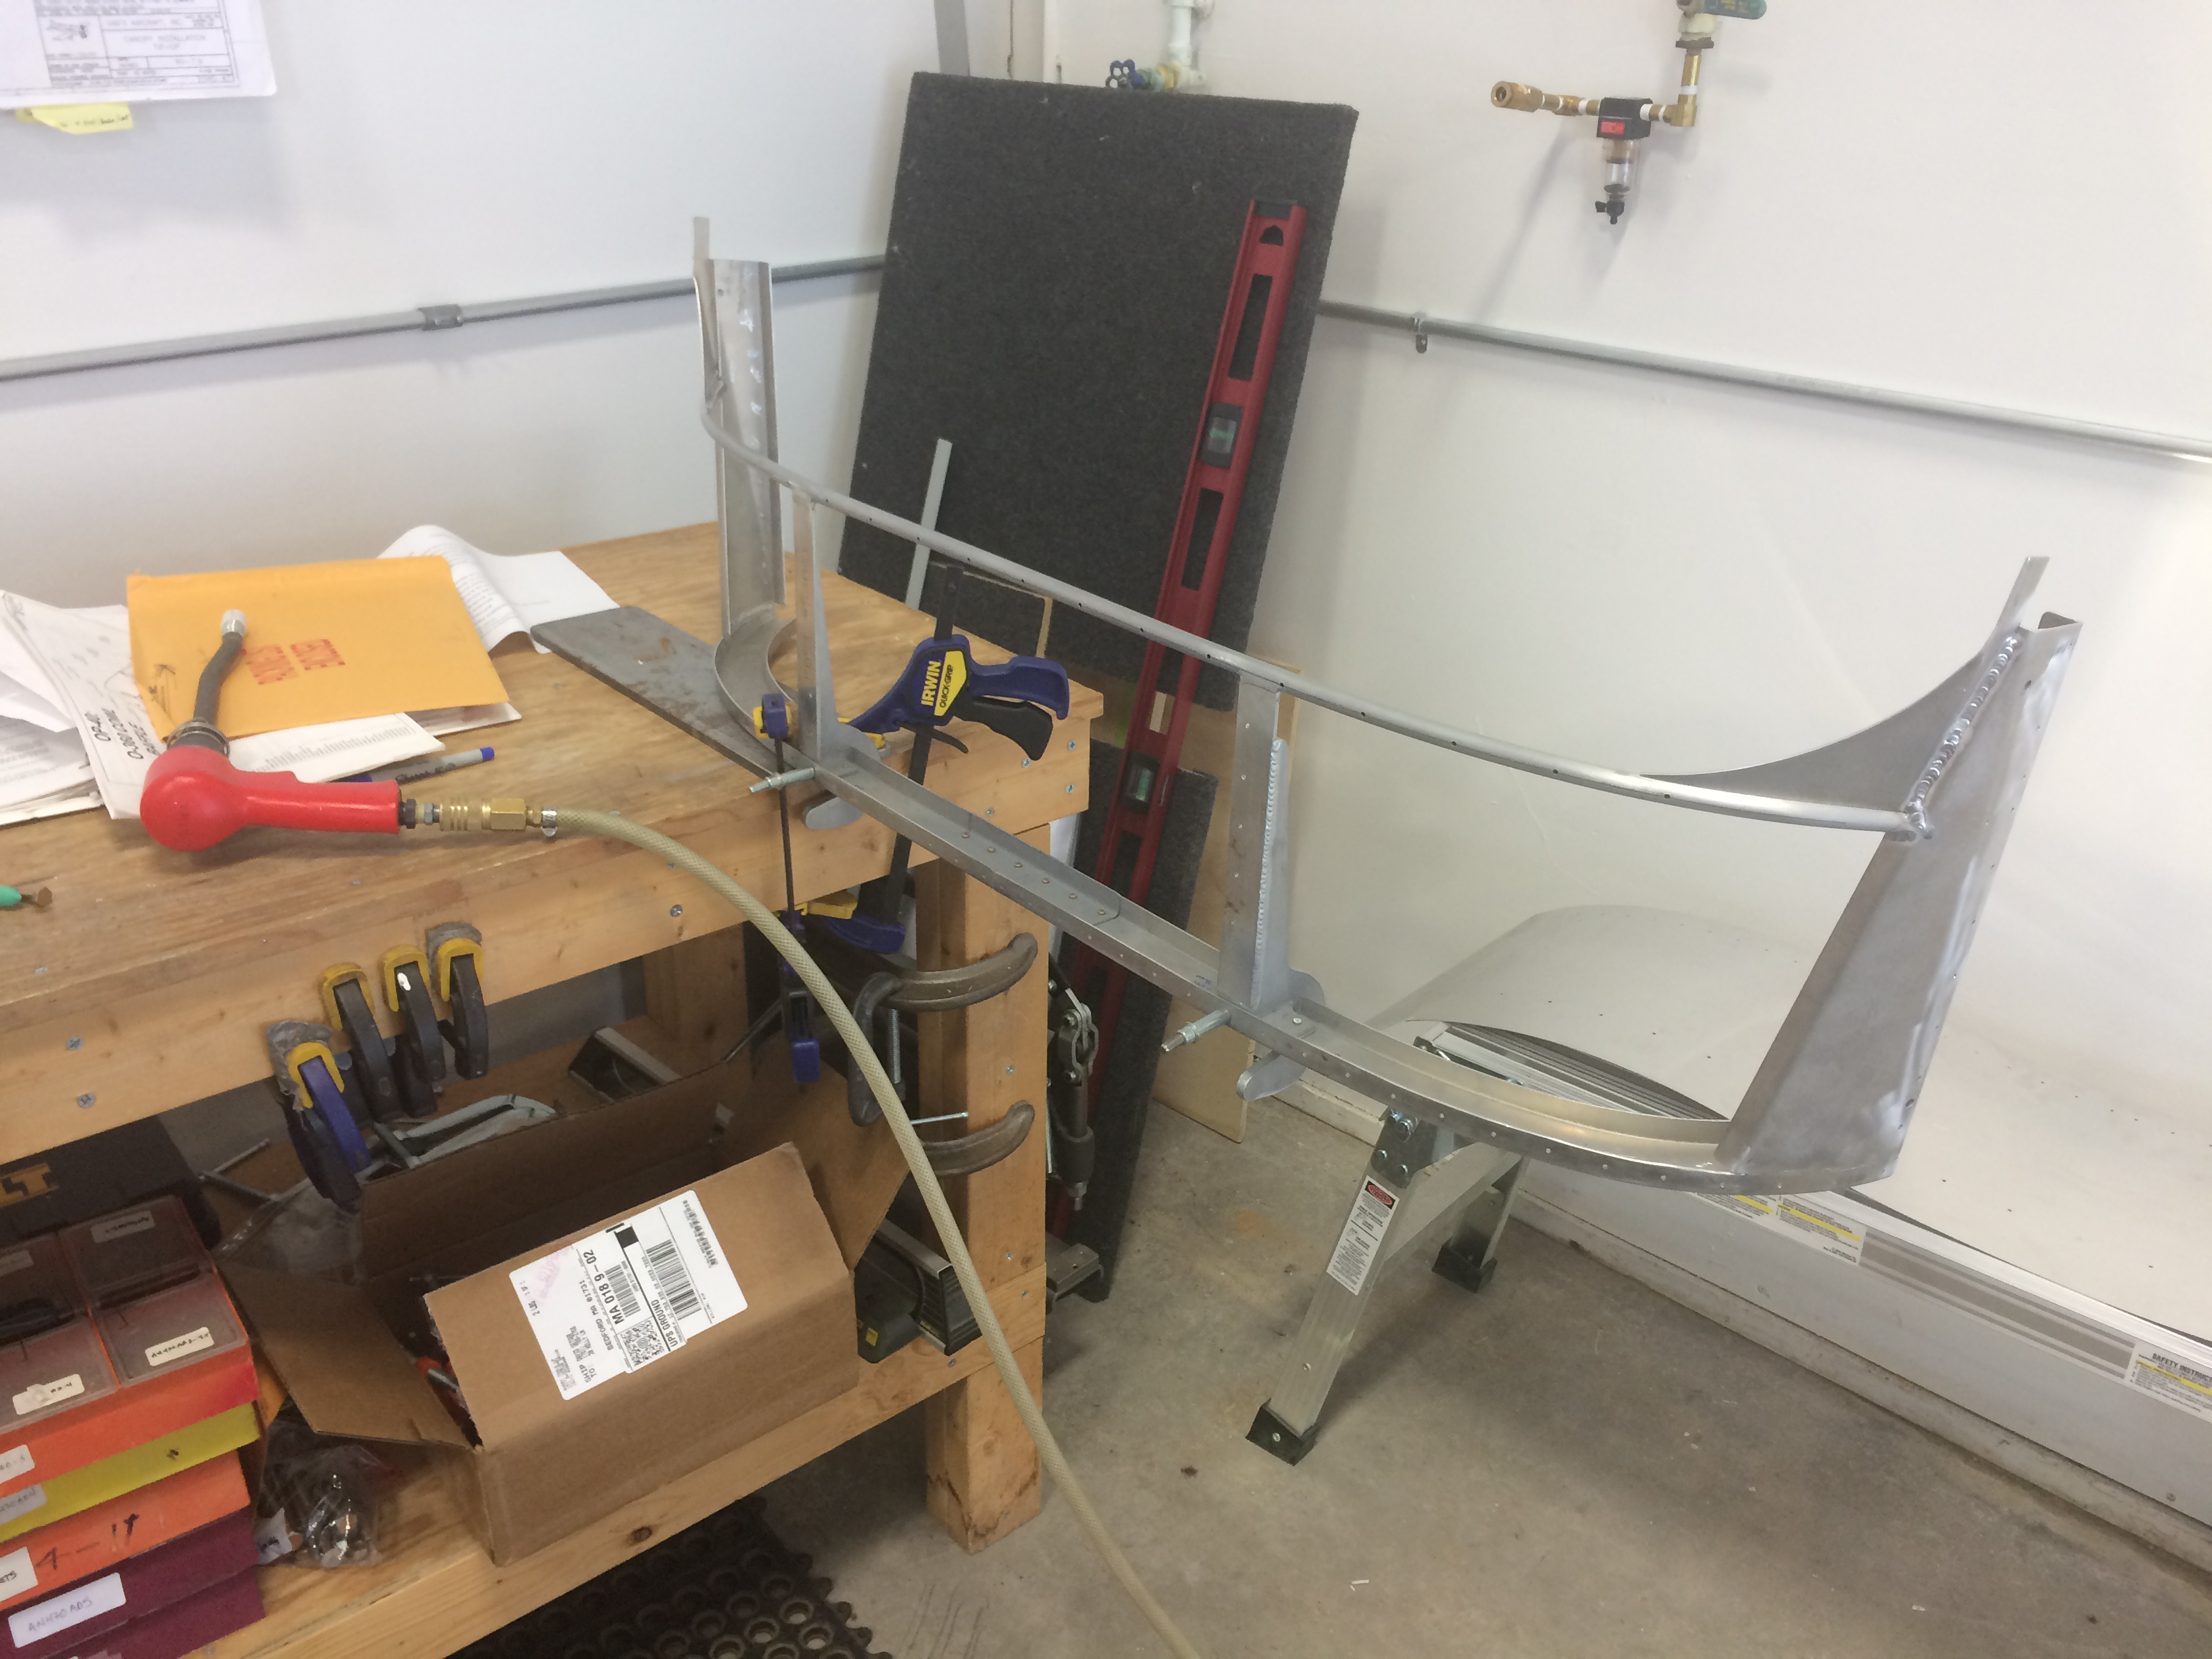
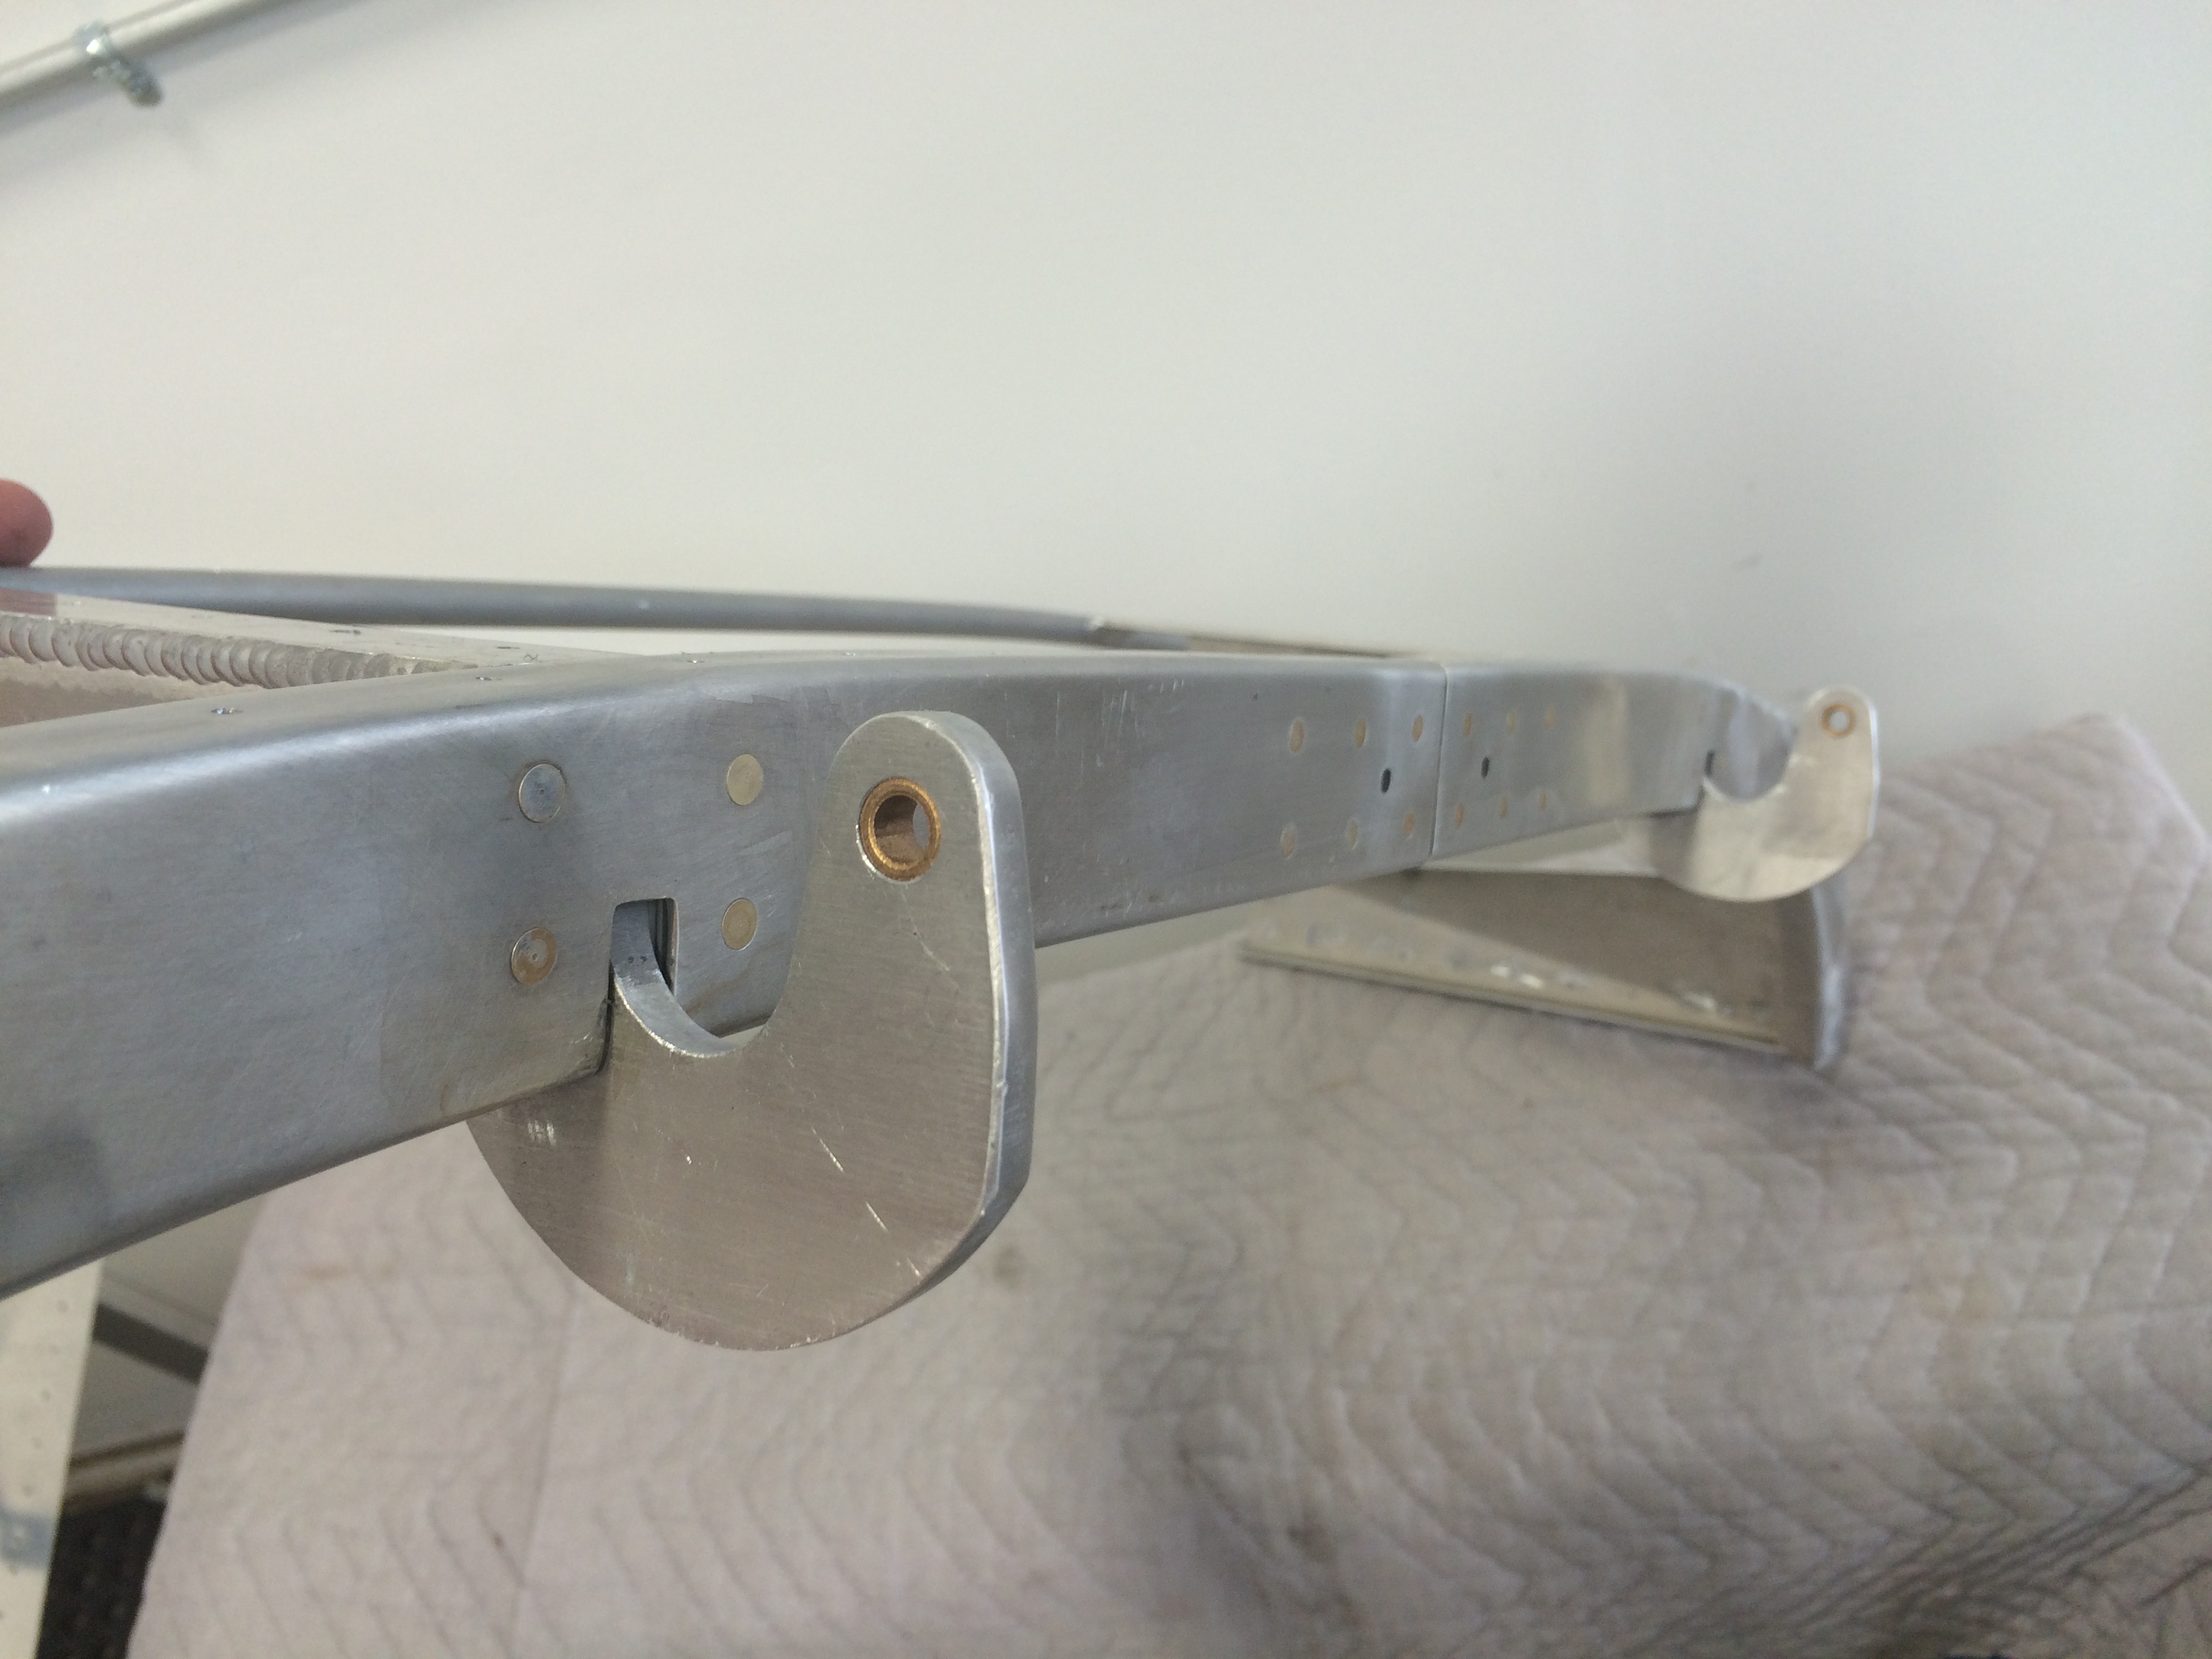
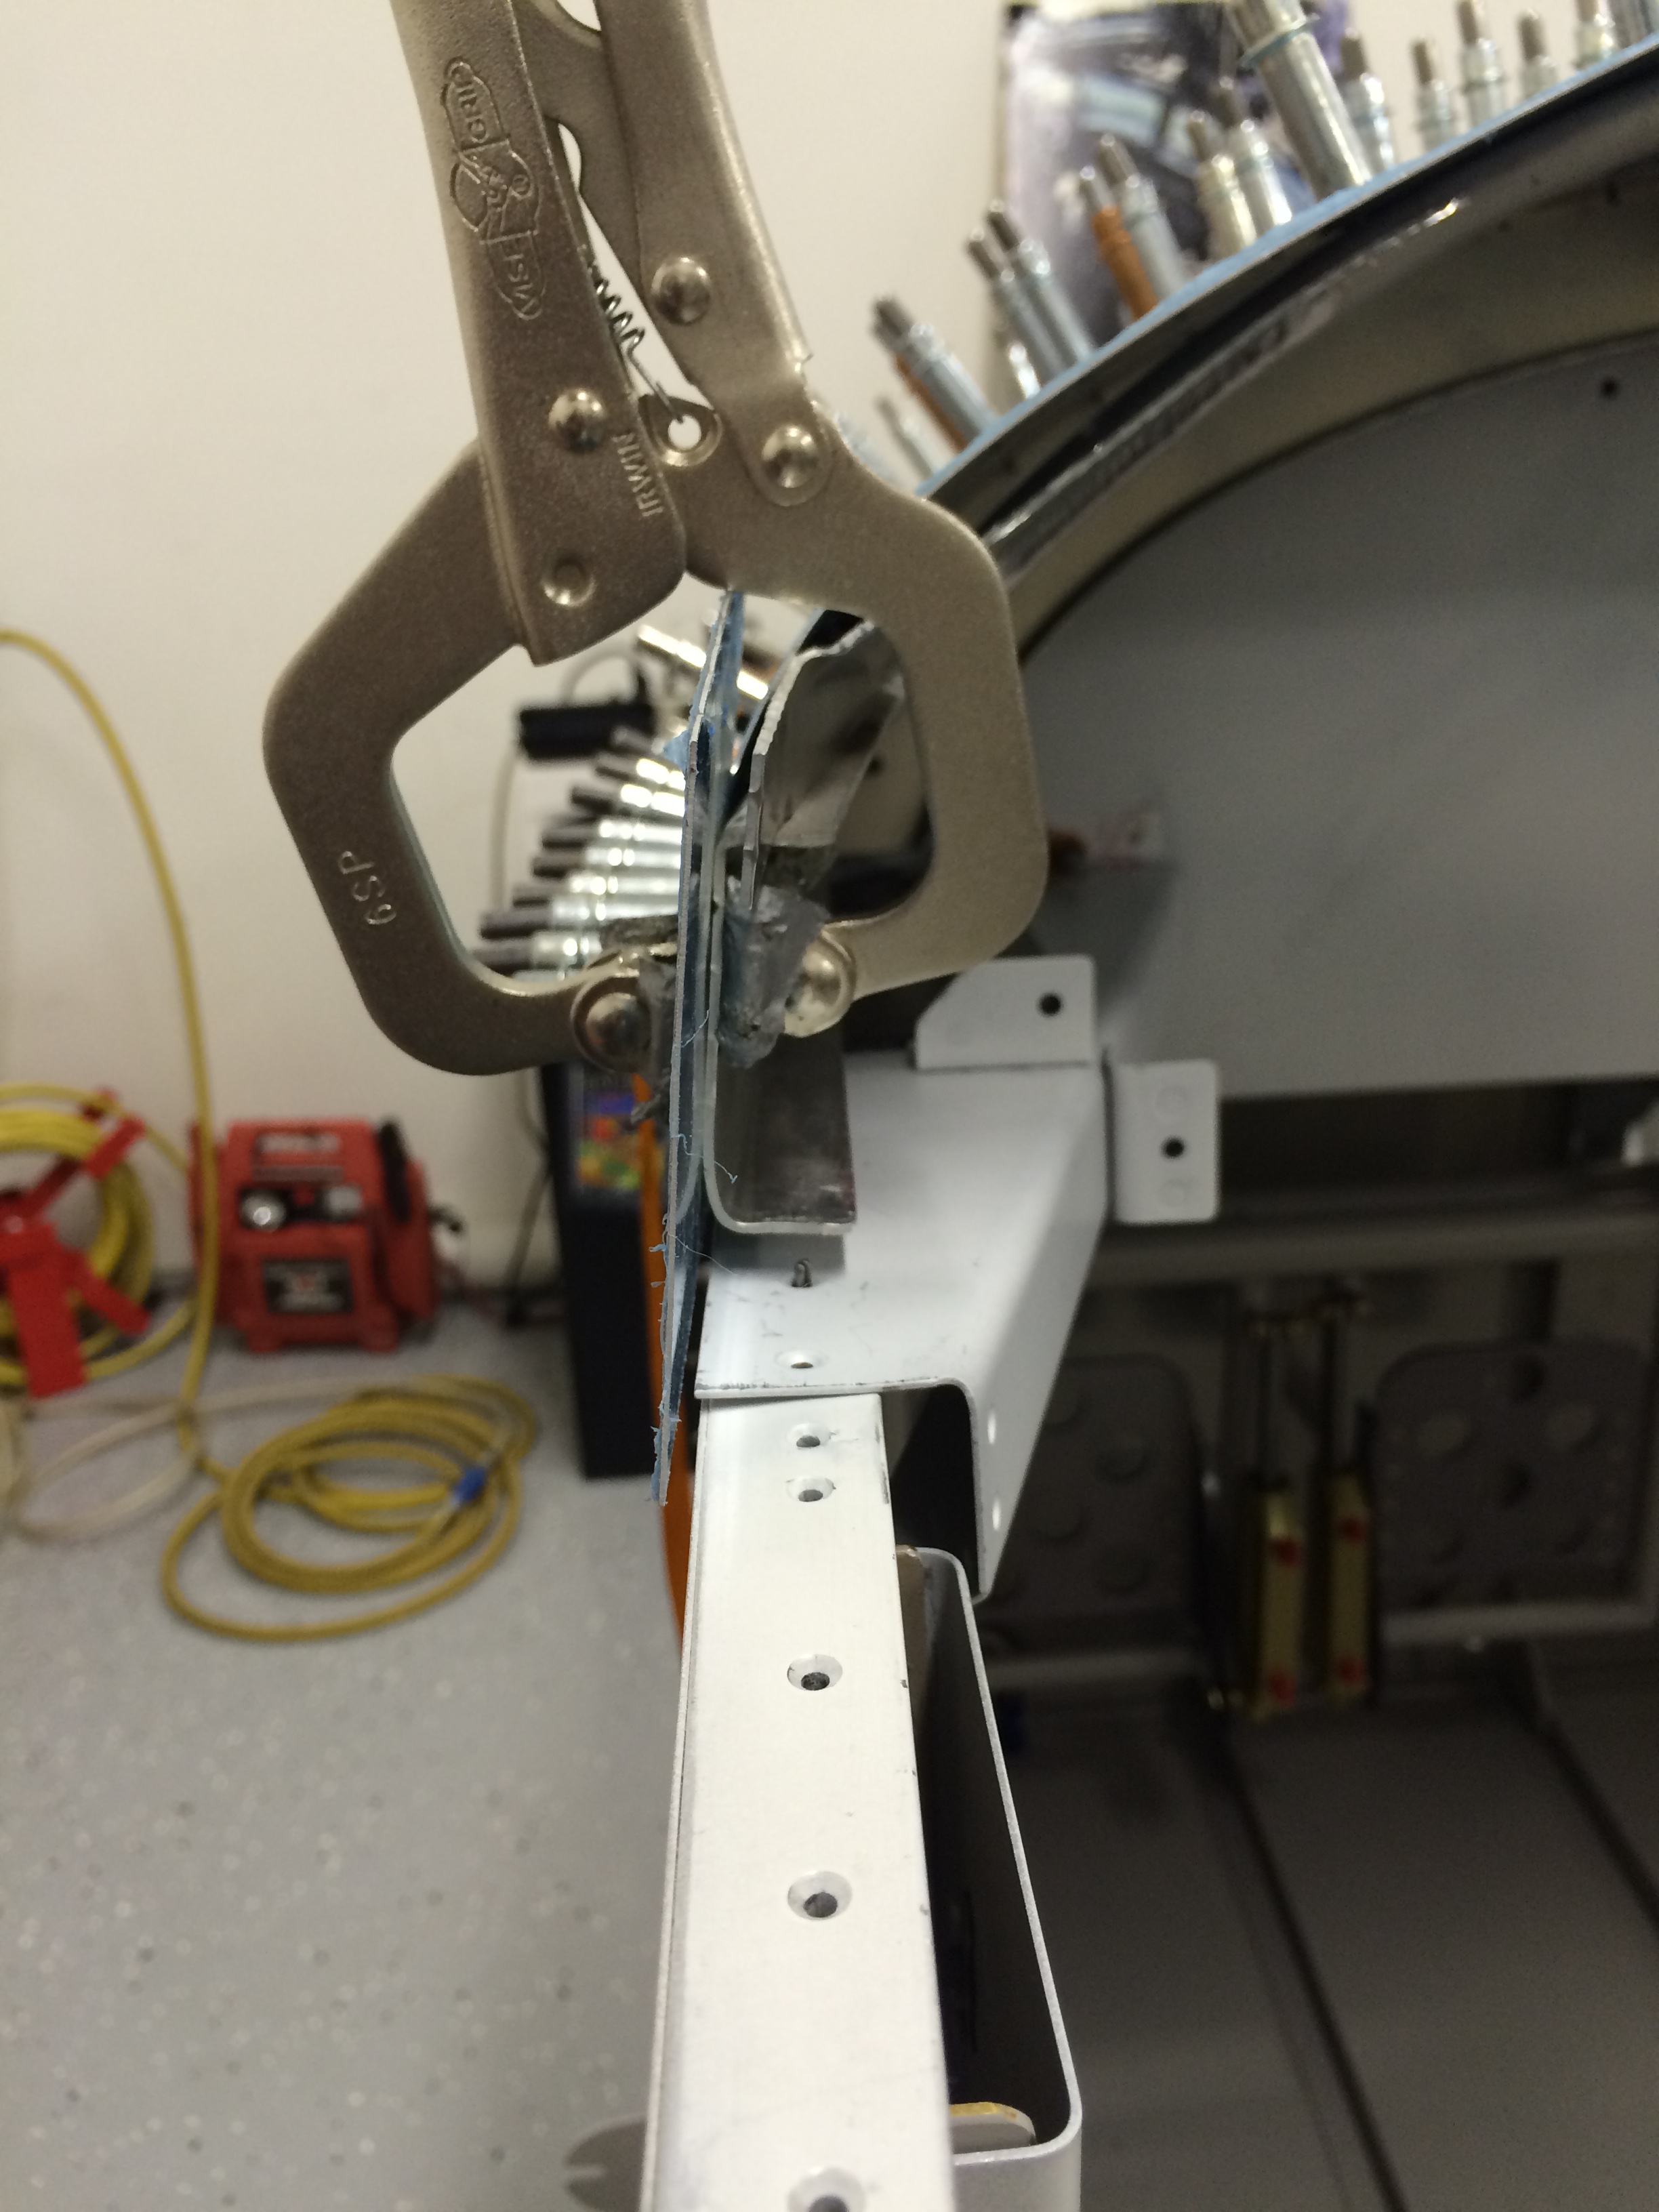
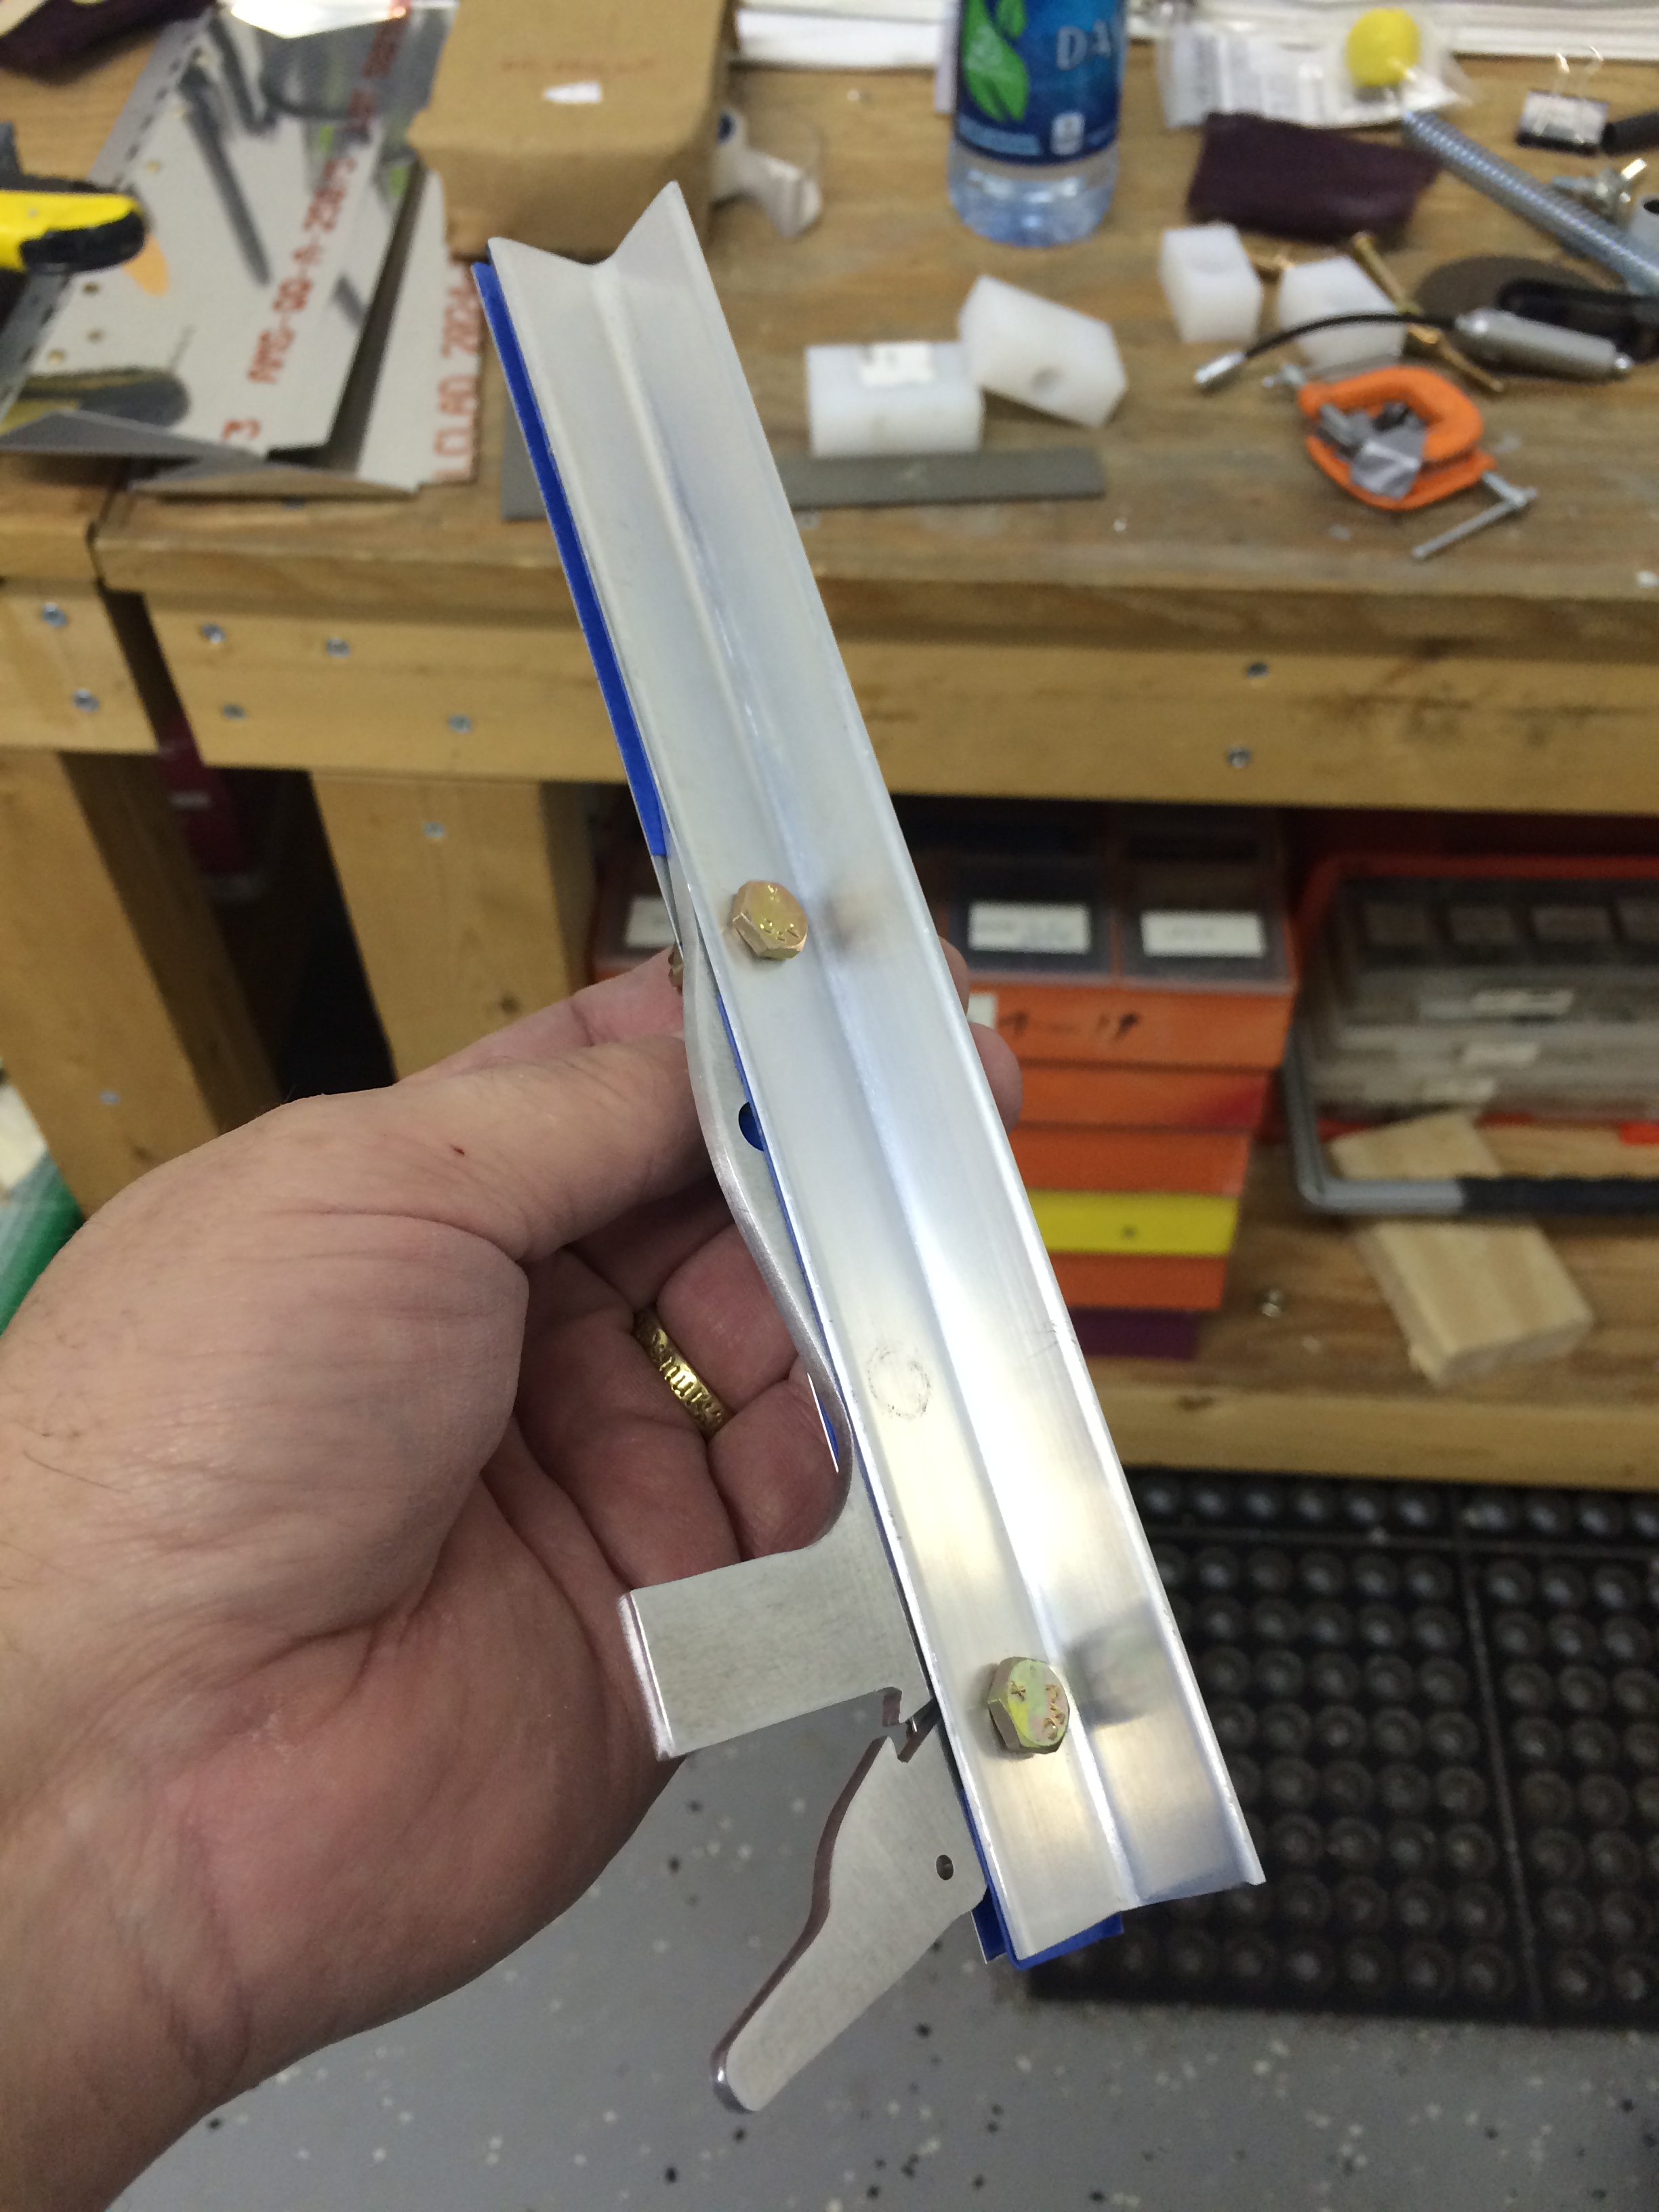
There are a couple of tabs on the front canopy frame that overlap the side rails. The instructions require that the tabs and side rails be adjusted to match the curve of the canopy’s front edge, then drilled and riveted. There’s not a lot of guidance here, and it’s hard to see through the protective plastic sheeting on the canopy to tell how the curve should lie. So…I took my best shot.

Adjusting the canopy rail bends - holes countersunk 
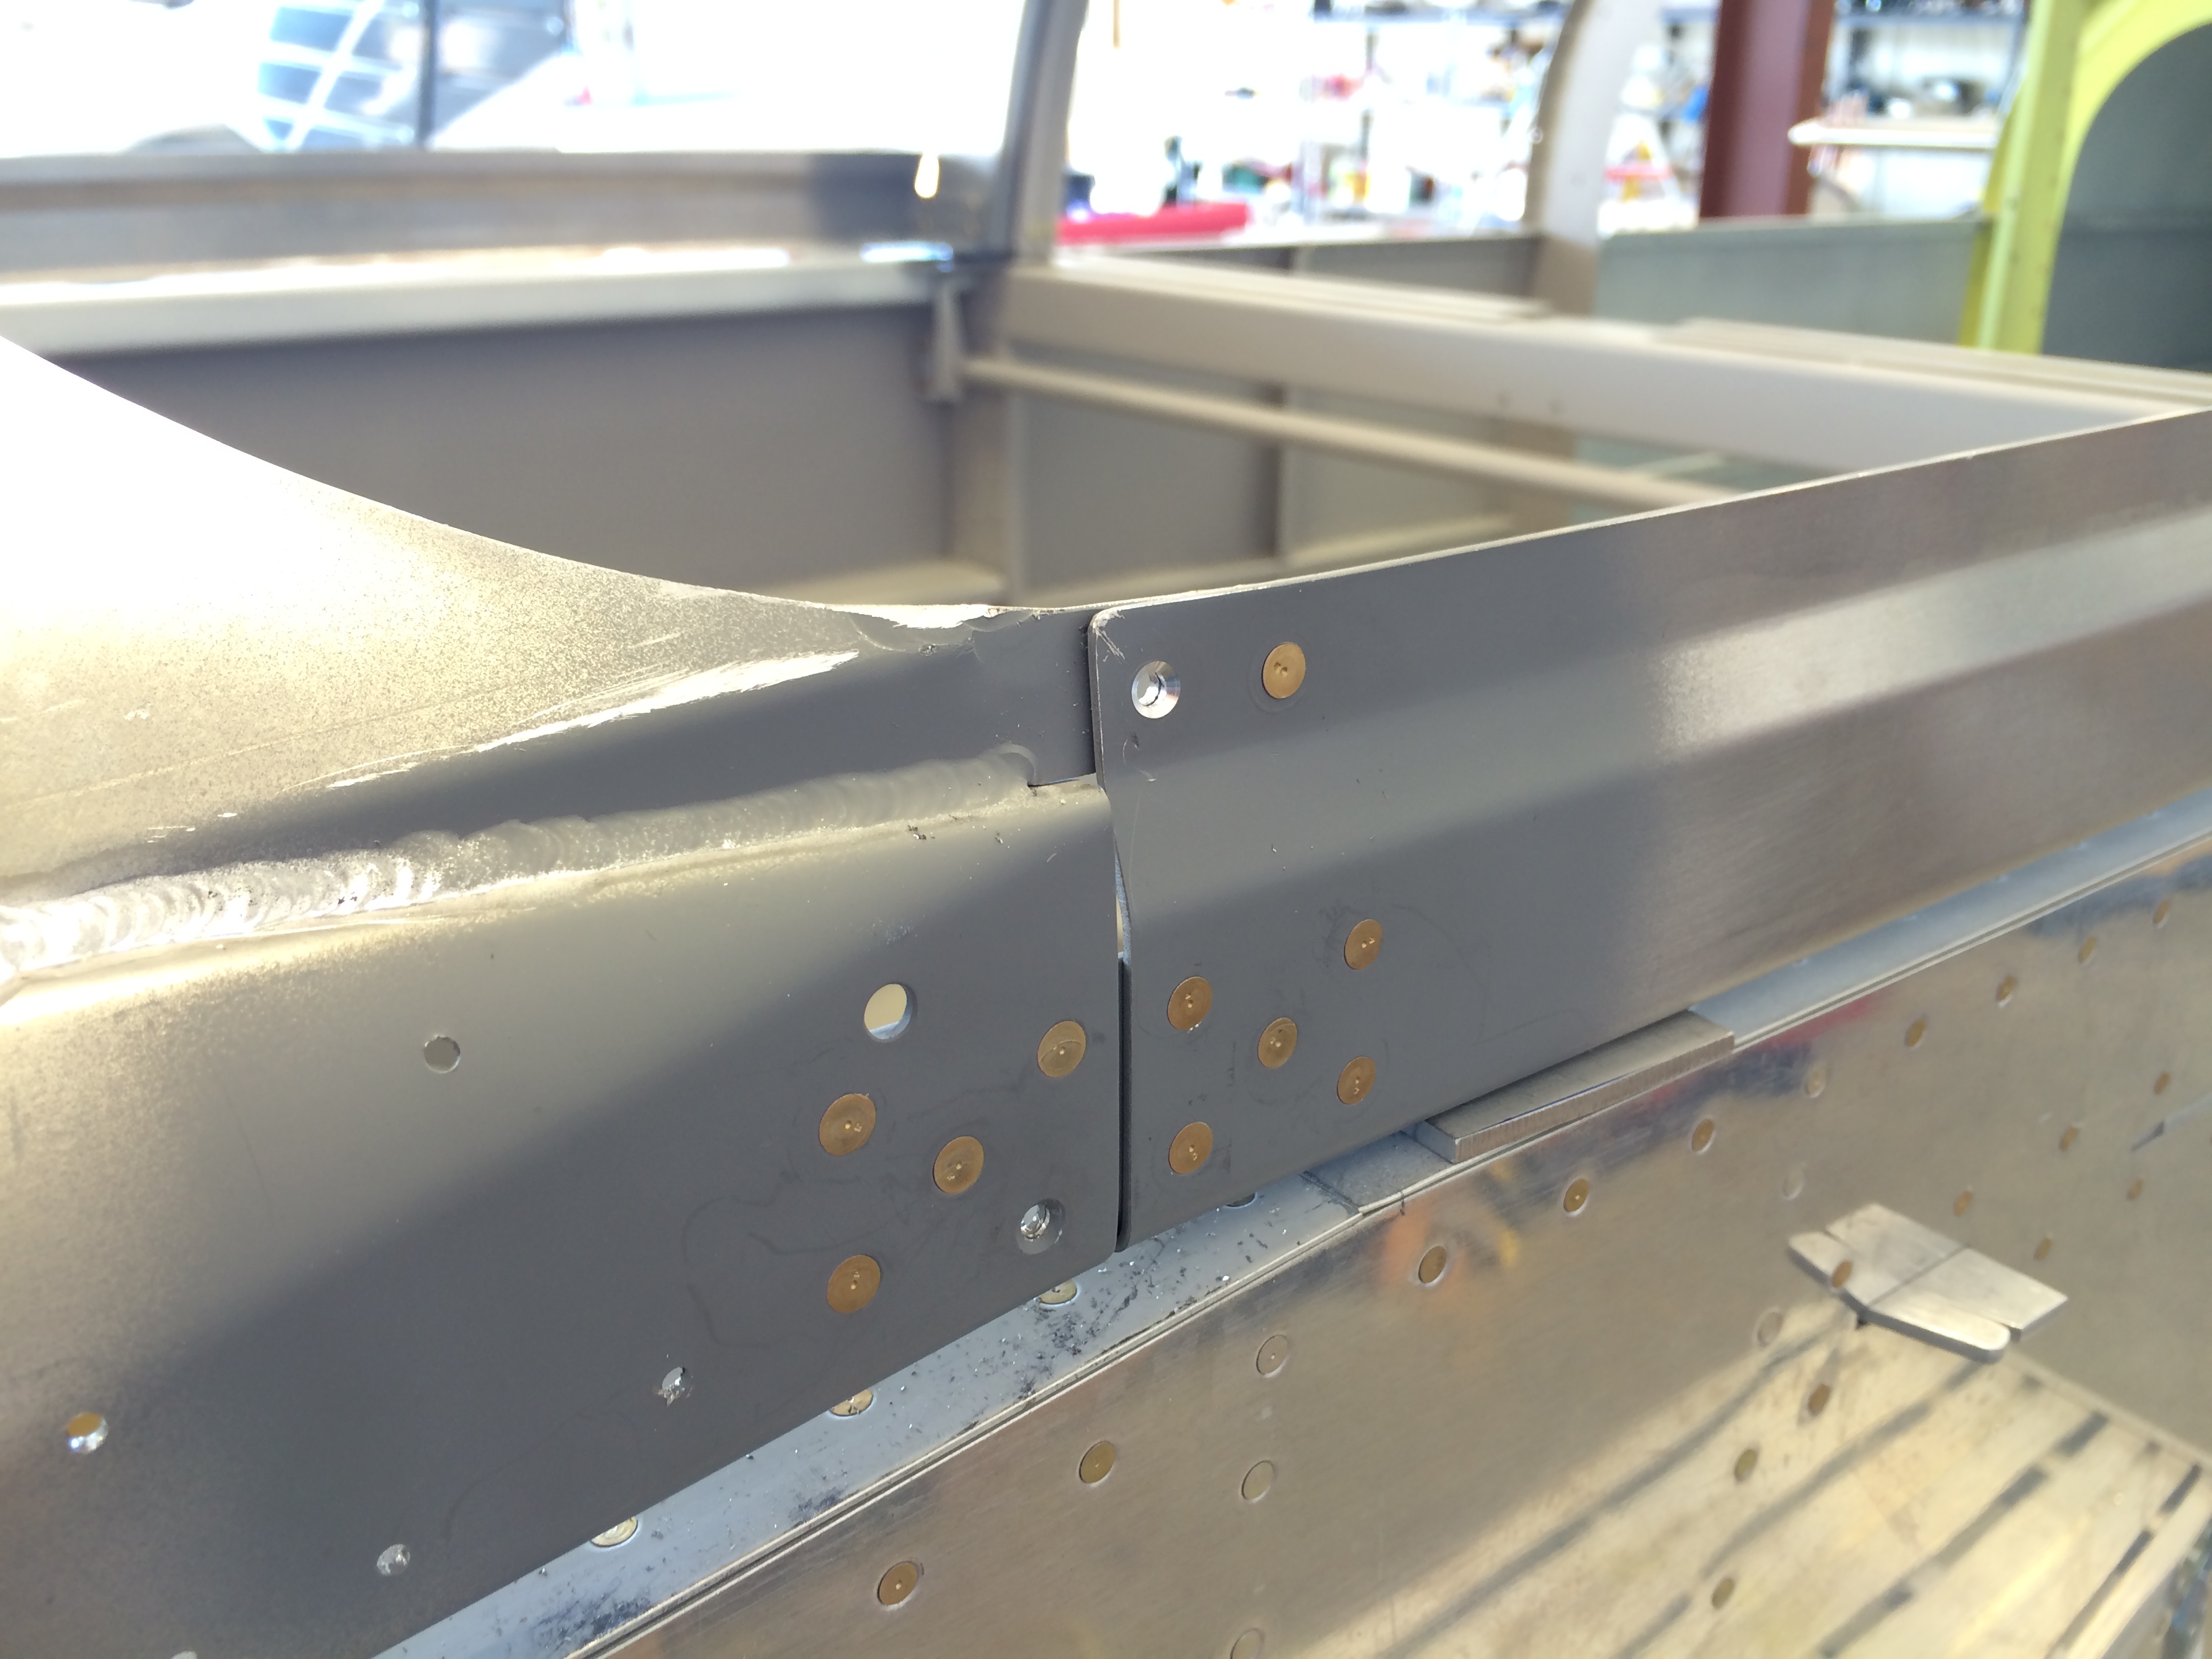
And then riveted the tabs…

Canopy rail fitted and riveted on the right side

…and everything looks good for now.

Canopy marked for cutting

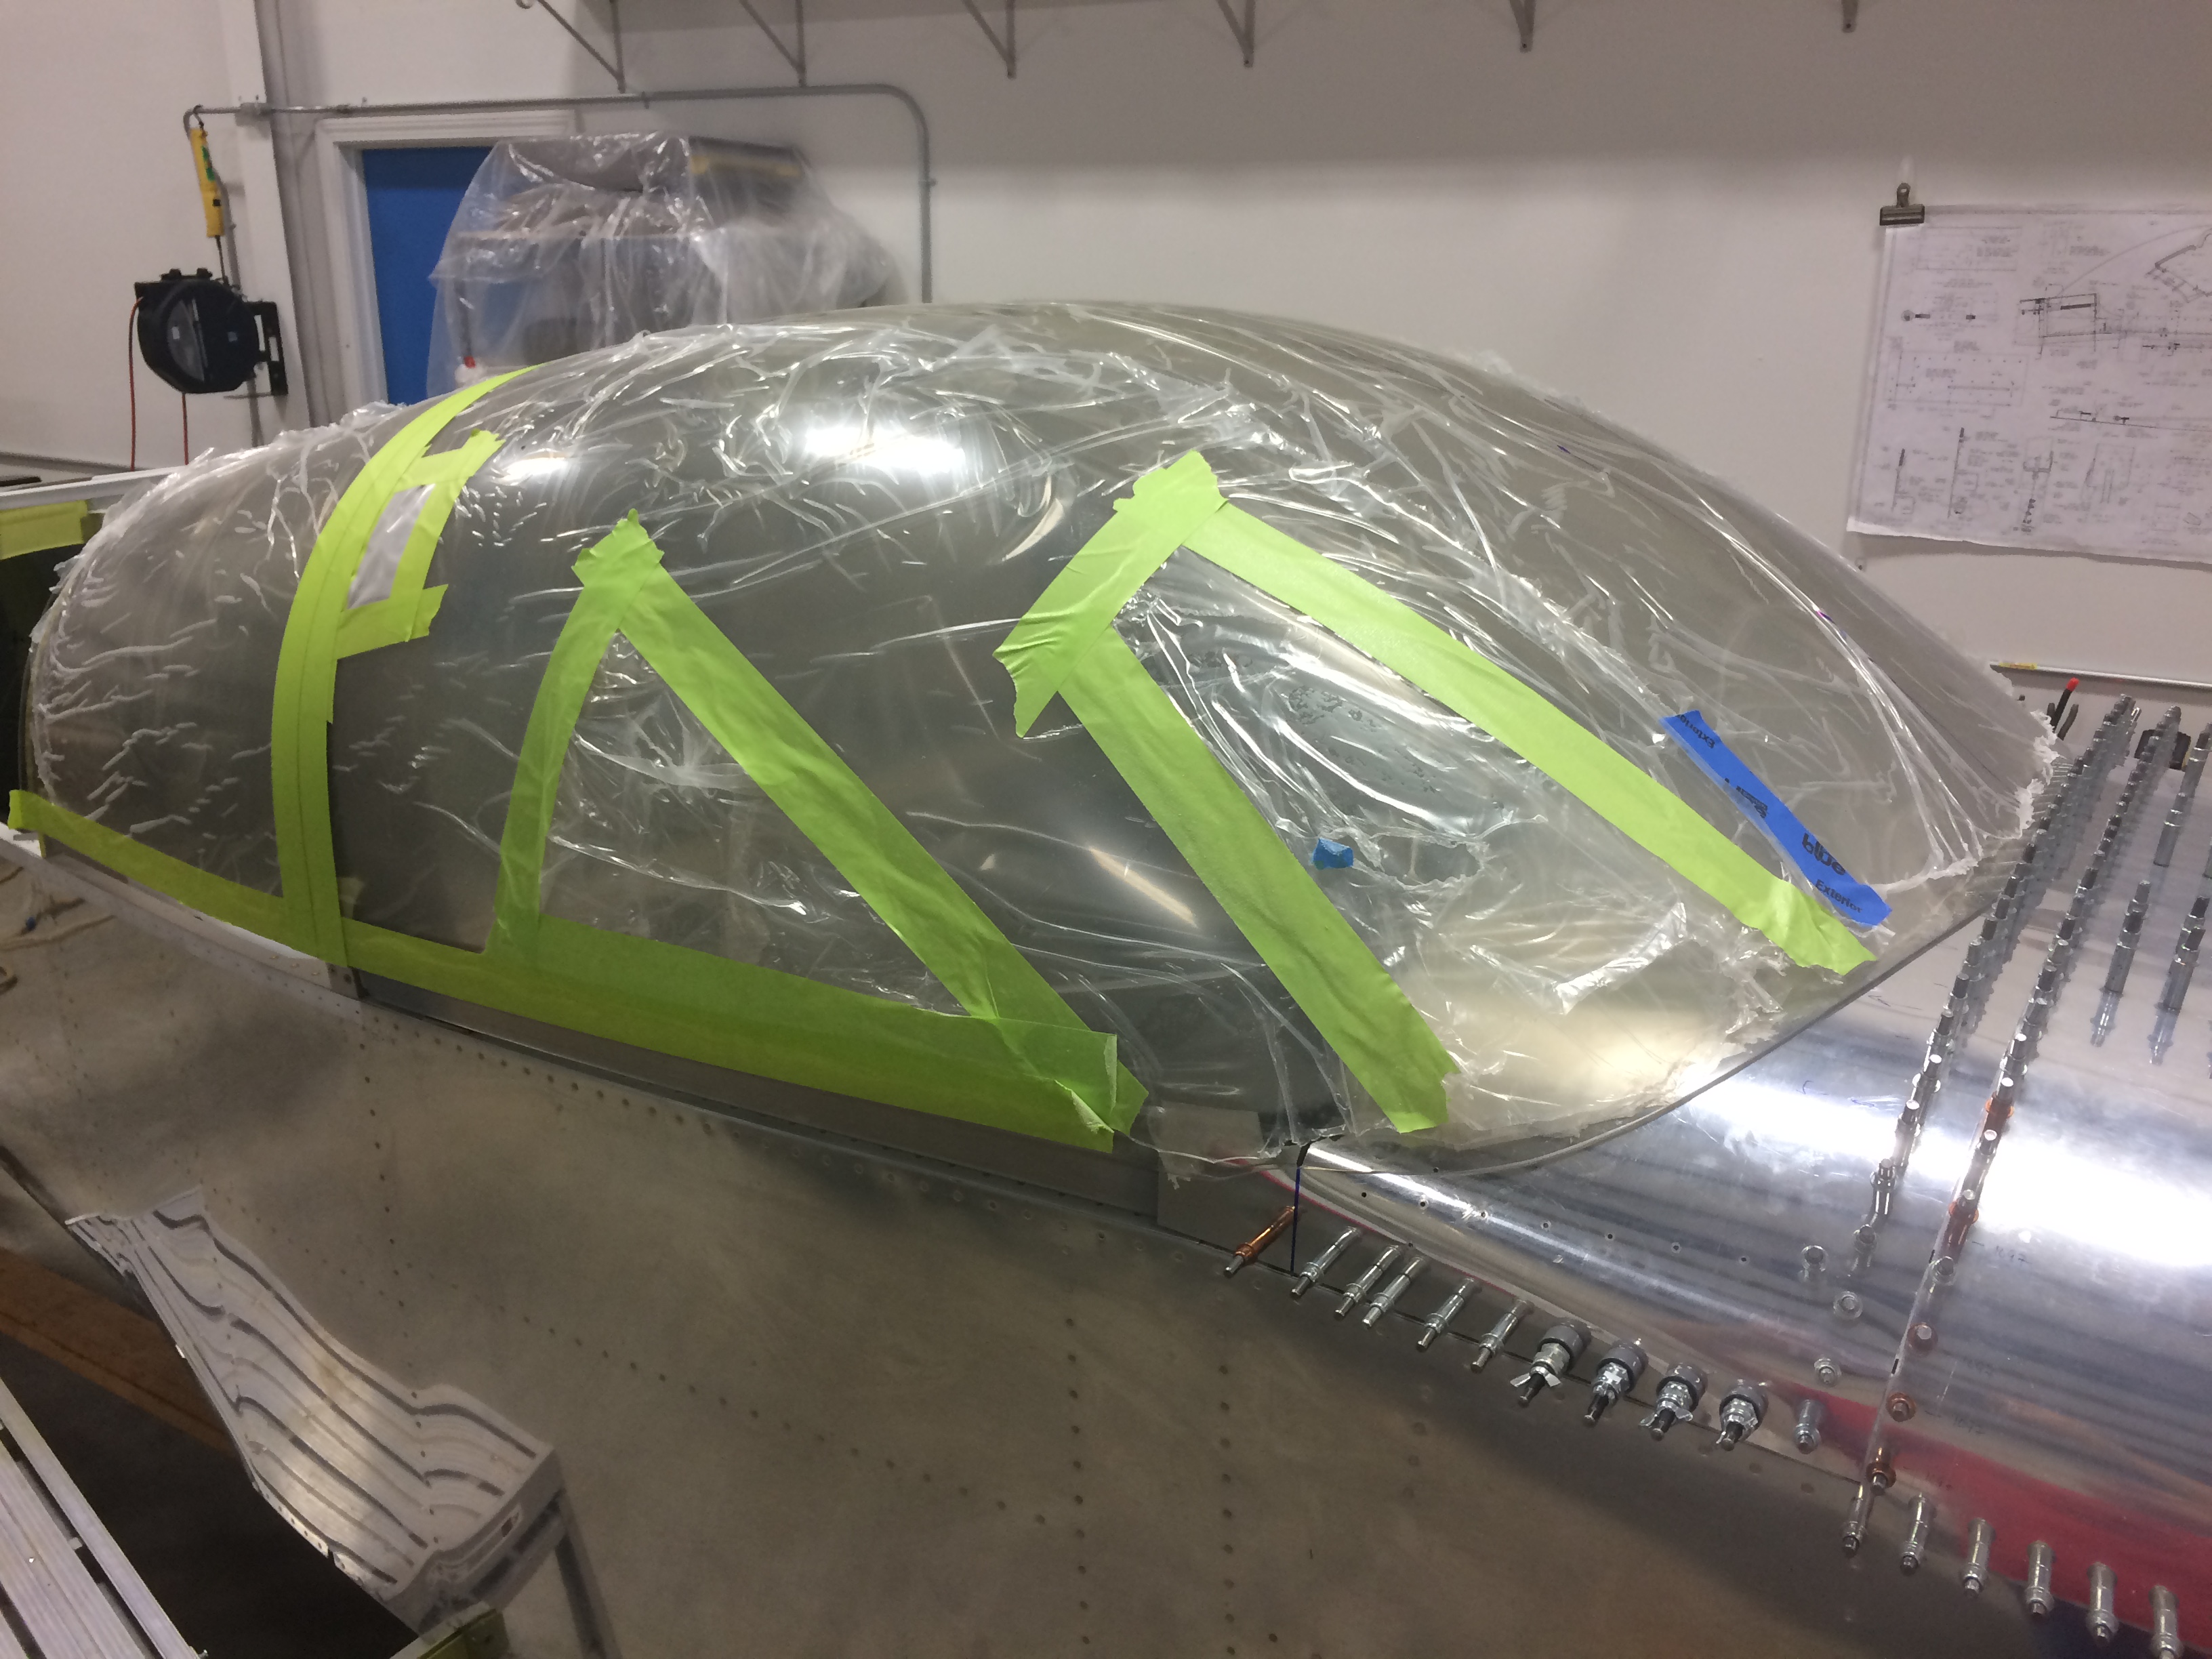
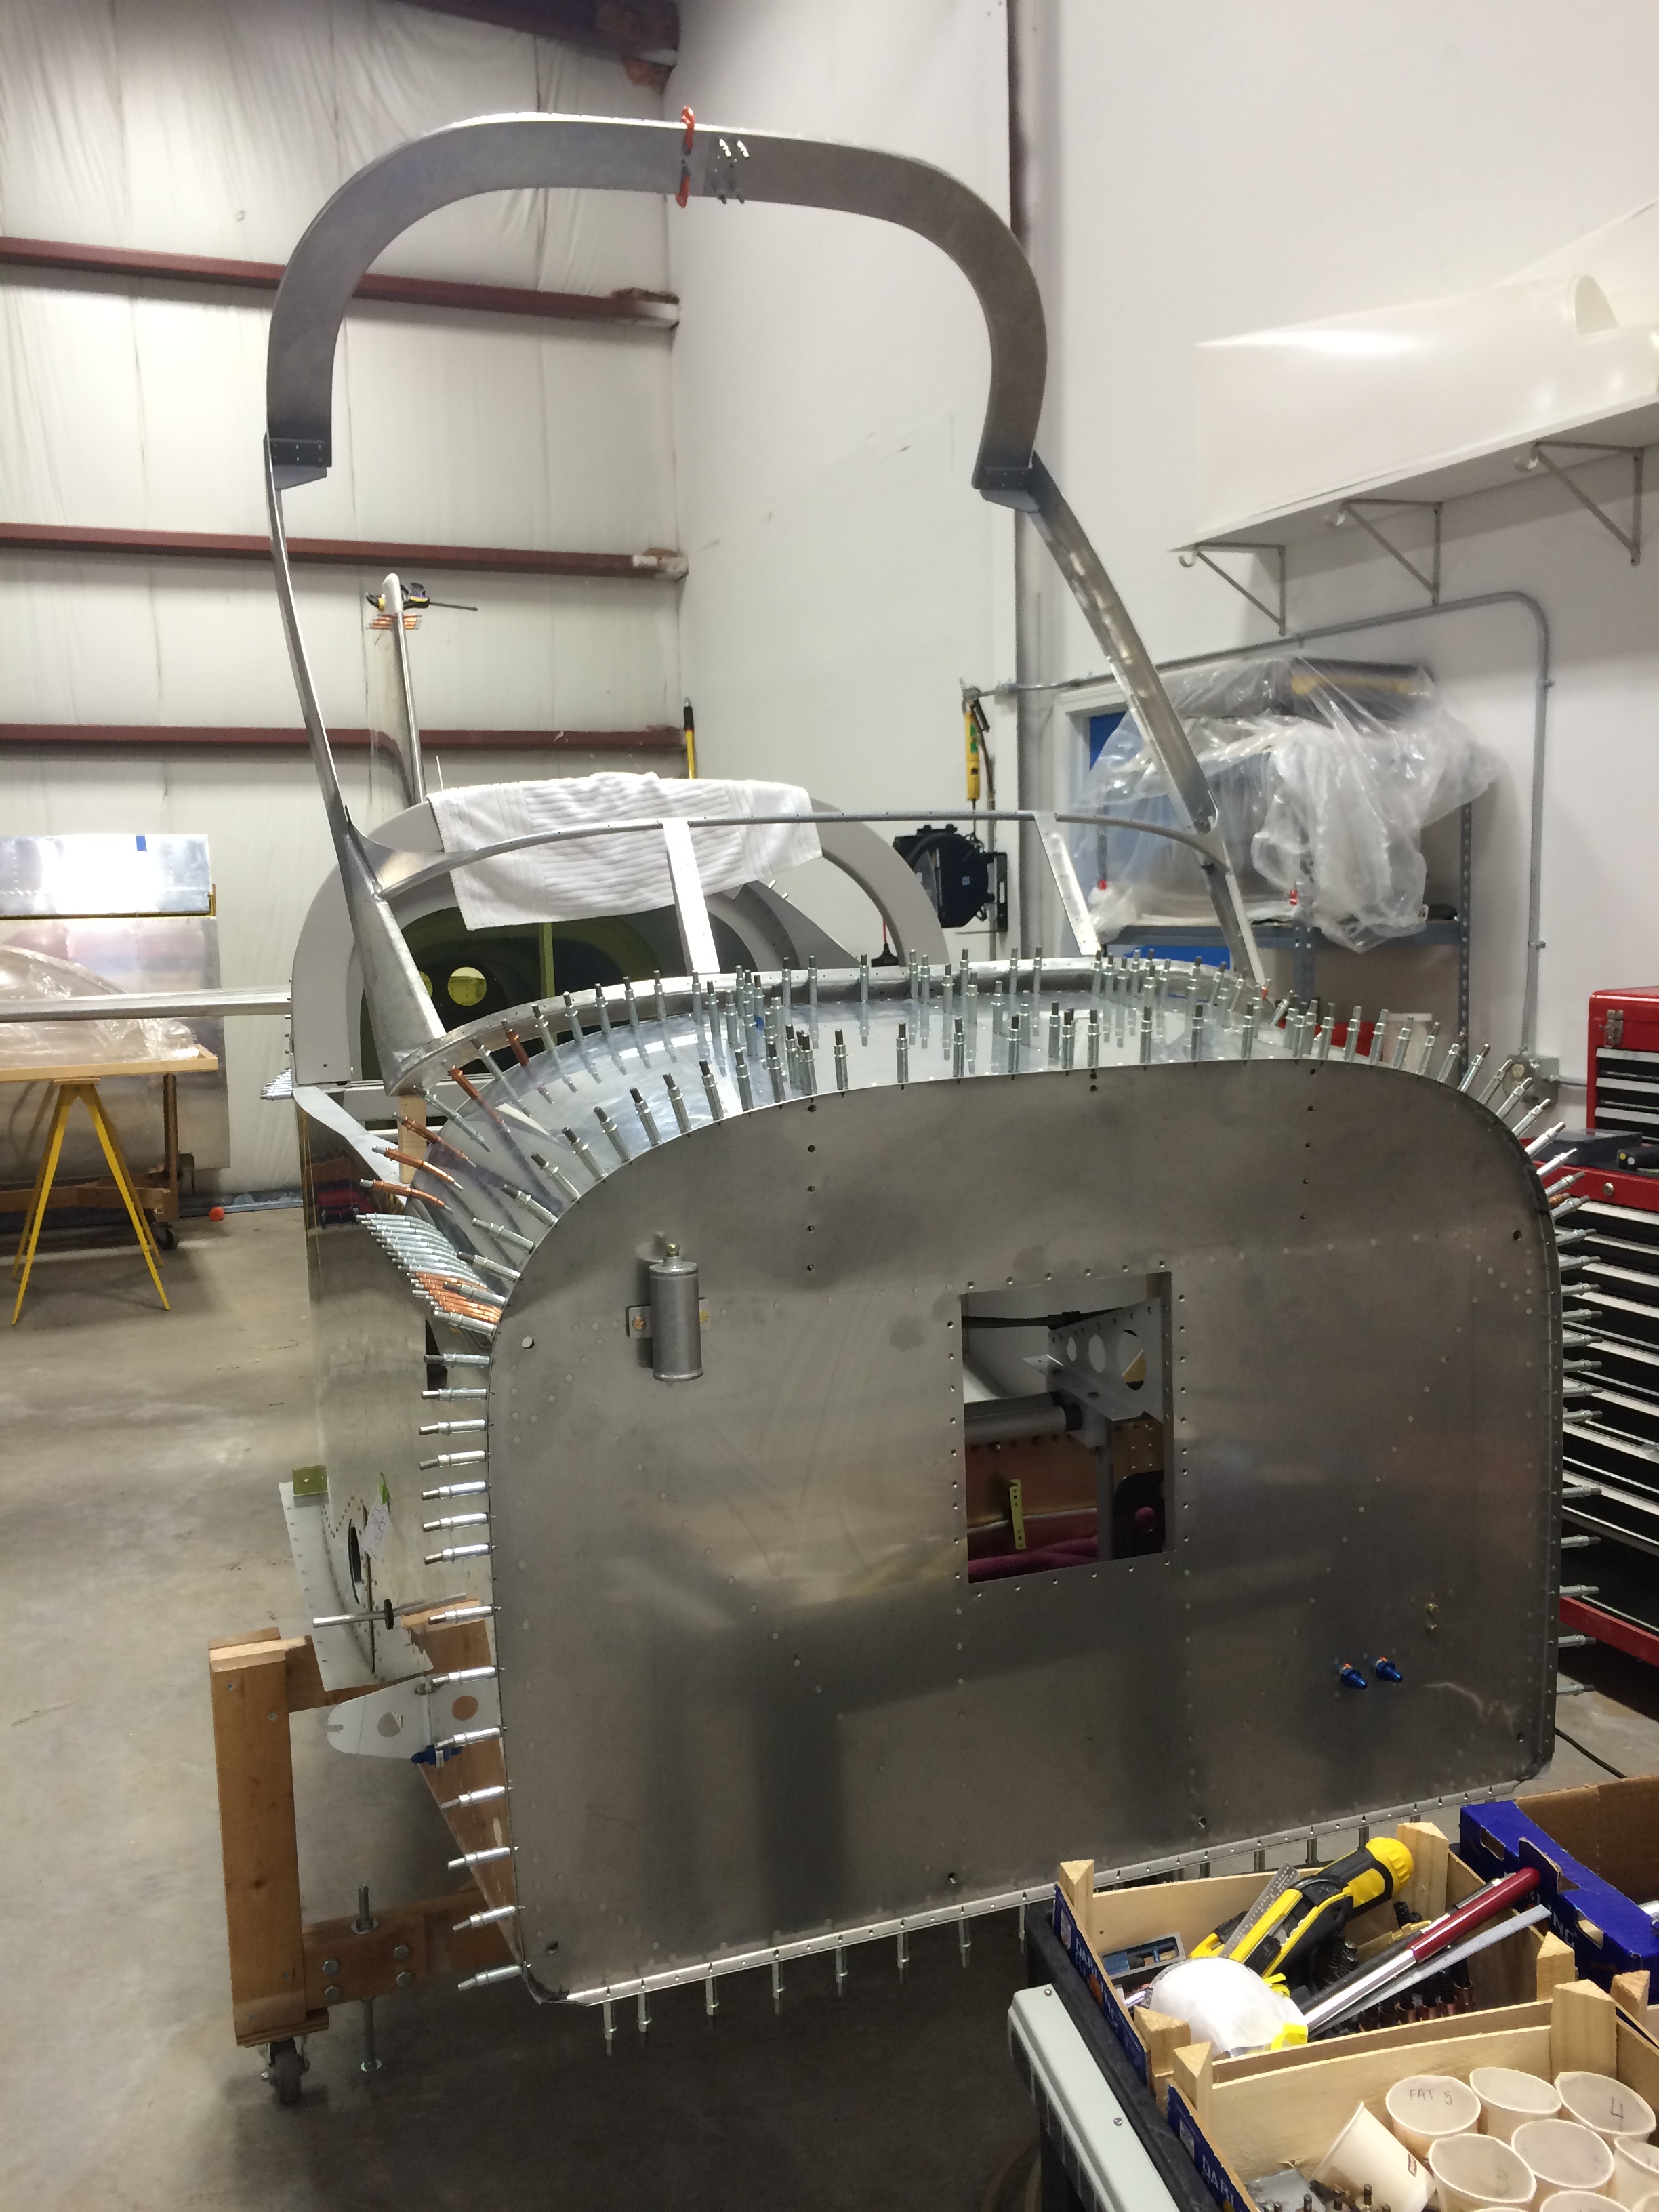
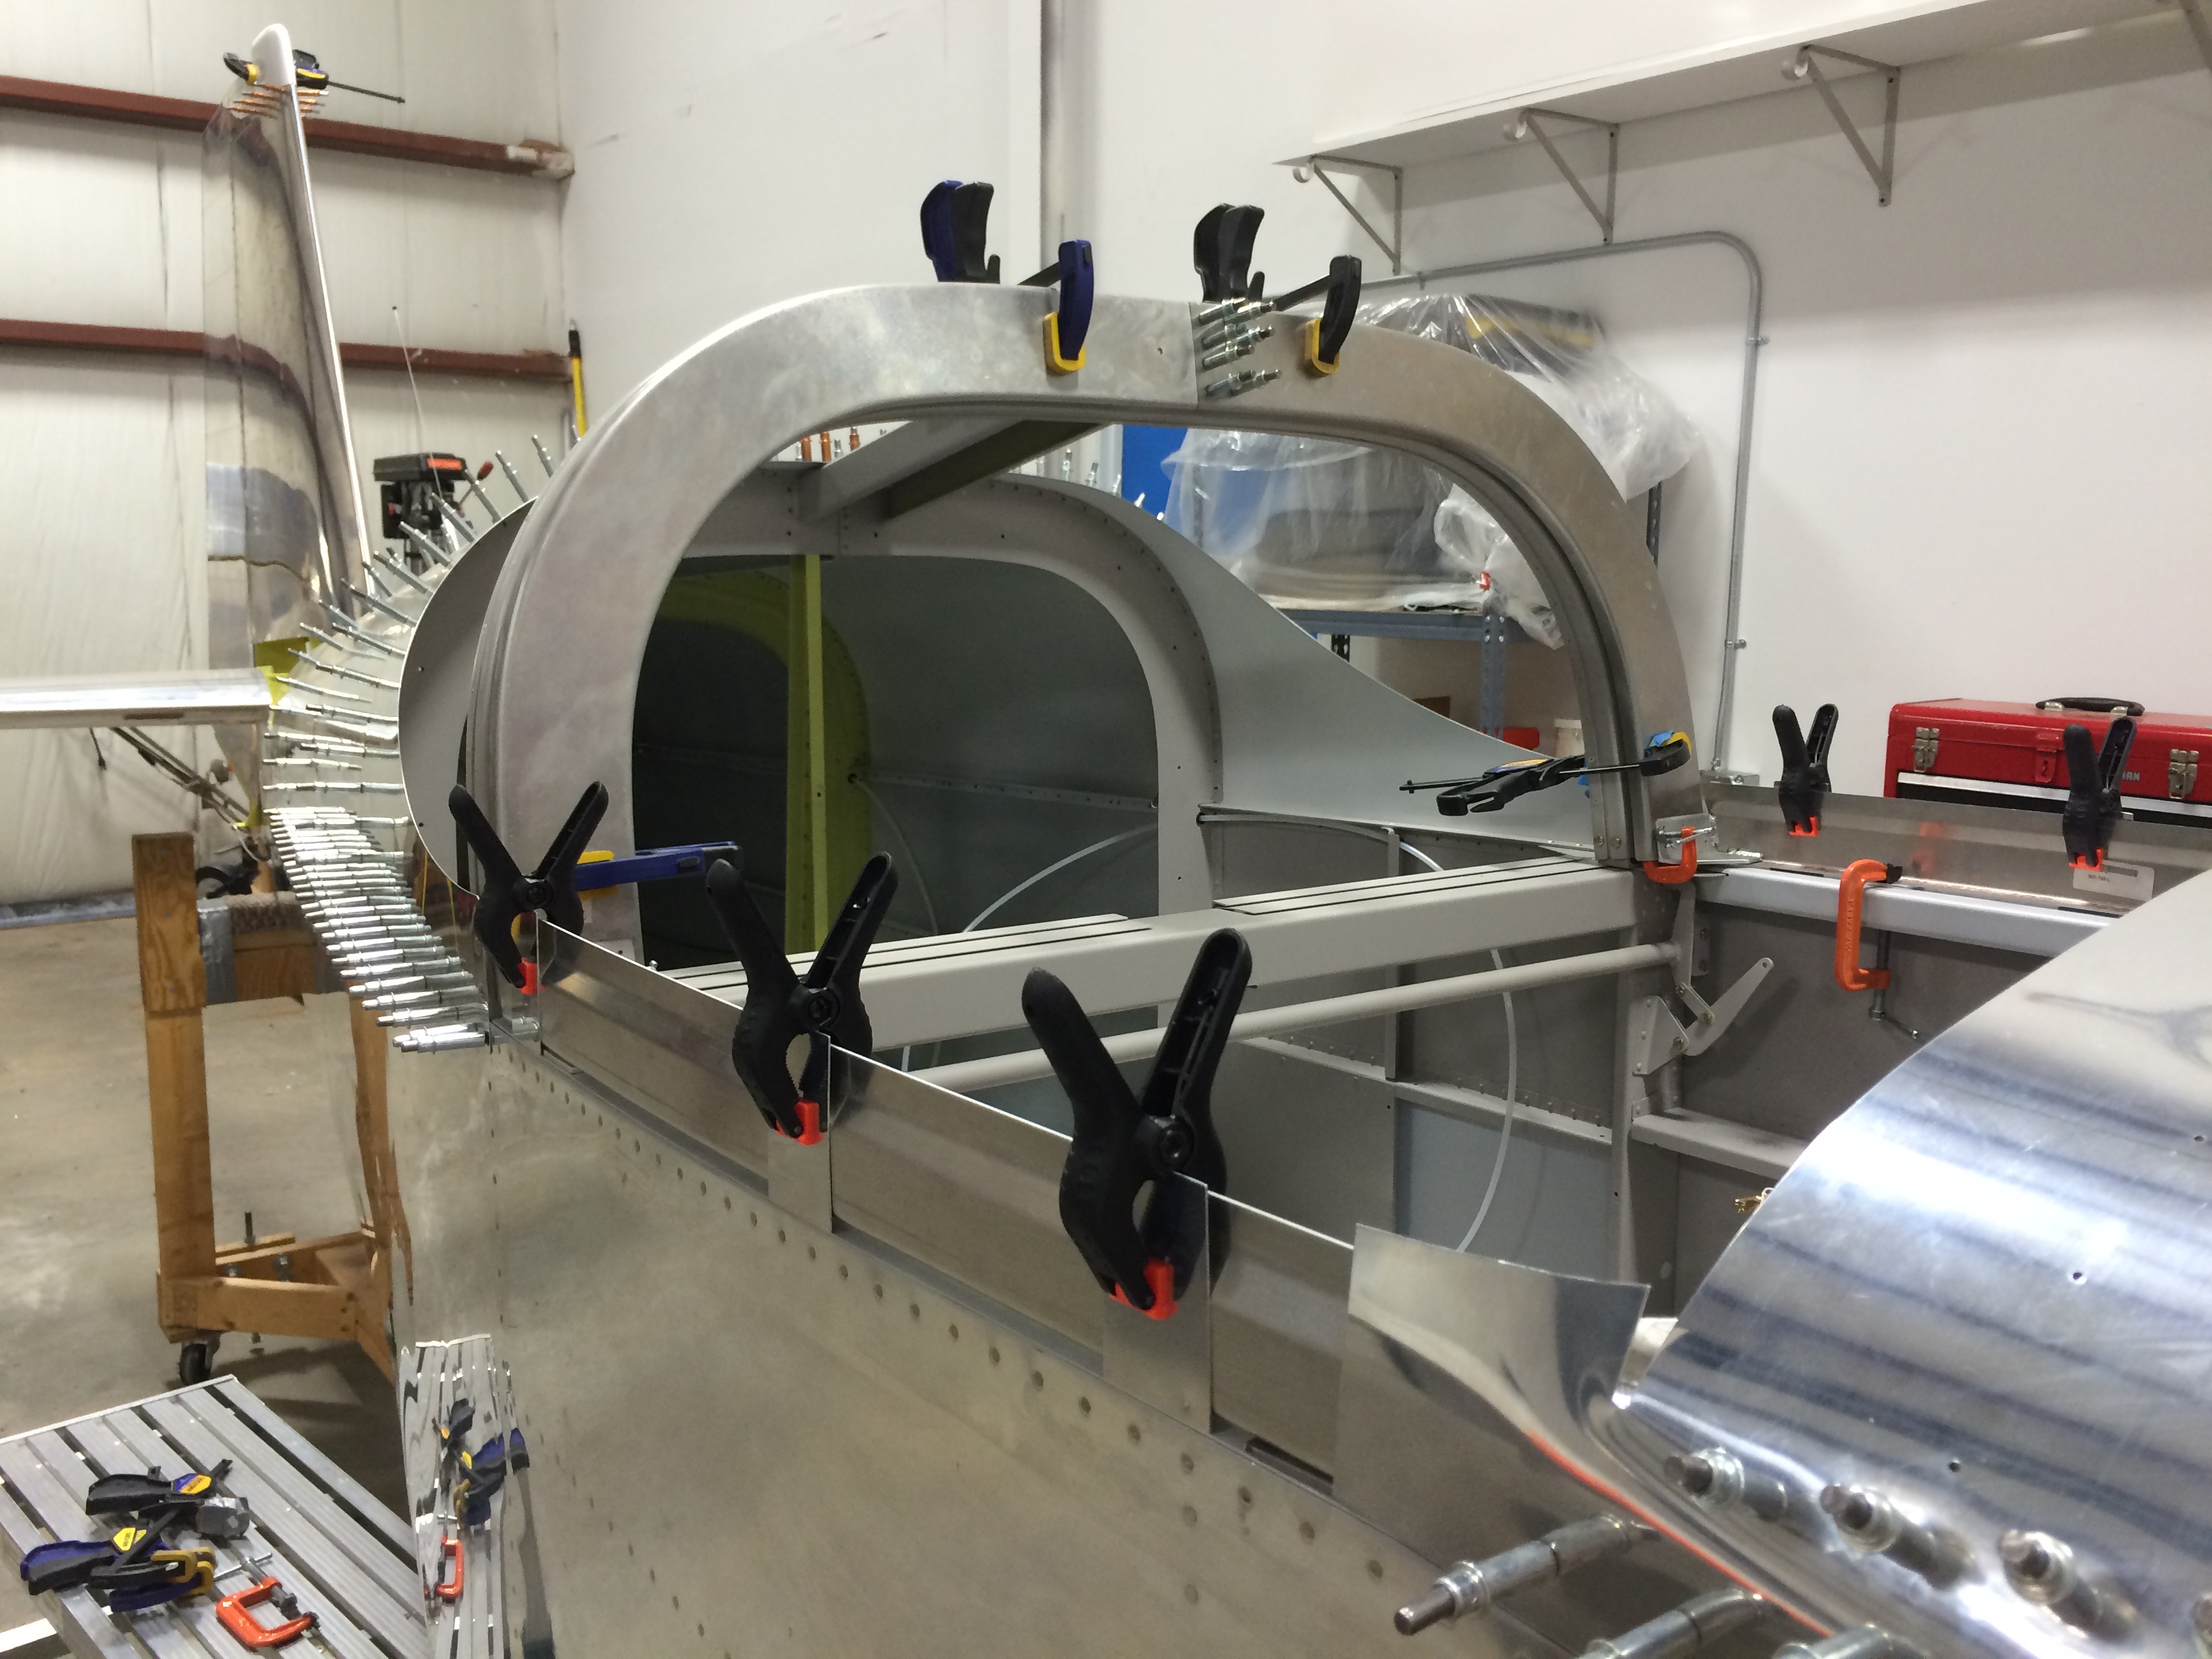
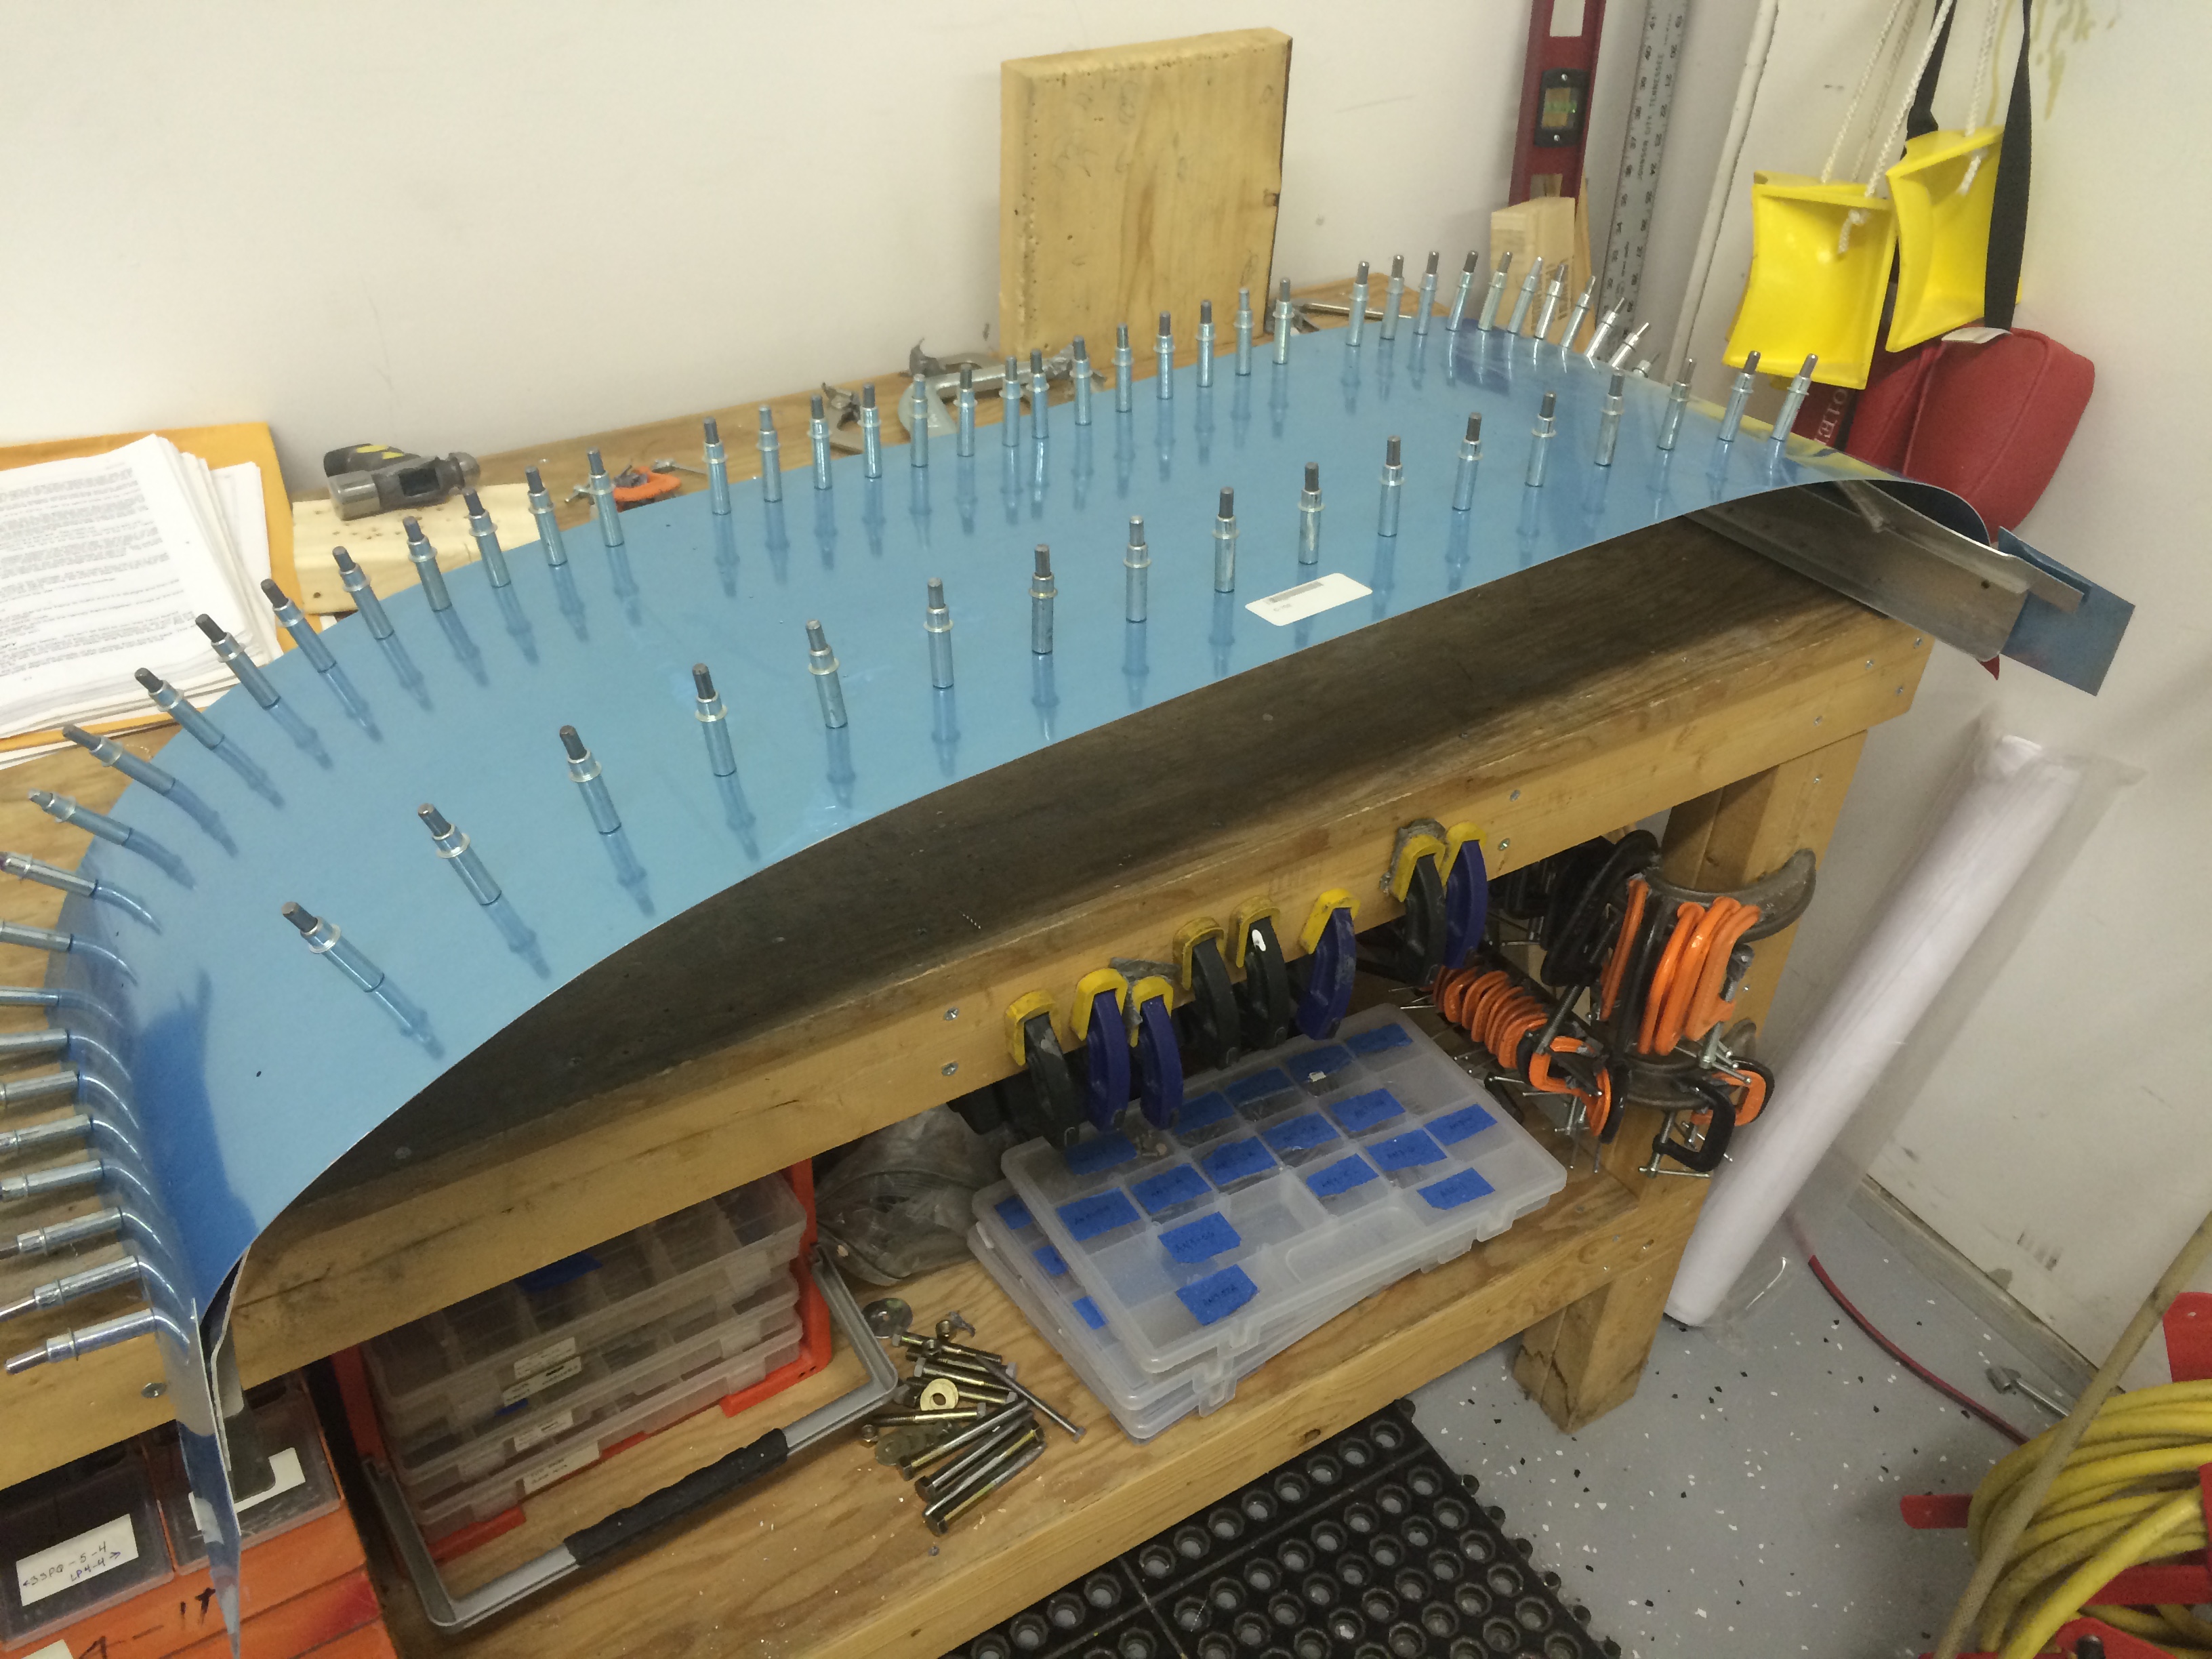
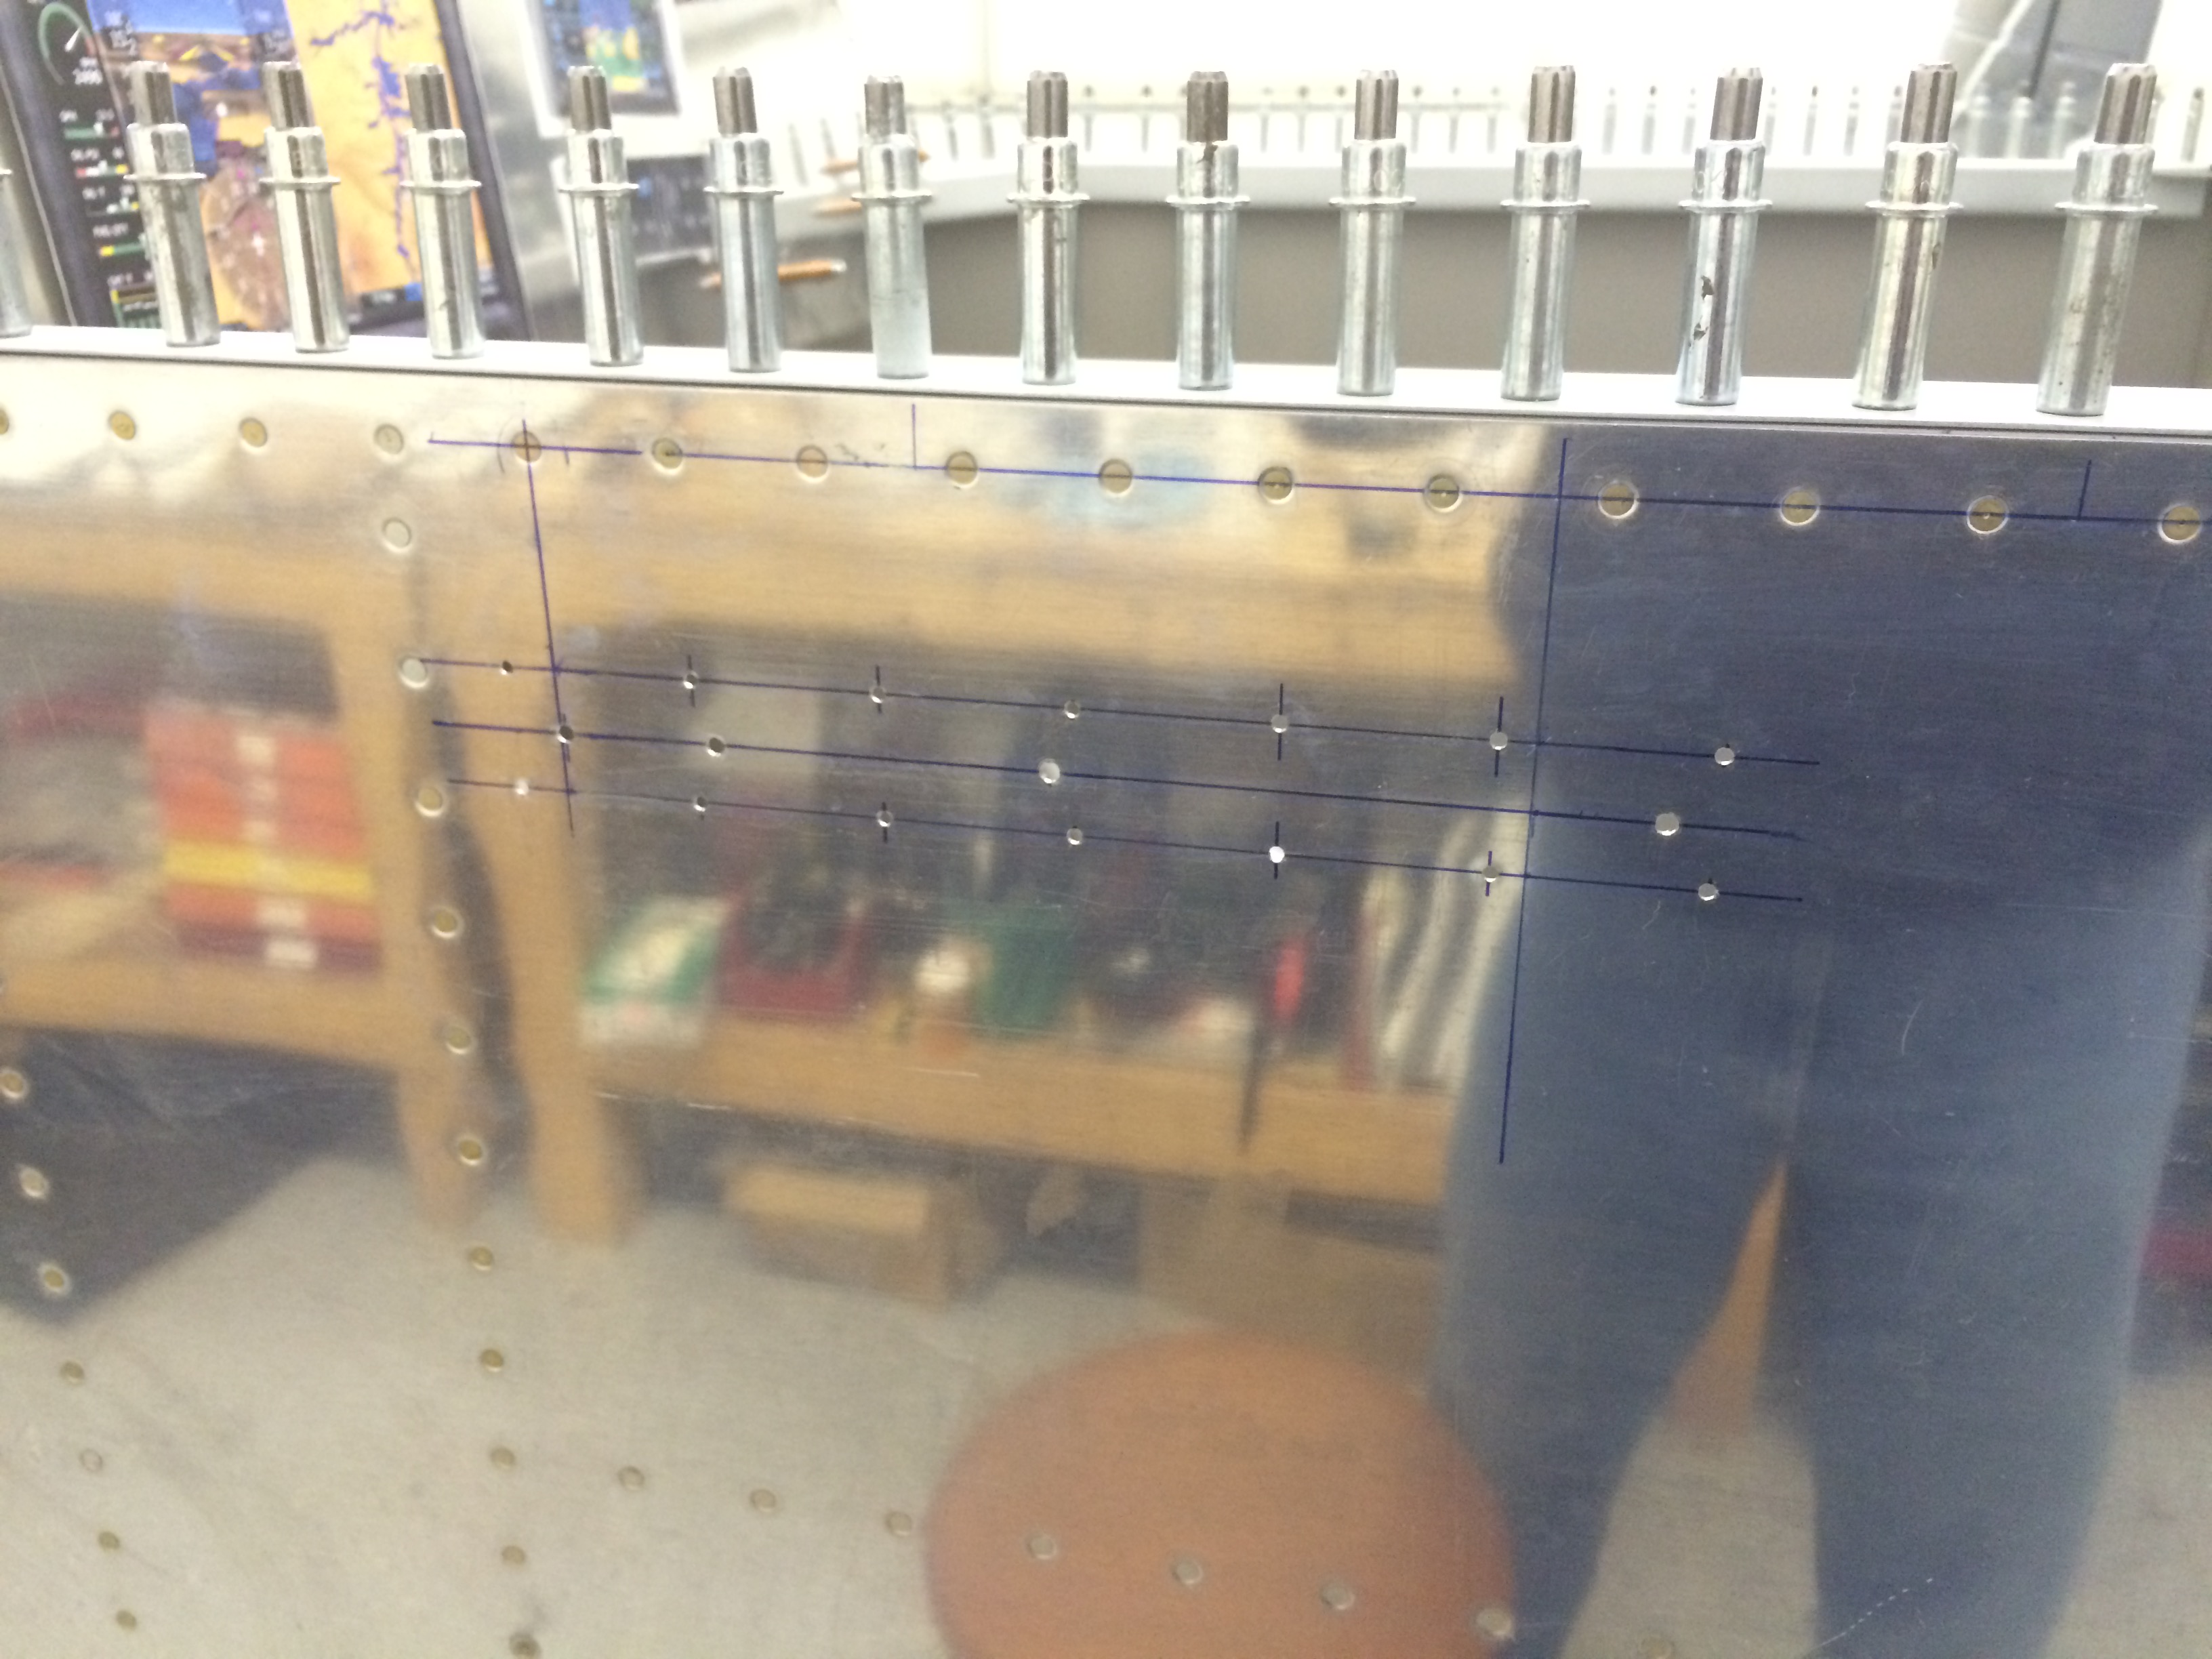
I’m reasonably happy with the canopy fit, so I started marking the line across the rollbar where the canopy will be cut into forward and rear sections. This process is not-really-affectionately known to builders as making The Big Cut.

Canopy forward edge

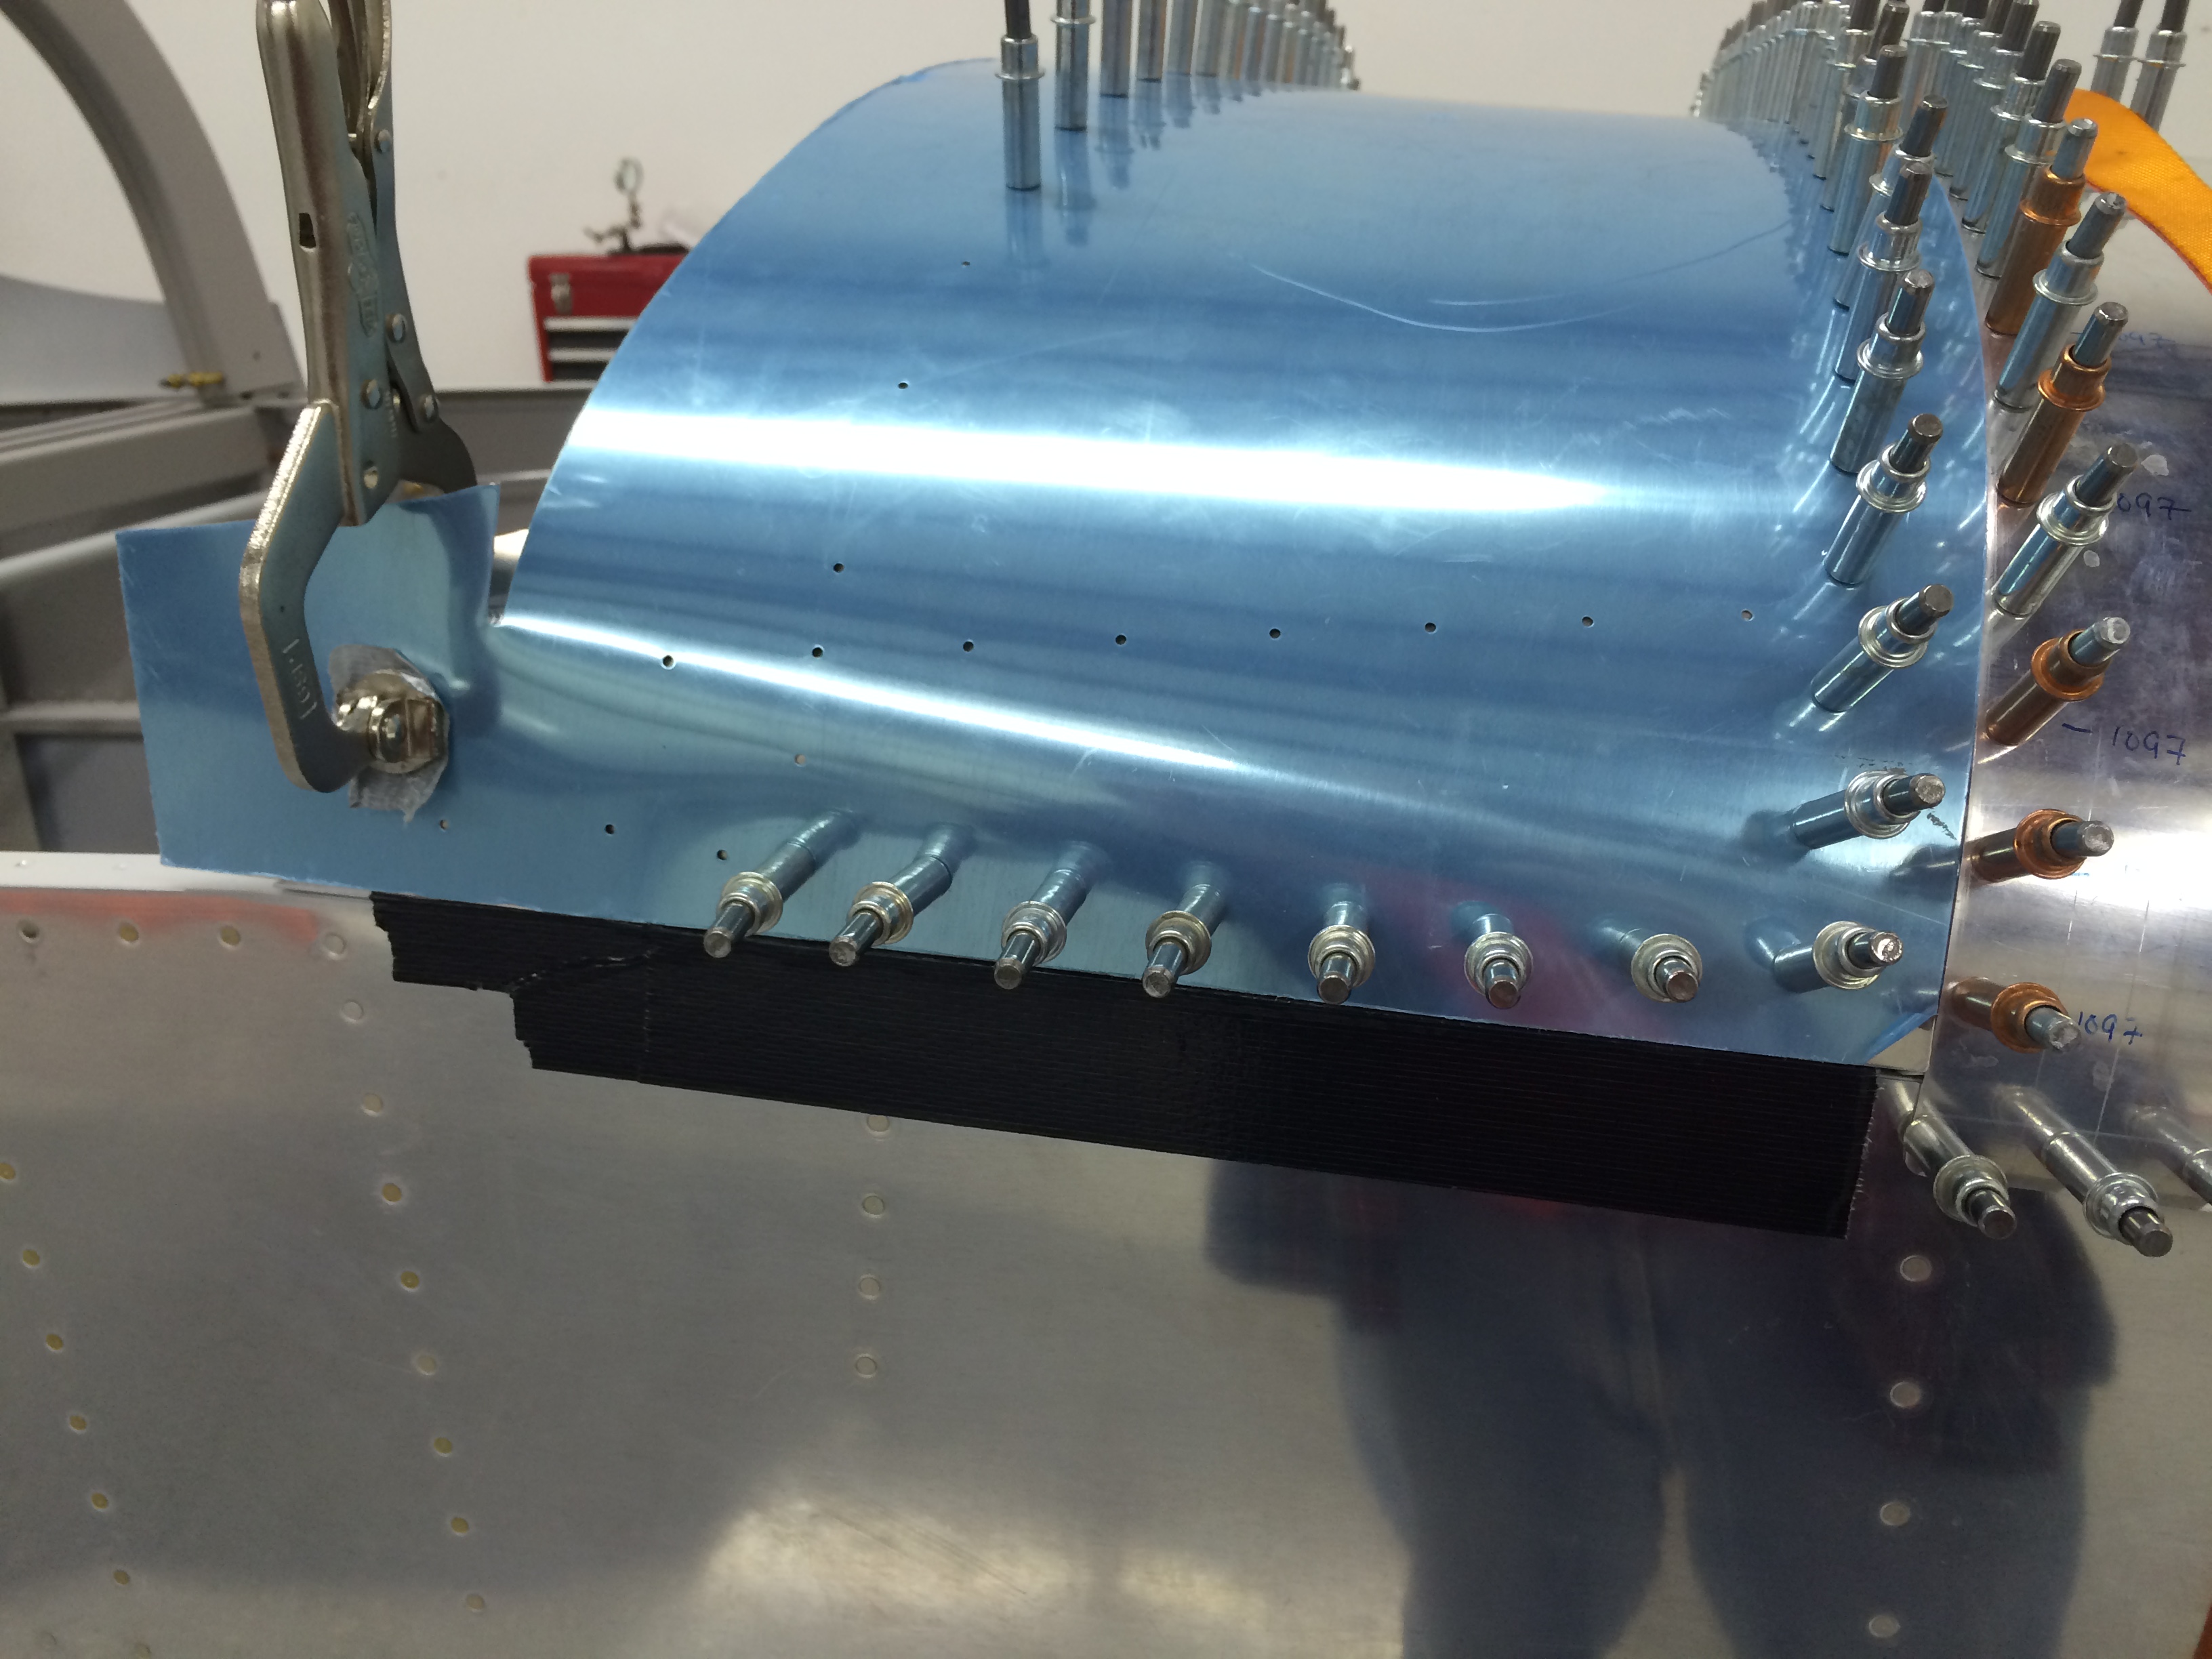
I worked on the front edges a bit to get them to lay down a little more accurately on the front canopy skin, but from what I’ve seen on other builders’ websites, you can do all the work on this area you want but once the canopy is drilled in place, some gaps will open up.  So I’m going to get it close and not worry about it.

Canopy in place for cutting

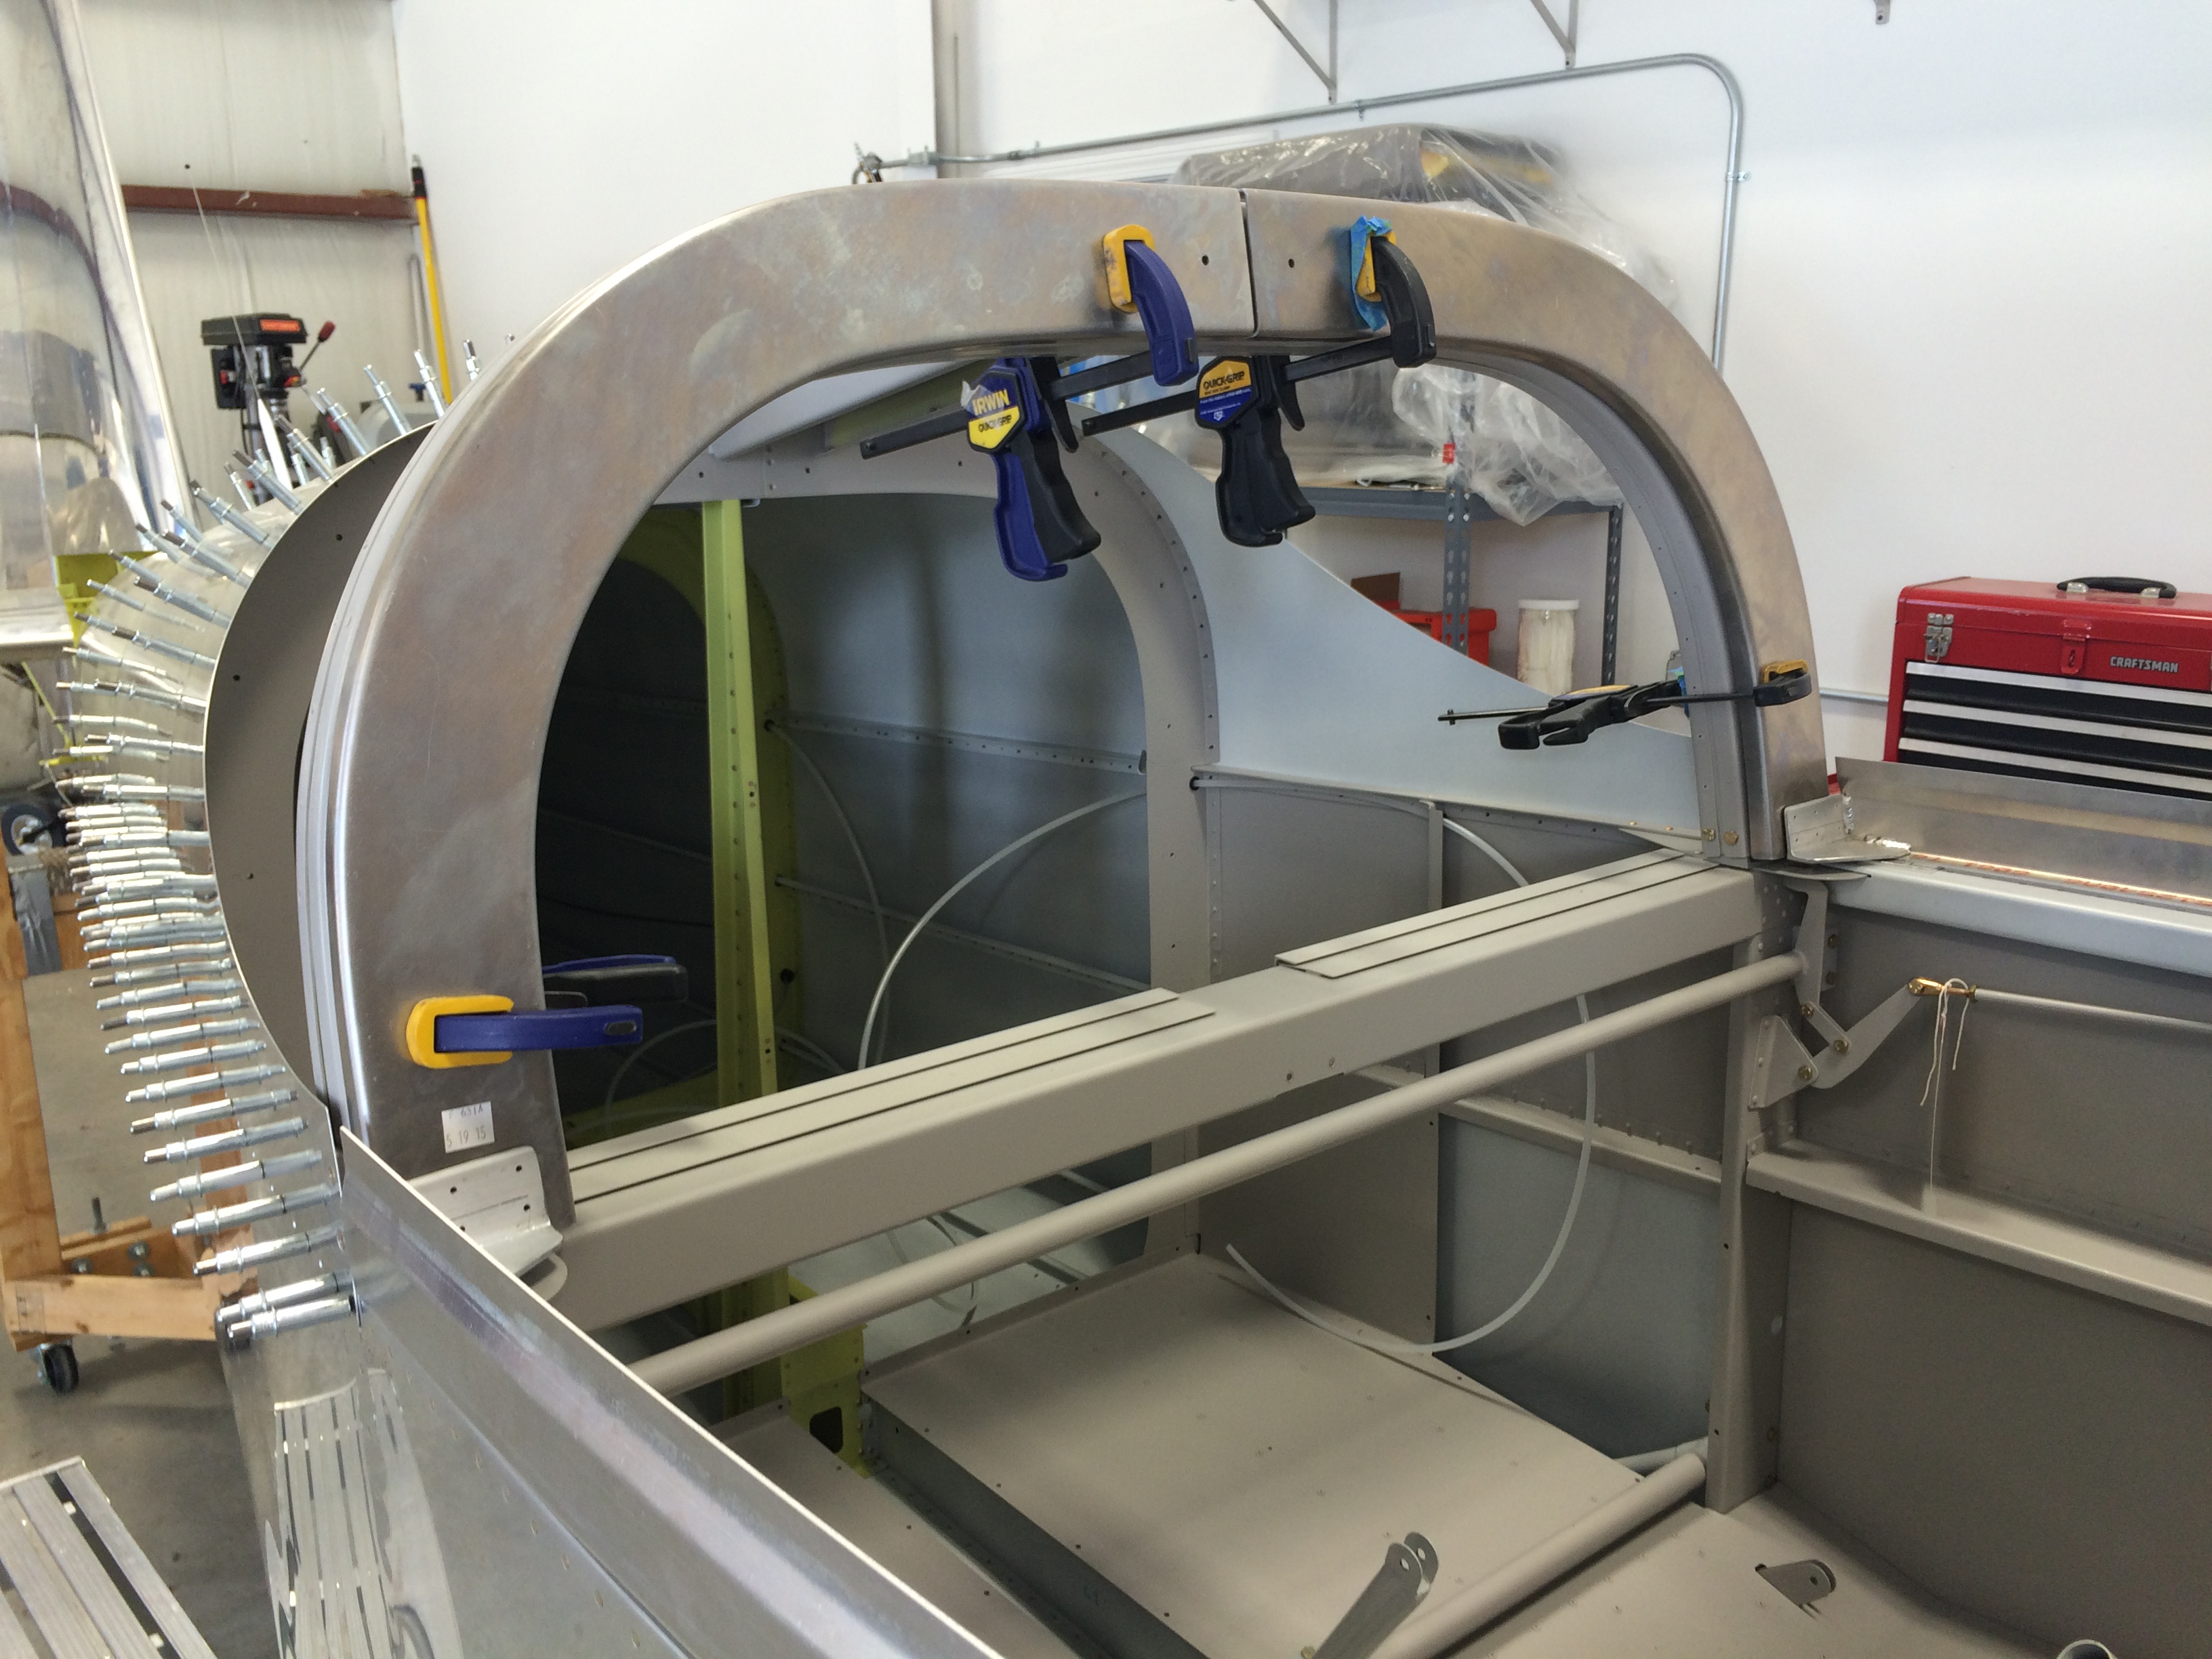
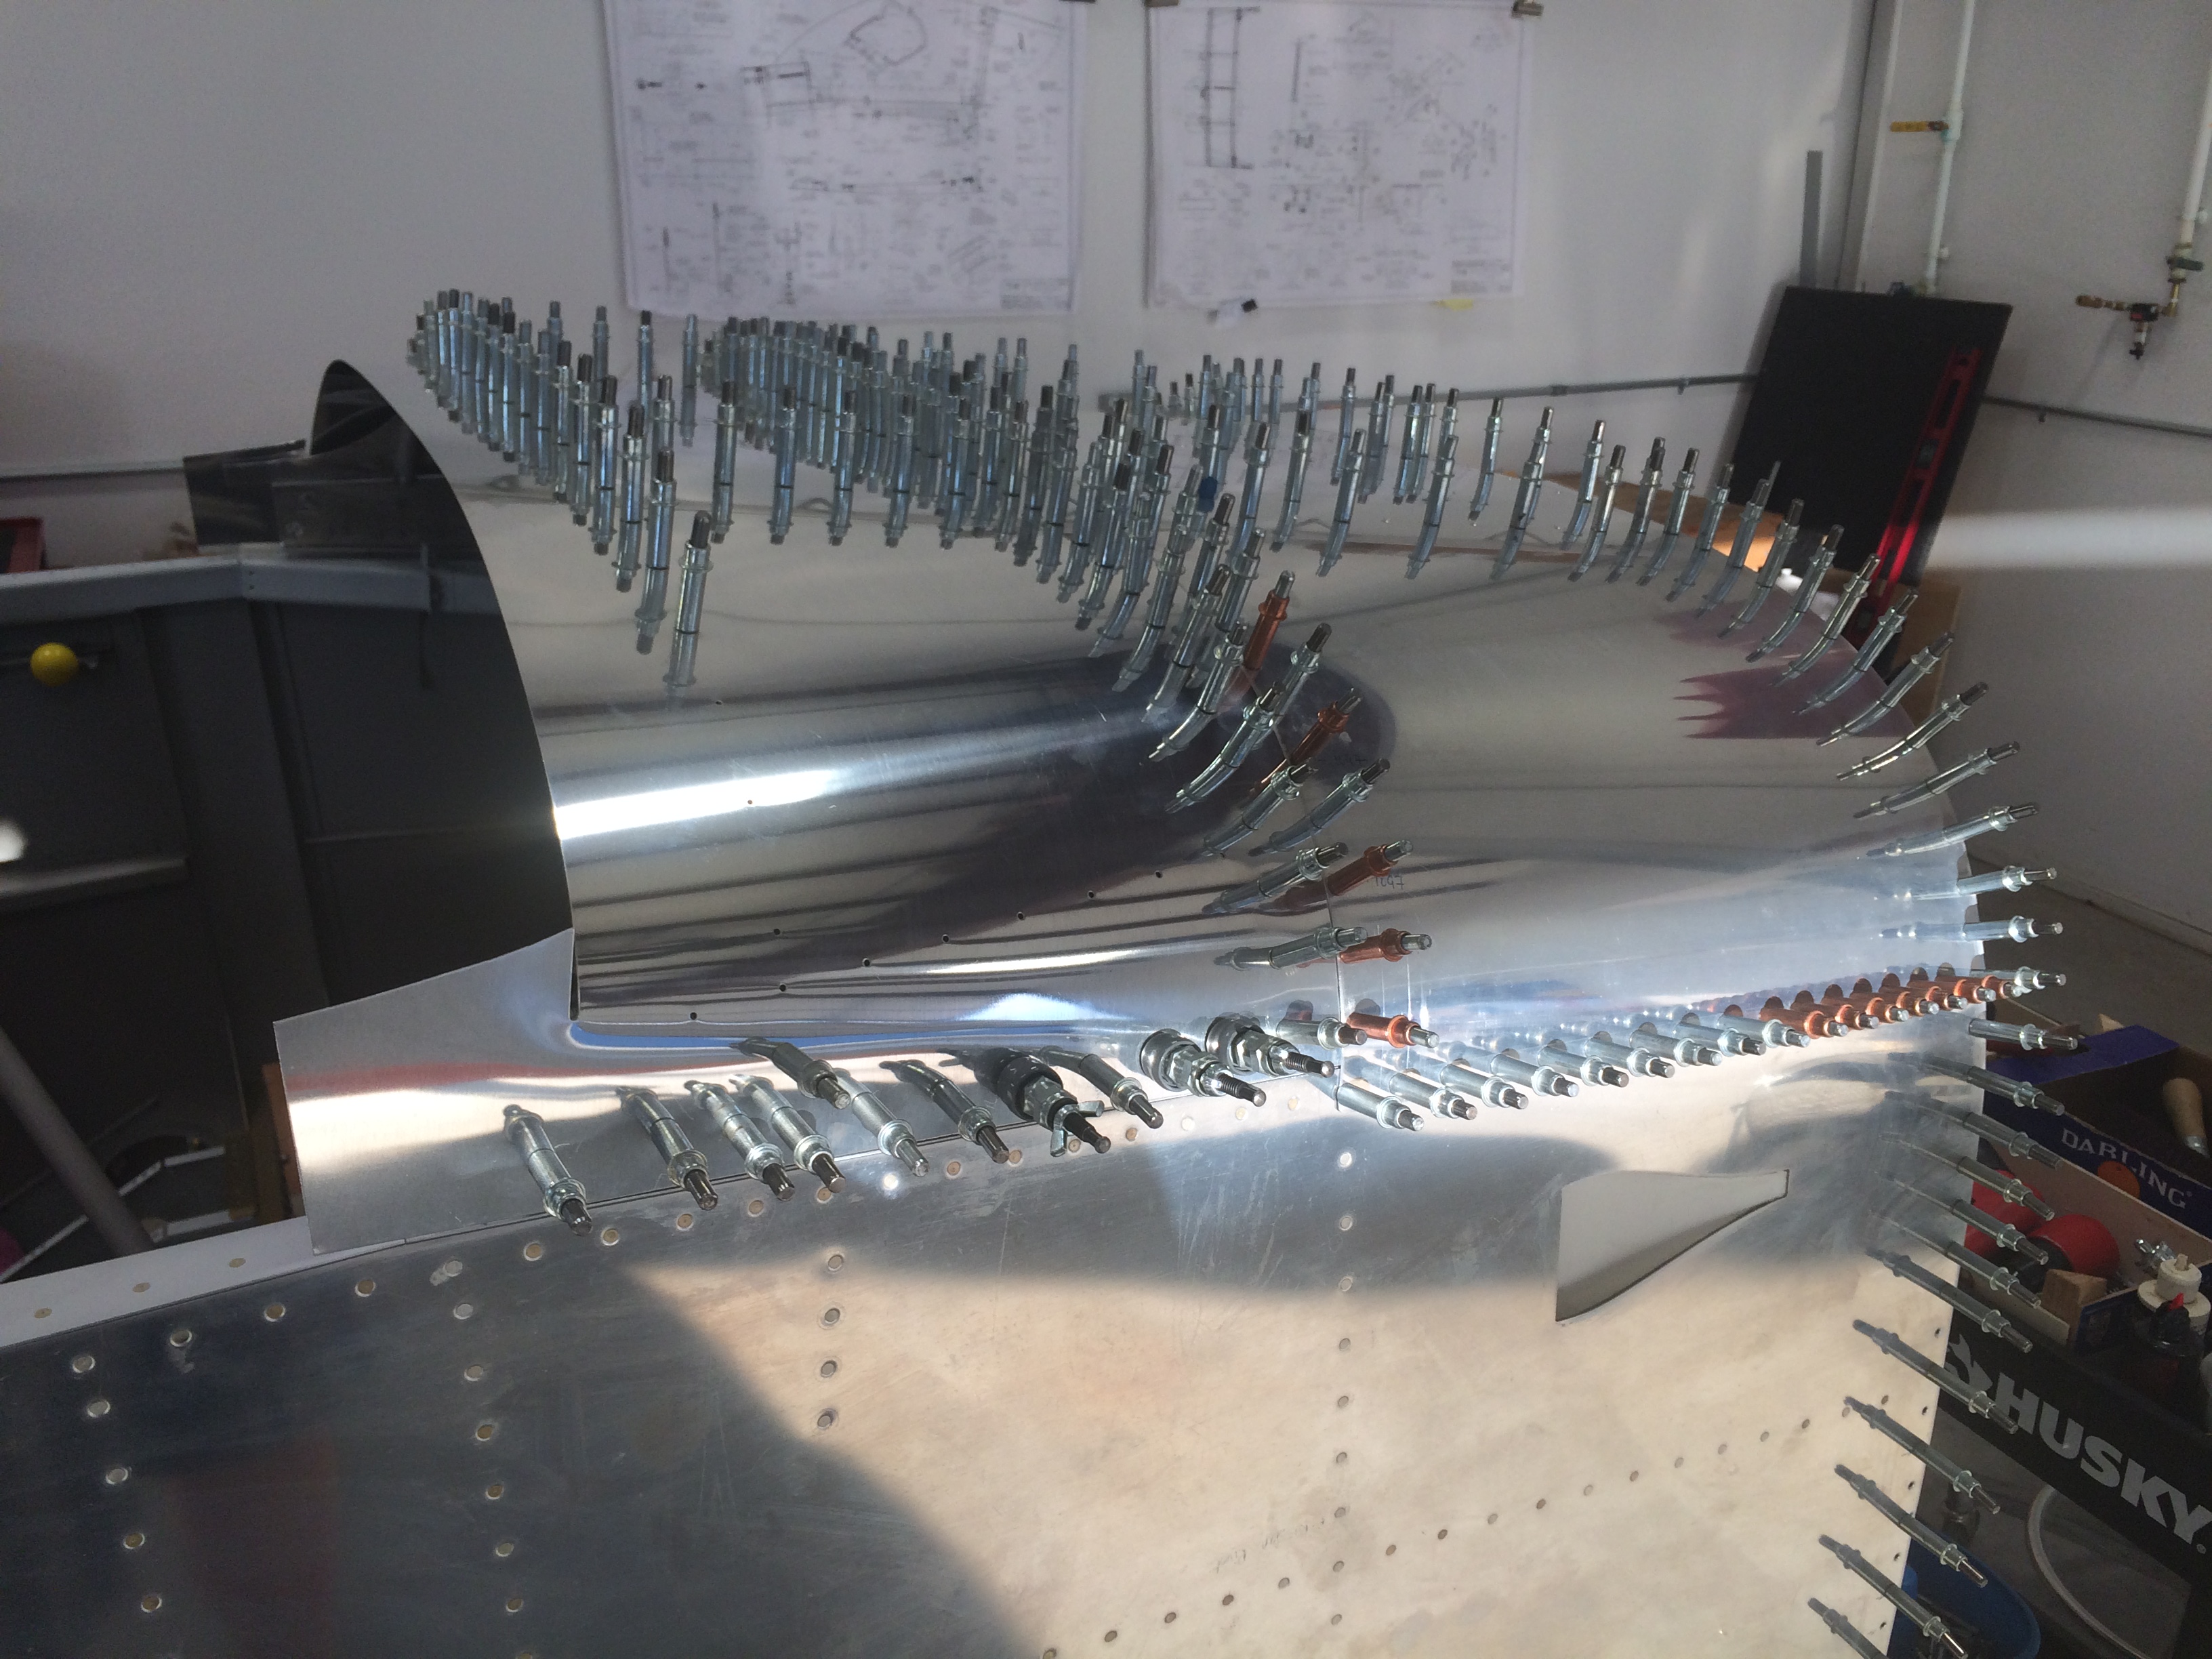
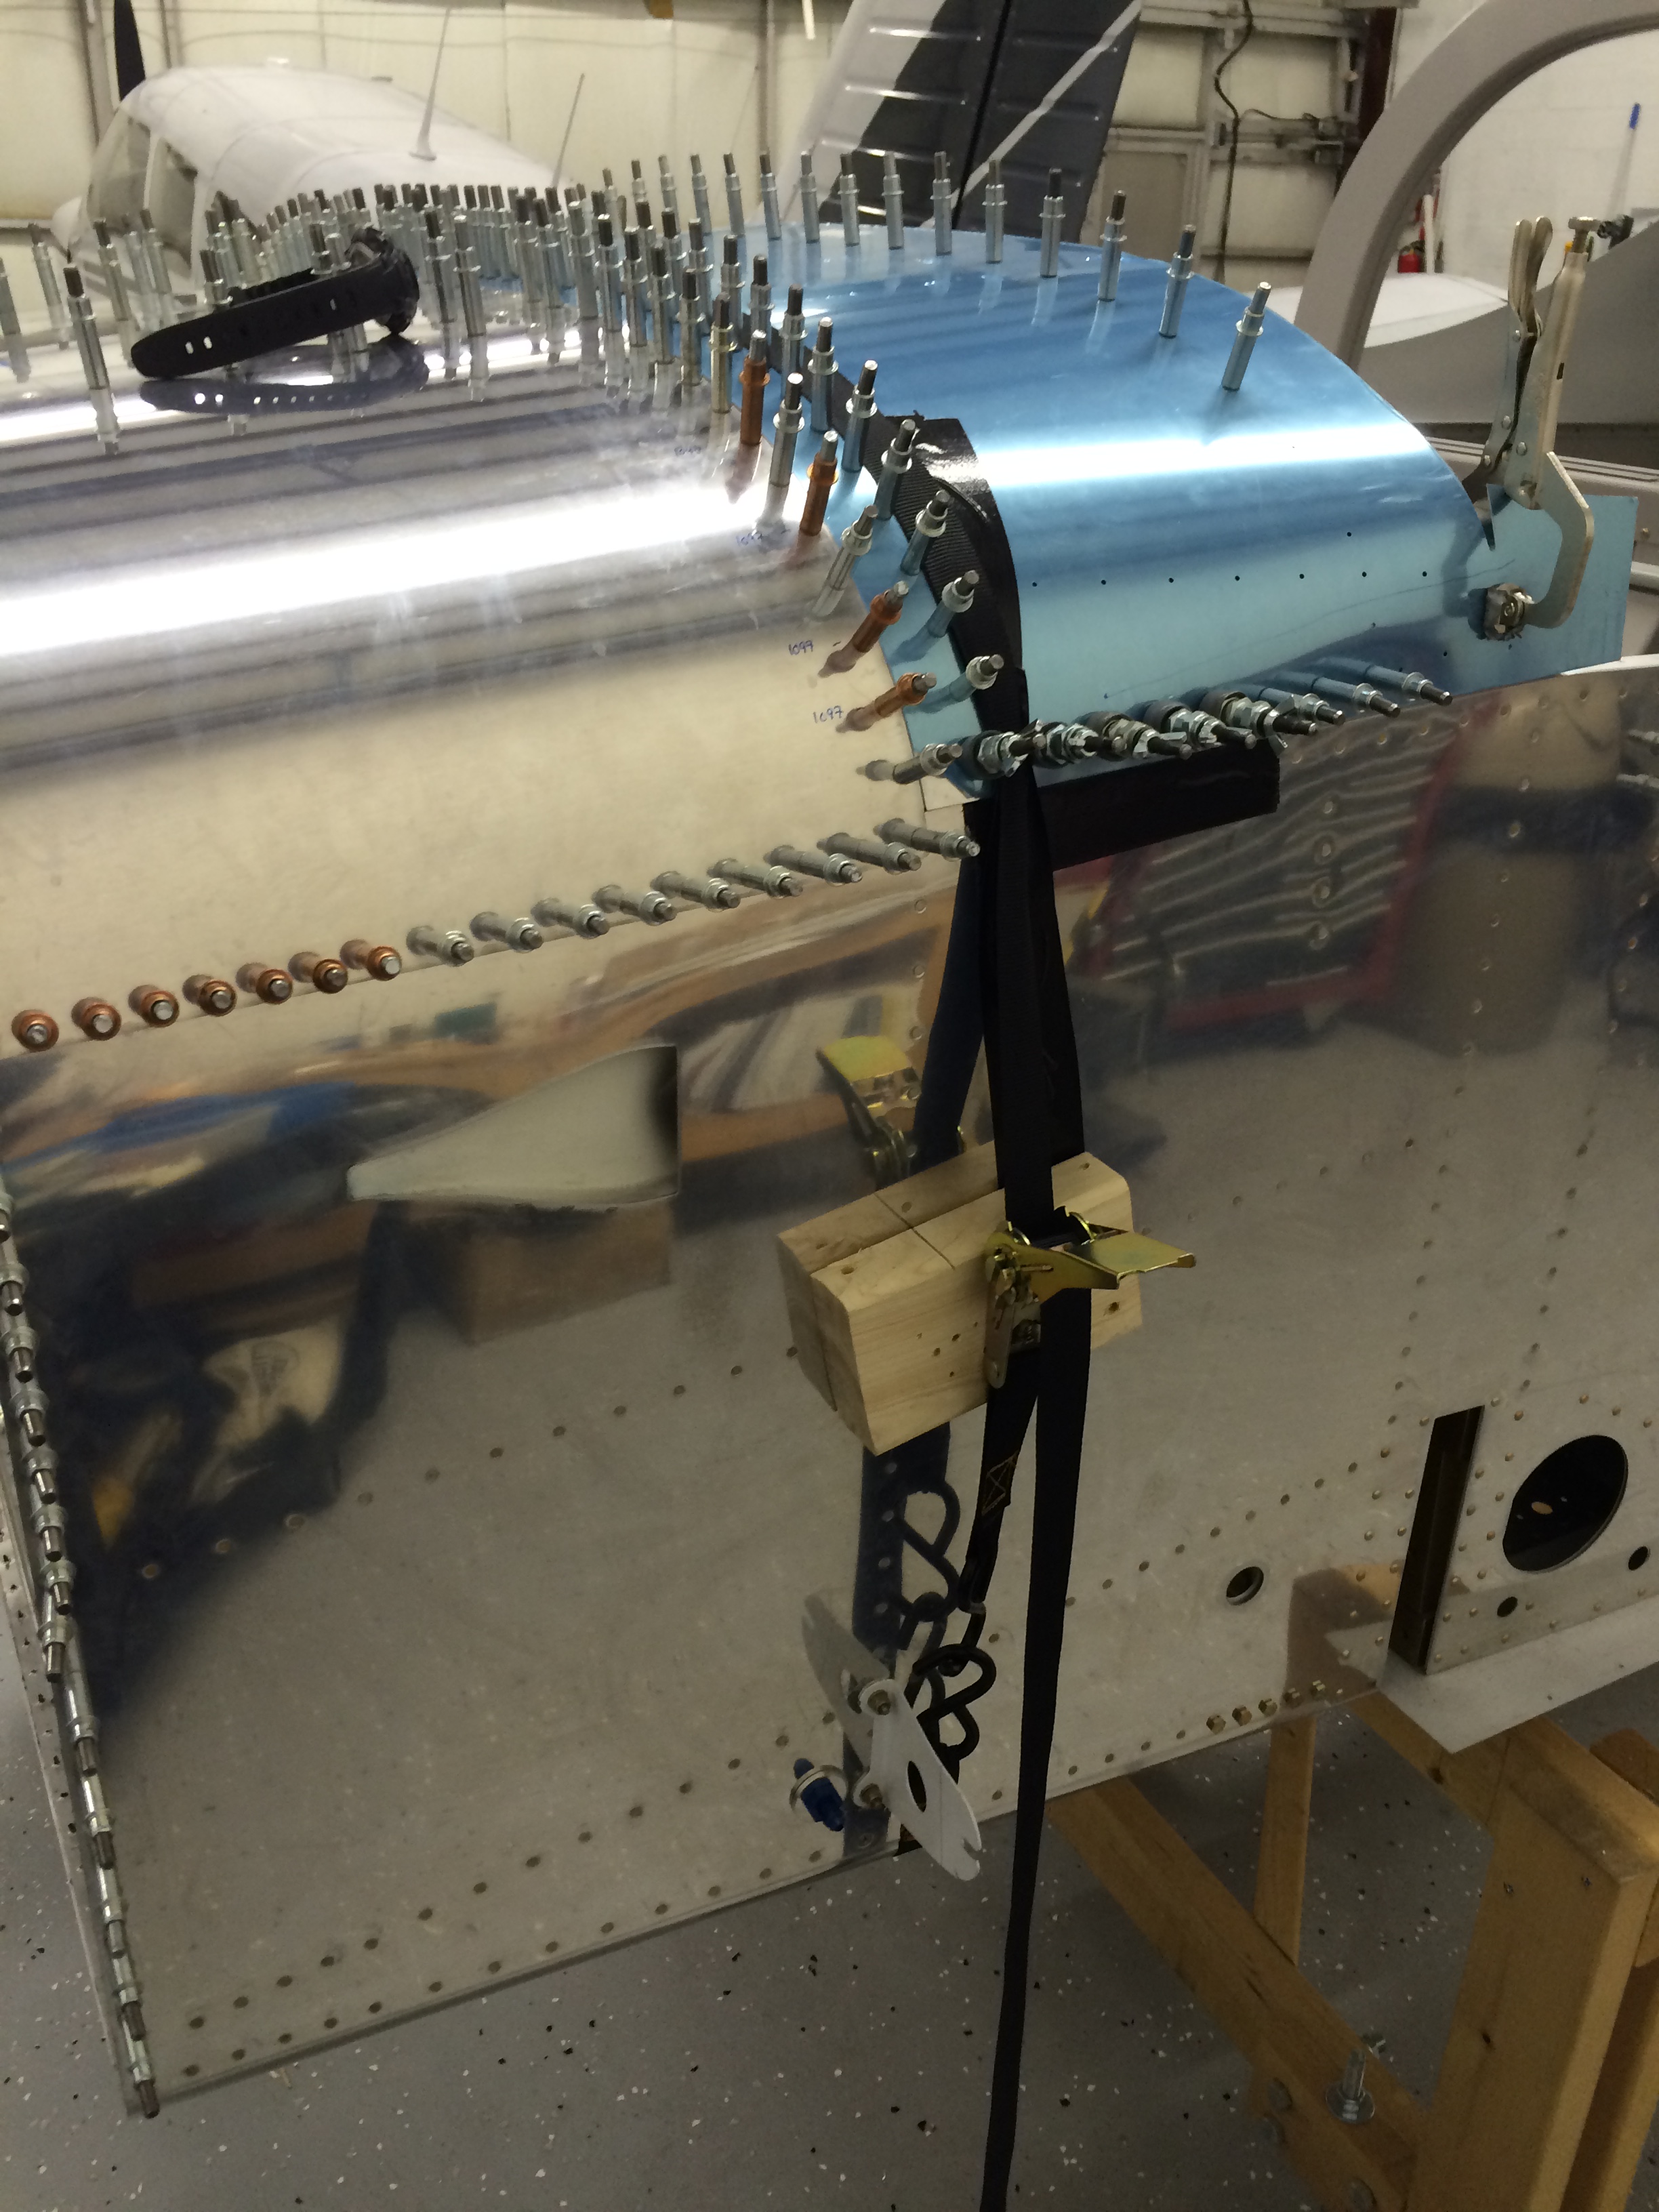
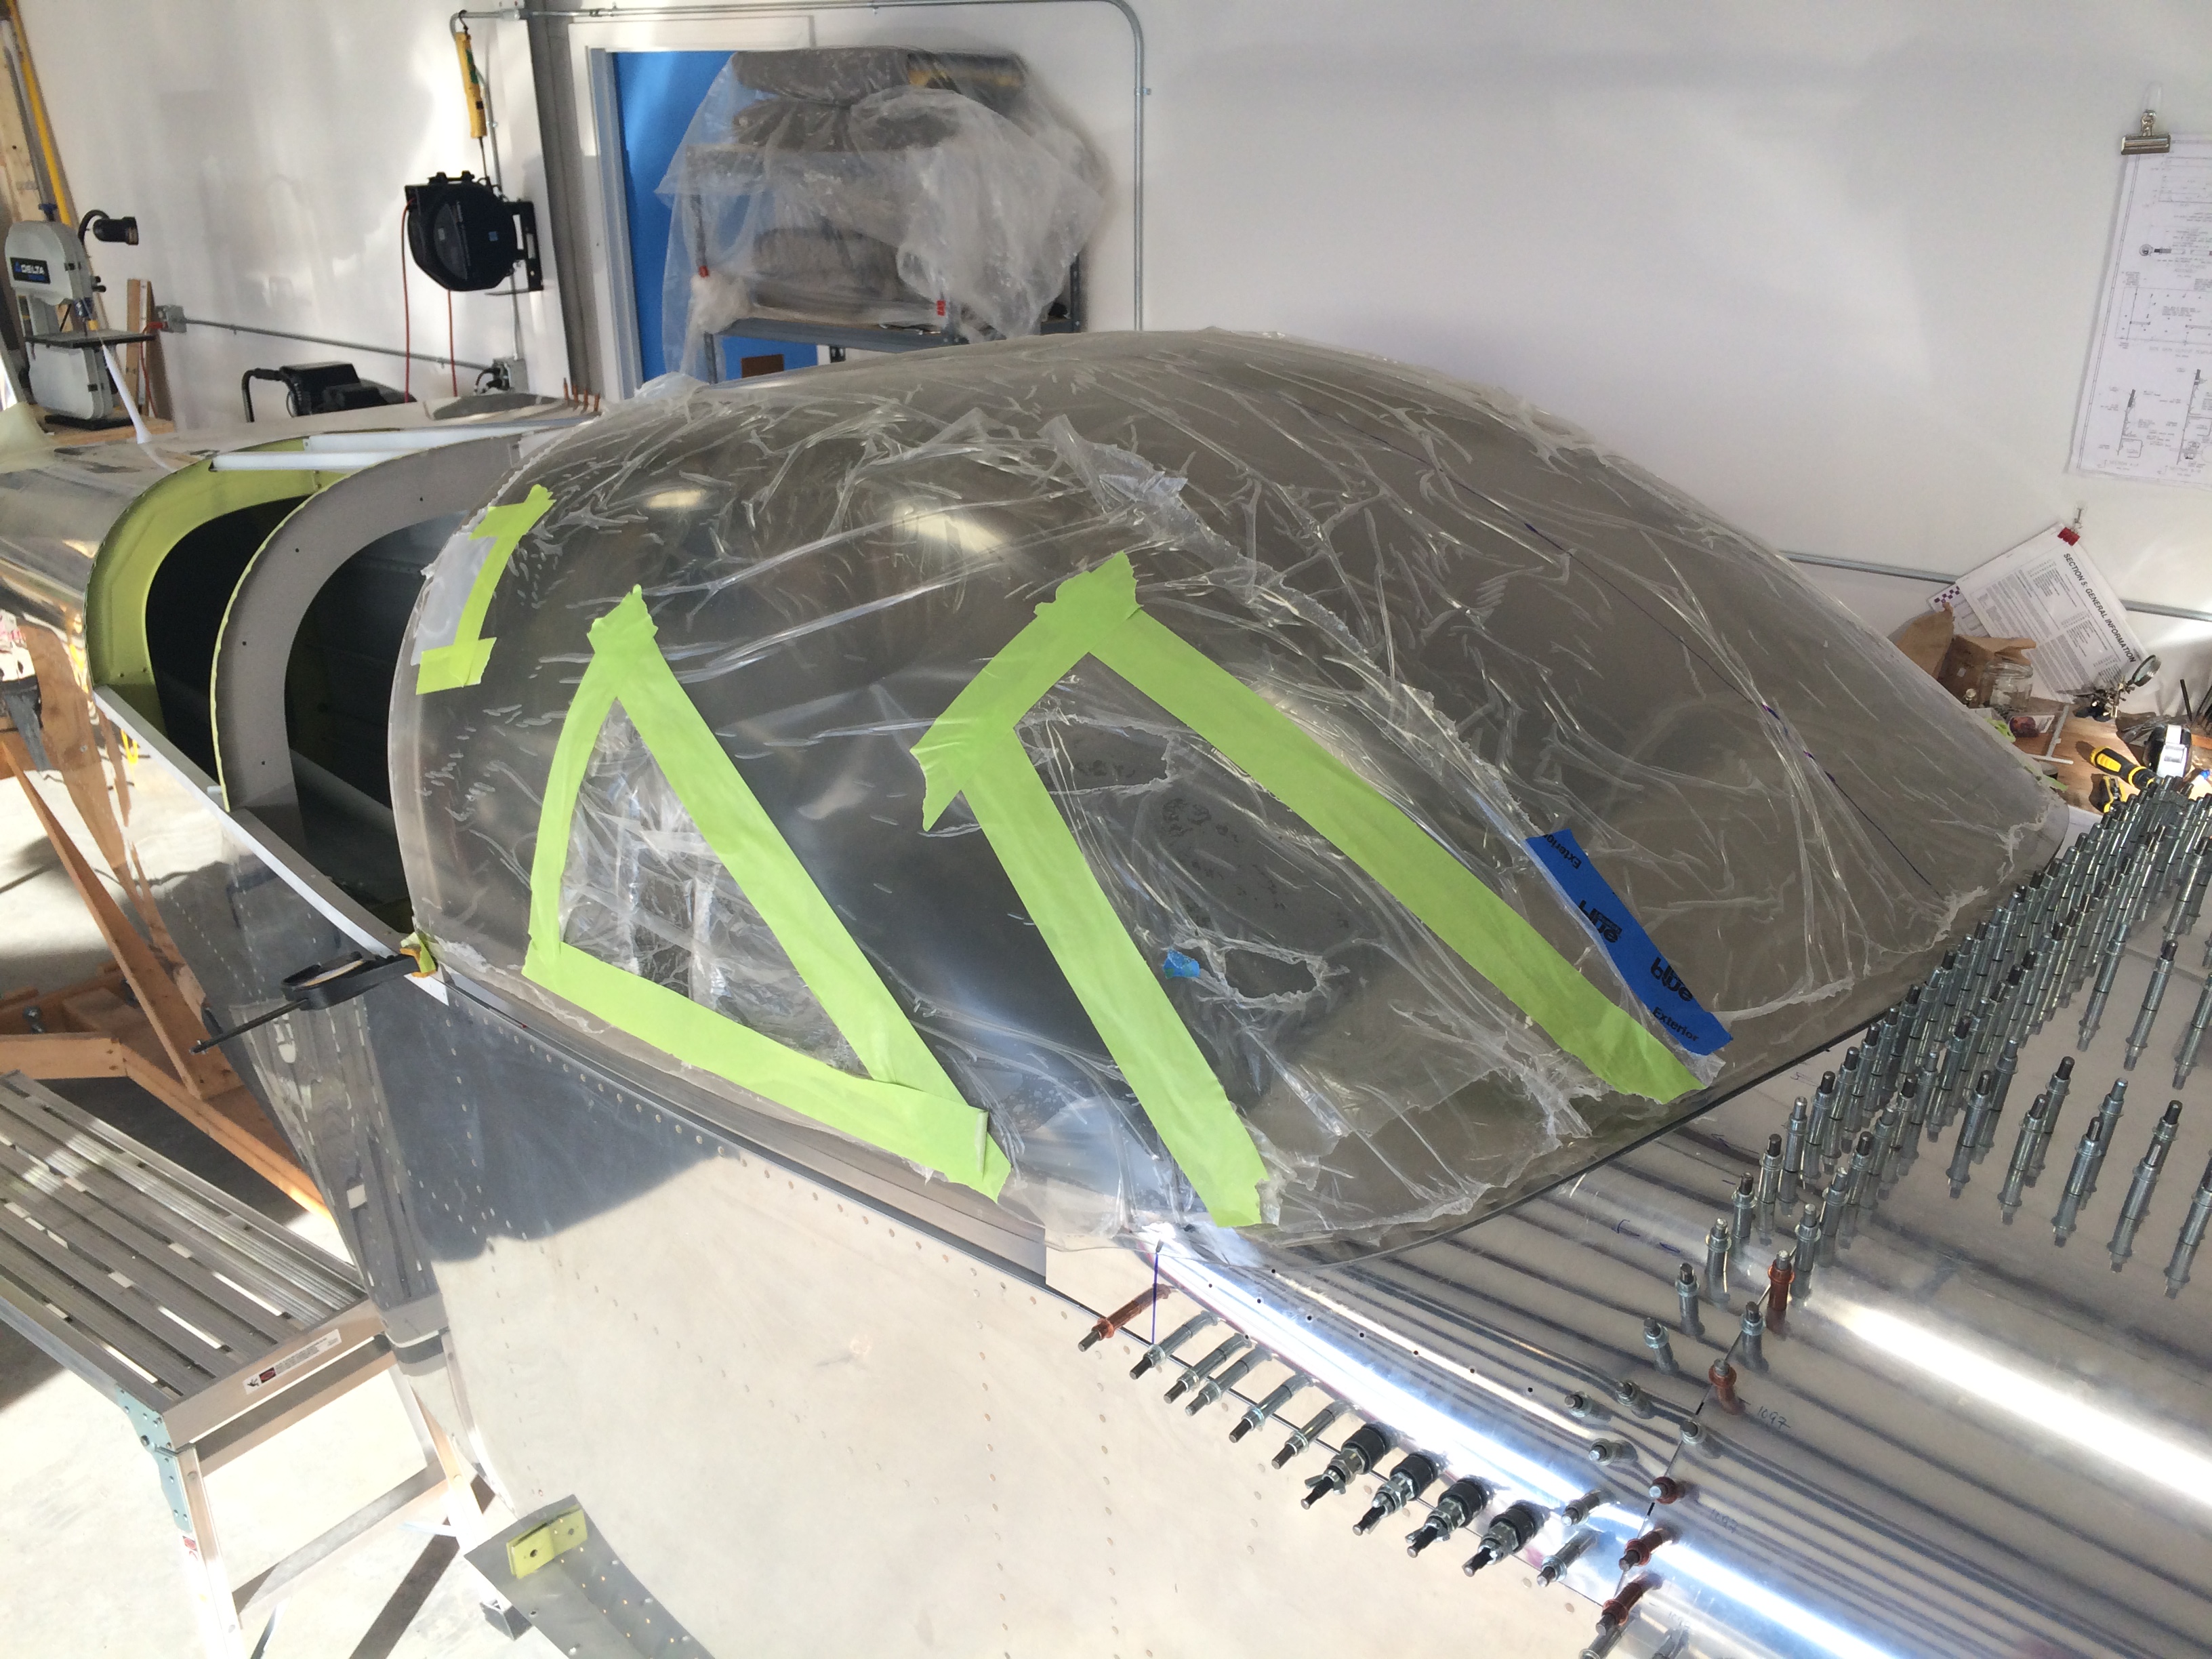
I hoisted the canopy onto the sawhorses and plywood, and used some long 2x4s to move it off the work surface They also gave me something to clamp some smaller pieces of 2x4s as side supports that keep the canopy from spreading as I cut it.

As other builders have also done, I laid several pieces of masking tape along each side of the cut line to help guide the cutoff wheel. I was skeptical that this would work, but it did and very well too.

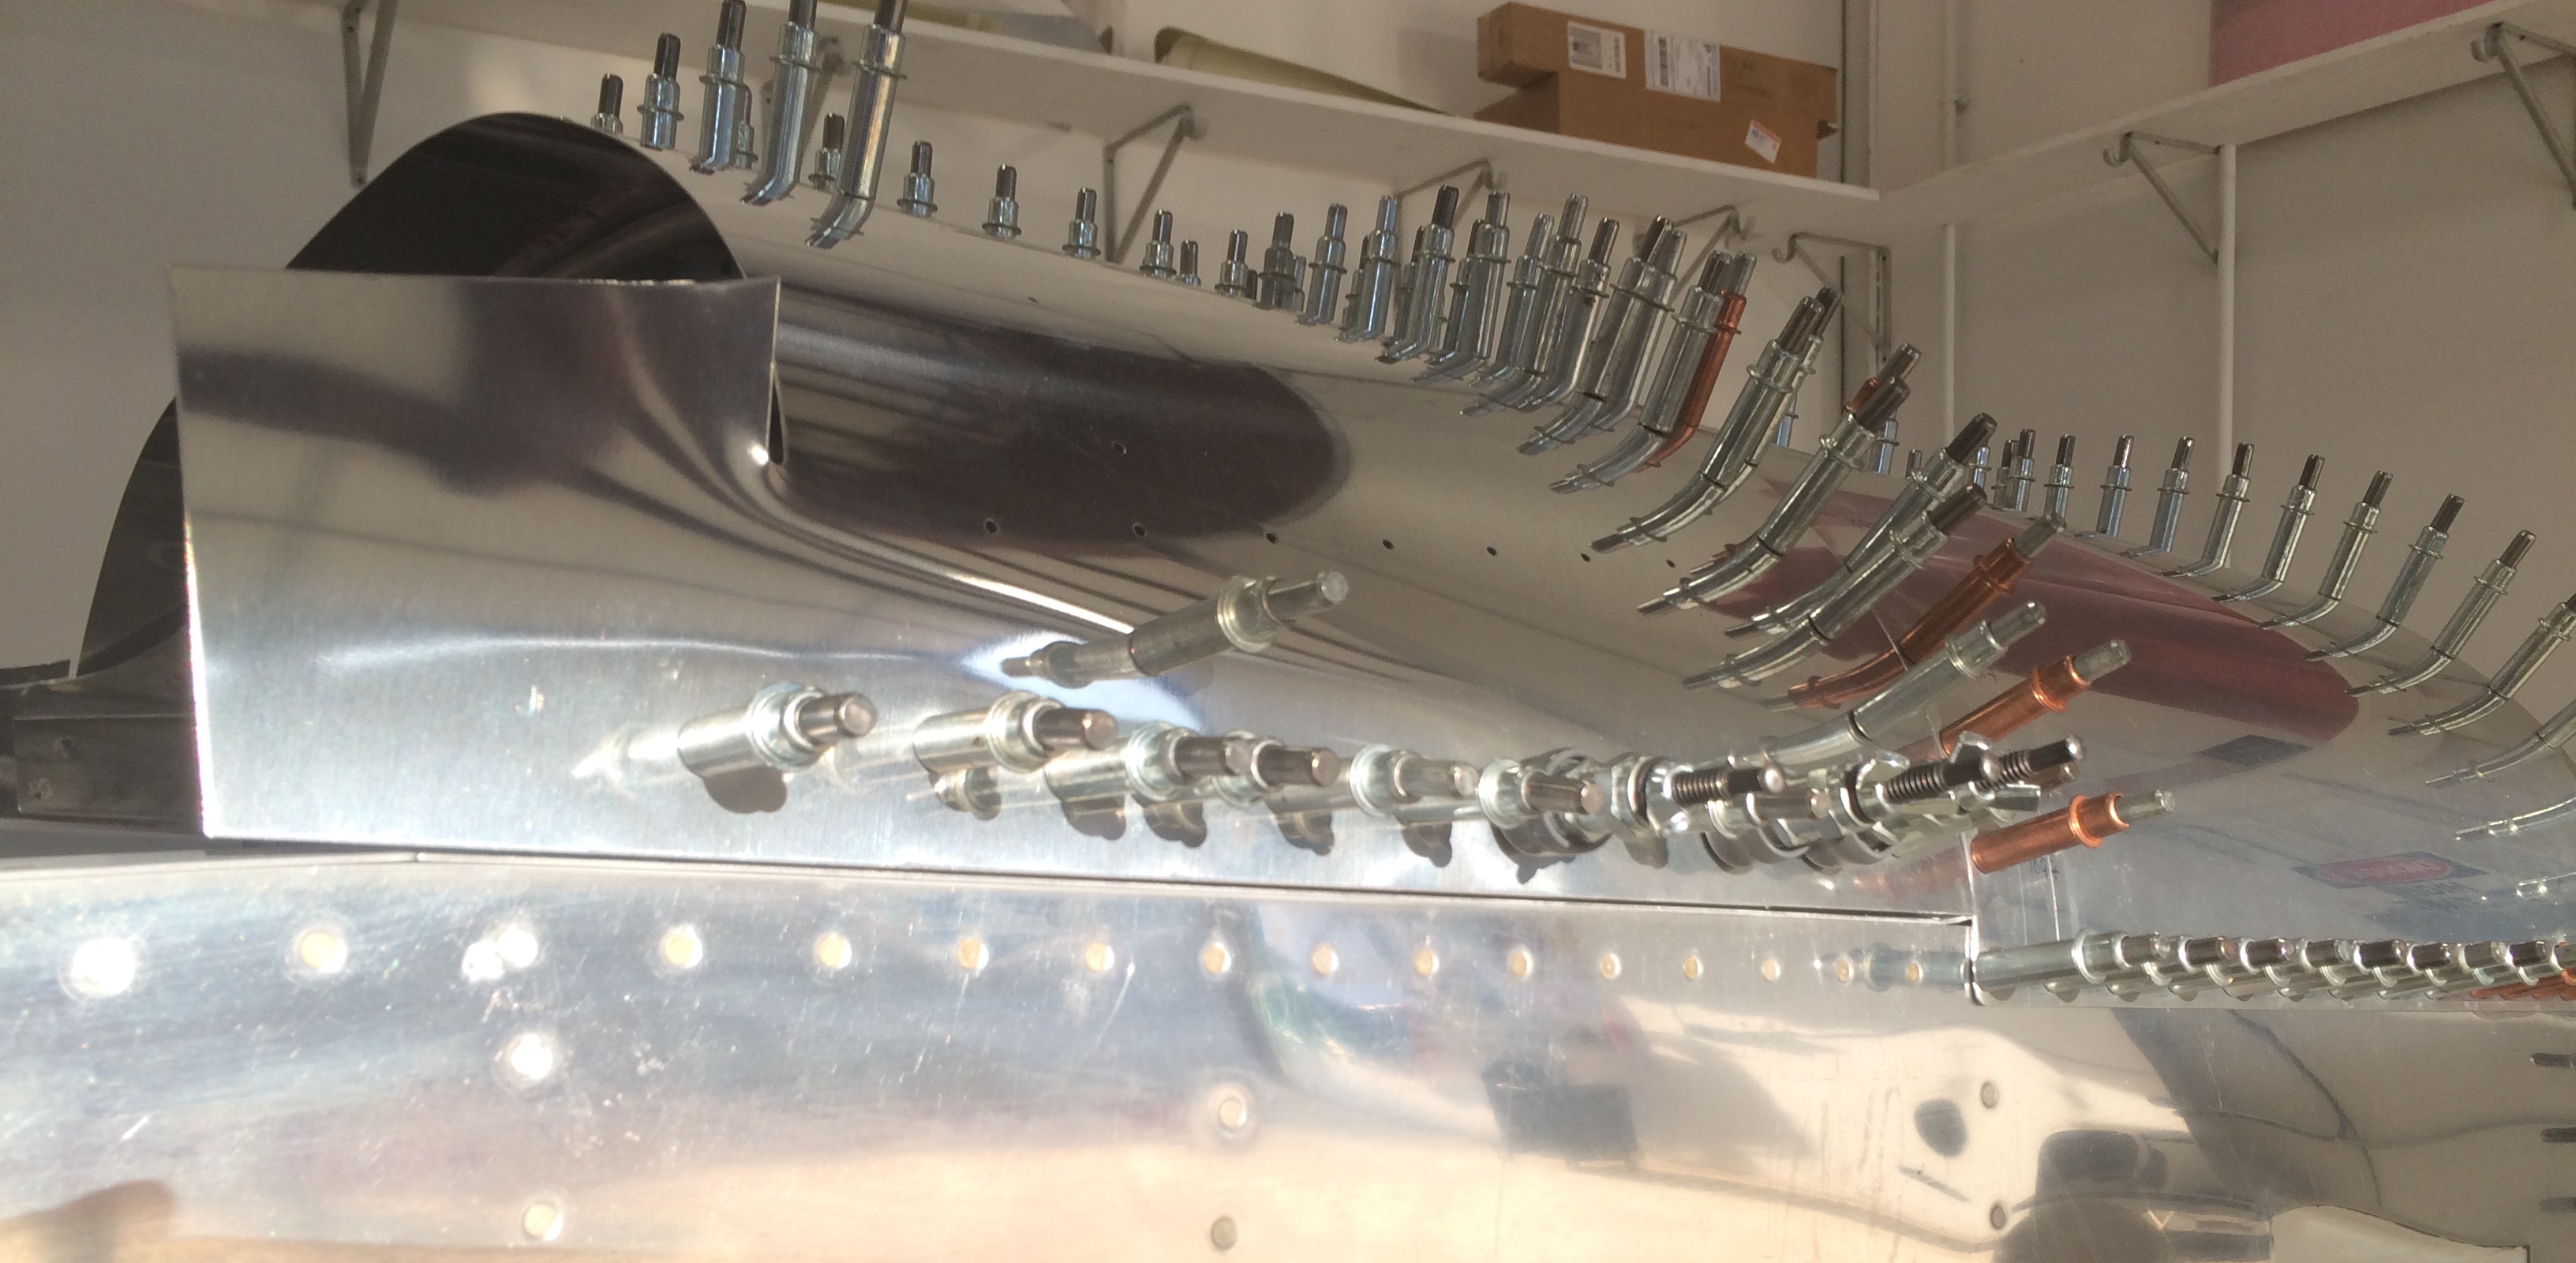
I took a few deep breaths, and started cutting…

Starting the Big Cut

…and the process went very well. I used tongue depressors to keep the canopy separated  as I worked my way along the cut line.

The Big Cut is complete

And here’s the completed cut…what a relief to have this done.

Forward half of canopy on the frame

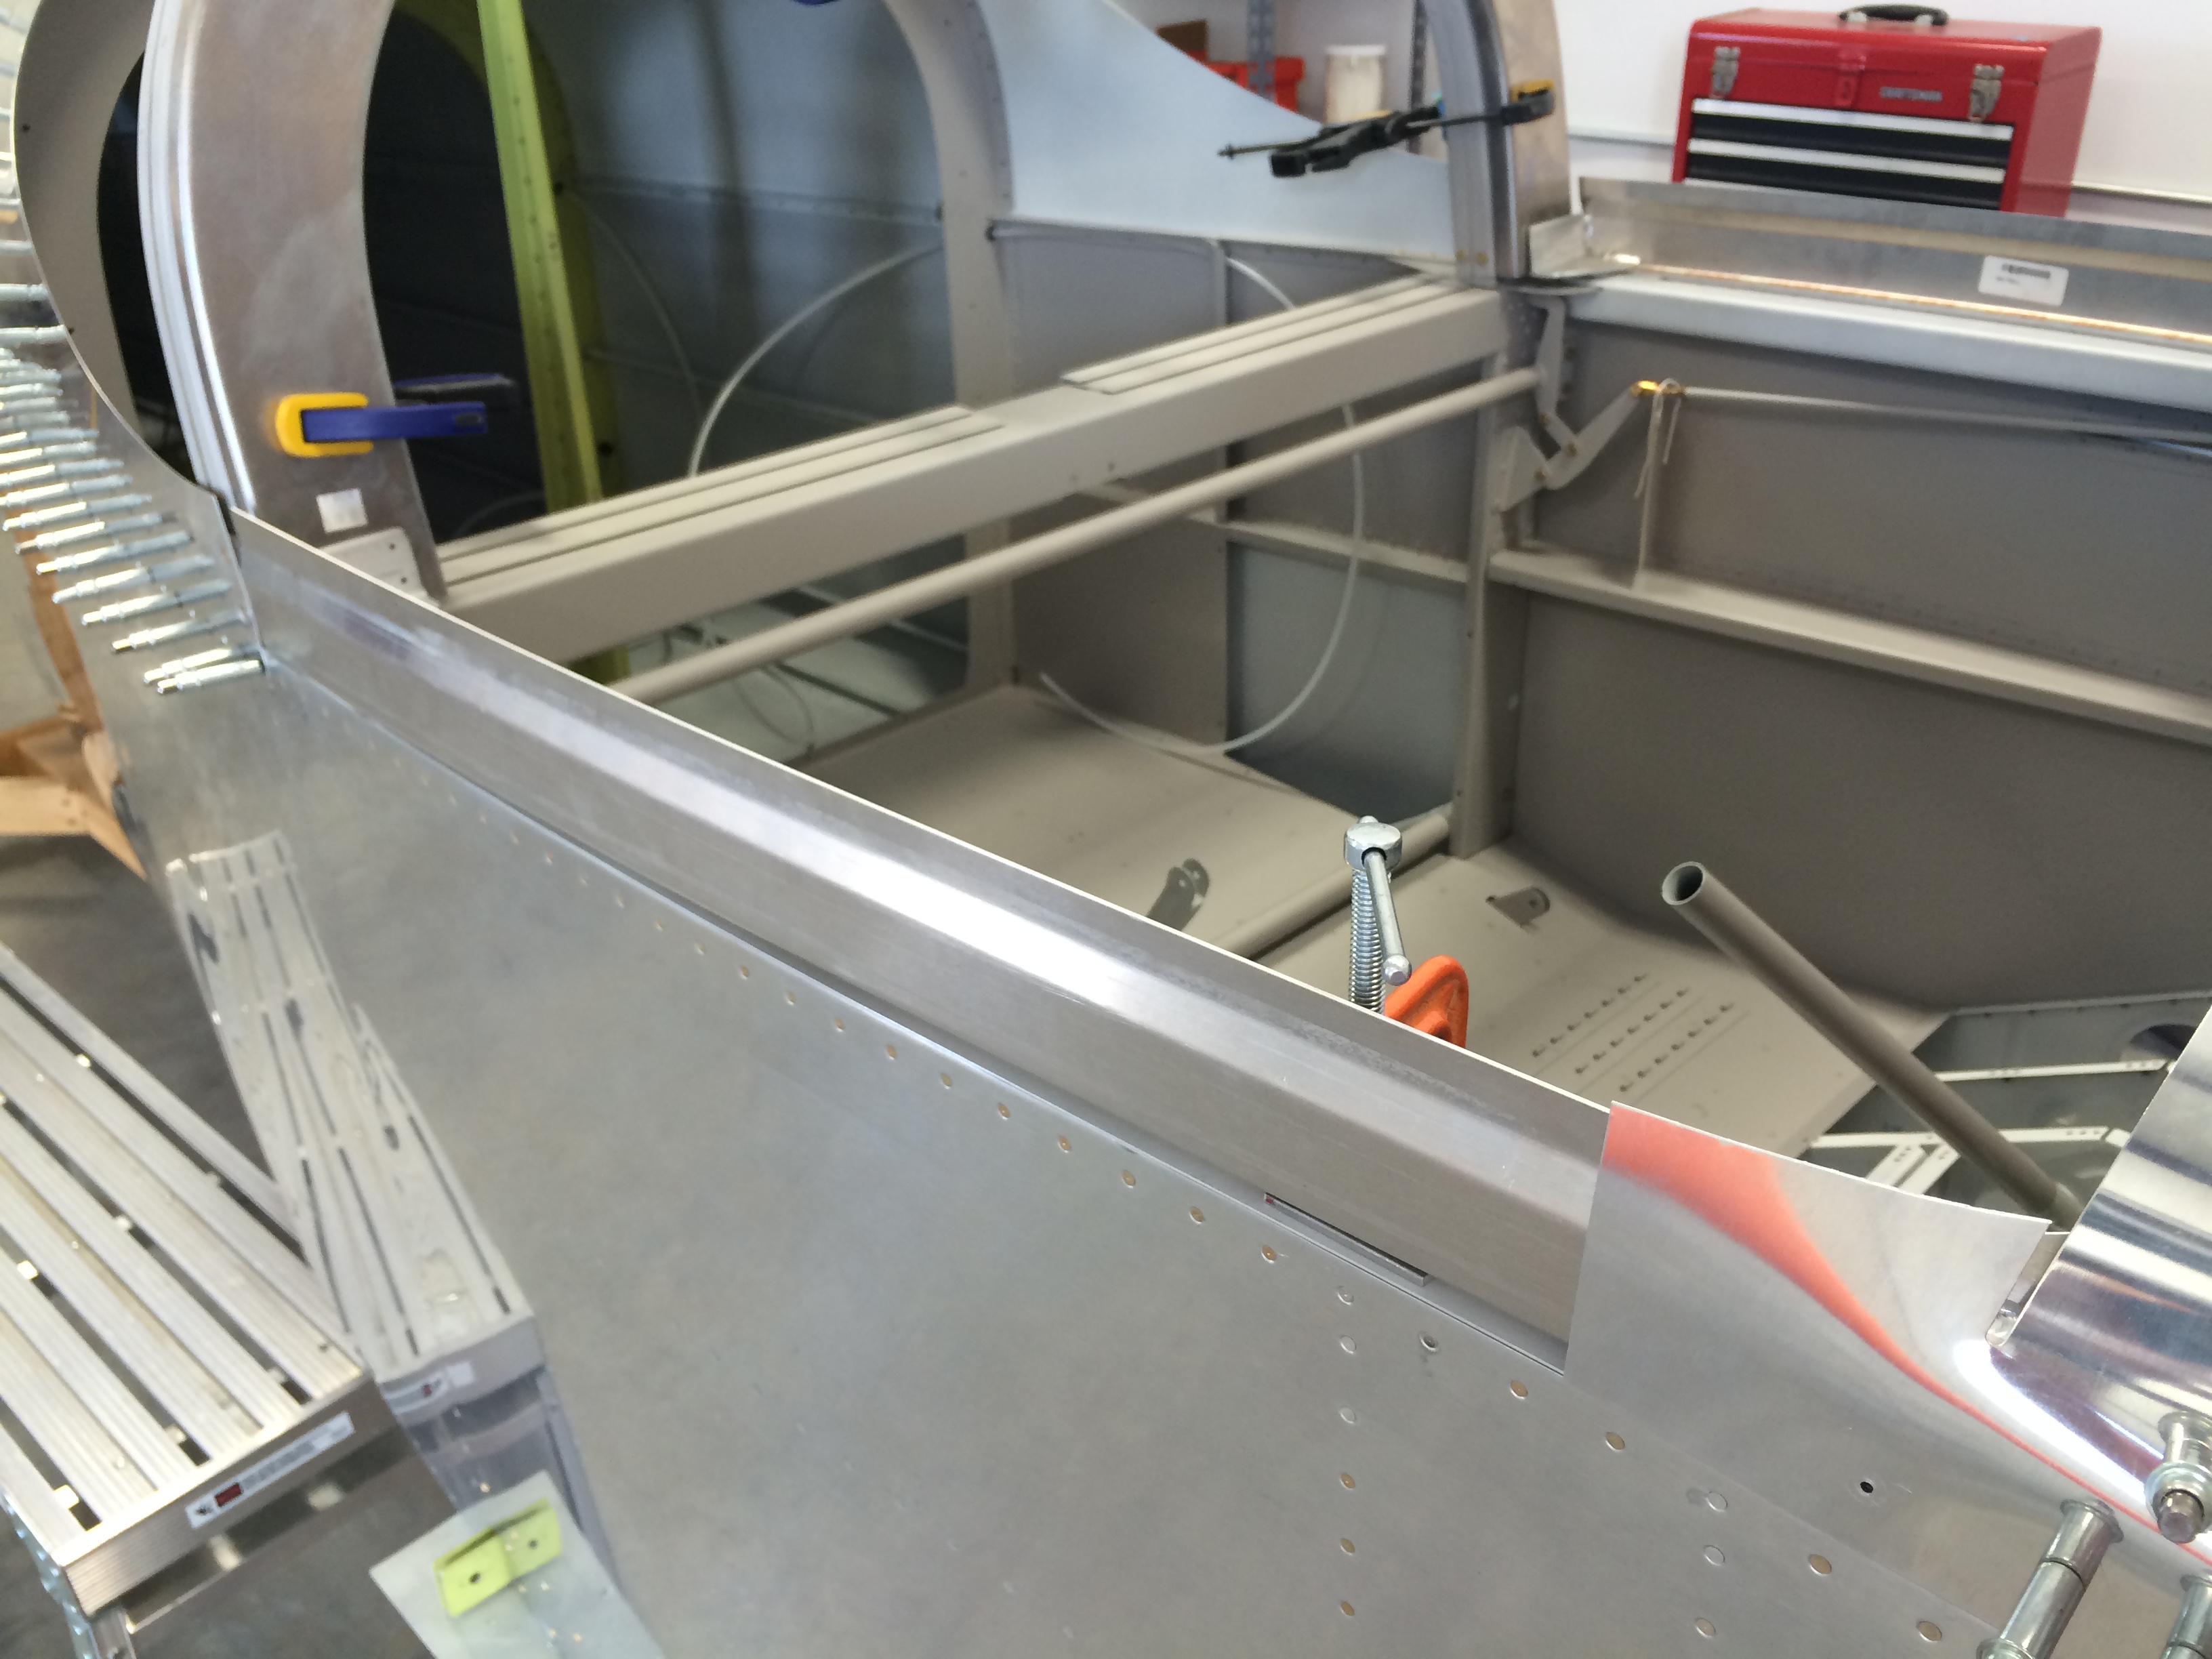
It’s a lot easier to move the canopy on and off the fuselage. I’ll be doing a lot of that as I finish fitting it to the frame and then drilling the attach holes.

A riveted frame

Got just enough time in the hangar tonight to rivet the canopy frame together and put it back on the fuselage. I left the primer to dry for a couple of days, and the Nason etching primer I used was tough as nails!

Frame riveted before installationFrame rivets

There’s an small and easily fixable mistake in this pic. Can you spot it?

2015-08-27 20.53.47

And now it’s time to start trimming the canopy…yikes!

More fun fitting the canopy frame

More fun with the canopy this week as I spent several hours adjusting the fit of these parts that form the rear canopy frame.

The distortion caused by both the flanges and L-shaped bend in each frame half takes some work to make them fit adequately. The instructions tell builders to flute these parts to remove the distortion, but at least one of mine was just about right out of the box and really didn’t need fluting. The other one doesn’t fit quite as well, but I’m resisting the urge to flute it because (a) the fit isn’t that bad and (b) I tried fluting a spare frame part I had and it was a PITA.

In this picture the frame halves are not perfect, but they’re getting close to being good enough.

Rear canopy frame

The side rails were an easier fit, because Van’s had already done all the bending and metal shrinking needed to make the side rail curve fit the longeron bends I worked so hard to perfect several years ago.

Canopy side rails

The side rail flanges don’t quite conform to the aft frame parts, but I think they’ll pull into shape pretty well when they’re drilled and clecoed.

Side rail to canopy bow fitI still have some parts to fit to the frame, so stand by for more words and pictures.

Canopy splice platesLaying out the side rail and rear canopy bow splice plates. Note that the side rail doublers at the bottom have one hole that isn’t marked to be drilled – that’s because Van’s conveniently forgot to mention in their plans that there’s already a hole through the canopy frame in this area, and if you drill the hole in the splice plate it won’t line up with the frame hole.

2015-08-20 19.55.46

Ok, so I said I wasn’t going to flute the rear frame – but I did, and it actually came out pretty well. Here’s the side rails and rear frame clamped into position.

Fitting the side rails

The little cheapo Harbor Freight clamps are holding on some strips of 0.032″ scrap that simulate the canopy side skins. The side rail is correctly placed when the bits of scrap lie flush with the side of the fuselage.

Side rails drilled to F-631s

Sharp-eyed RV builders will see that I’ve inserted a shim between the side rail welded angle and the F-631 rear frame half.  The fit wasn’t quite what I wanted, so when in doubt – shim it out. After that I couldn’t think of a good reason not to drill everything, so I did.

2015-08-21 16.07.25

These plates splice the side rails to the forward canopy frame, and drilling them was a bit of a pain. It’s vital to uncleco and peel back the forward canopy skin, as nine of the ten holes in this part don’t go through that skin and drilling through it would be uncool.  You’ll see one hole (bottom row, second from the right) that doesn’t quite line up. That hole *does* go through the skin and frame, and once the other holes were done I back-drilled this one using the forward frame as a guide.

2015-08-21 17.10.48

And here’s everything drilled and clamped to make an almost-complete canopy frame. As my friend Jim would say, this is one of those moments of Big Visual Progress. They kinda sneak up on you after a lot of tedious fitting and drilling, then suddenly everything comes together…et voilà, it looks like a real airplane part.

I hated to take everything apart, but there are a couple of small parts left to fabricate and fit to the frame.

Wedges

Look carefully in the pic above, just under the two leftmost copper clecoes, and you’ll see a thin aluminum wedge filling the gap between the side rail splice plate and forward canopy frame flange. Scroll back a couple of pictures and you’ll see the unfilled gap.

I had to make two of those – one on each side of the canopy – and each one took about an hour of cutting, sanding, filing and fitting.  What fun…but now I can take the frame apart  and debur, countersink and prime everything before riveting. And that, in turn, means it’ll soon be time to work on the plexiglass canopy itself.

Tweaking the canopy frame

After drilling the canopy hinges, I had to do some filing on the seal support angles so that the canopy would open without rubbing on them. Not really much to see, because the seal support angles are hidden in this pic.  But the canopy frame now pivots the way it should, and that’s worthy of a picture.

Tweaking the canopy frame

A week of airplane building

A solid week of airplane building…missing Oshkosh, but getting a lot of work done.

I’ll be adding text here when I get the chance.  Right now it’s a holding place for pictures so I can document what I got done…more to follow.

Support for brake line Adel clamps

Matco PVPV-D parking brake and doubler –

Parking brake valve and doubler

Doubler plate taped to firewall

Temp fitting the parking brake doubler

Testing out my plumbing idea.

Valve taped into place

Parking brake taped into place to check lines

2015-07-21 17.34.33

Parking brake valve crossover lines installed.

Brake lines protectedBrake lines protected against abrasion with spiral wrap. Somehow it makes them look more “finished.”

Canopy latch parts painted

Canopy latch parts painted

Canopy latch installed

Massaged the canopy frame, then reinstalled skin. Flush dies in the pneumatic rivet squeezer helped work out inadvertent creases in the skin, and a flush set in the rivet gun helped with the frame.

Canopy taped for final drillingCanopy taped in place with spacers installed for final fame drilling.

Riveting the canopy frame 1

Riveting the canopy frame. It’s about time I put that 12″ double-offset back rivet set to good use.  It sucks up a lot of kinetic energy, though…90 PSI on the compressor just to get the rivets to set.

Riveting the canopy frame 2

Another picture of riveting the canopy frame

Frame riveted

Here’s the canopy frame riveted, with the skin reinstalled, and fitted back into place on the fuselage.

Canopy frame fitted and ready for drilling

Final fit before drilling the hinge brackets

Canopy frame side fit

Fit is pretty good on the right side.

Hinge hooks drilled, bushings insertedCanopy hinges drilled and bushings installed


Framing the canopy

Today we started the last major structural part of the airplane – the canopy. The canopy is constructed from the forward edge back, and the first step is to fit the forward canopy skin to the welded aluminum canopy frame.

The frame has some holes already match-drilled in its forward ribs so it’s not tough to get the skin on the front of the frame, but the aft part of the frame is drilled in assembly with prepunched holes in the skin. The aft frame tube didn’t line up particularly well with the skin, so I had to apply some manual persuasion (i.e., I used a dead-blow hangar) to make the tube align with the skin for match-drilling.

2014-11-10 12.39.58

I drilled the holes to #40, although they’ll be drilled later on to #30 and countersunk to accommodate blind flush rivets.

2014-11-10 12.48.13

The skin still doesn’t fit particularly well…there are some gaps between the frame and skin that just can’t be closed. From reading various online forums and other builders’ websites, this is a common problem and I’ll find a way to deal with it.

2014-11-11 11.47.45Also, the canopy frame sides don’t line up well with the fuselage. Some additional manual persuasion may be required here…

Latches and linkages

Next up on the canopy task list…installing the side latch handle, linkage and latch tube. The only tedious part of this process was laying out and cutting holes – very visible holes – in the fuselage side skin to accommodate the latch handle slot and rivets.

Vans includes a template in the plans to lay out and drill the holes, but I decided to measure and lay them out by hand.  It took a little time, but the results were good.

Laying out latch holes

The four larger holes in the middle mark the start and end of two rectangular holes for the canopy latch handle. I used – very carefully – a cutoff wheel in my Dremel tool to start the holes, then finished them with a flat jeweler’s file.

Opening up latch holes

I borrowed an idea from fellow builder Mike Bullock and clamped a piece of scrap angle to the skin as a reference for filing. The holes came out nice and straight…very cool.

Latch assrmbled

Here’s the latch mechanism itself – two pieces of 0.063″ angle sandwiching the latch handle (top) and locking mechanism (bottom).

Drilling the latch

The latch mechanism fit almost perfectly in the slots I cut – only a little adjusting was required on the front hole. I clamped the mechanism in place and match-drilled the angles to lock the whole assembly into place.

Latch clecoed

Here’s the other side with the spiffy yellow latch knob installed. There’s also a very small hole drilled in the wing carrythrough bulkhead which supports a small spring that keeps the locking mechanism pressed against the latch handle.

Fitting latch tube

The latch tube itself is held in place by two Delrin blocks that are match-drilled to the F-705 bulkhead. Fingers on the latch tube engage holes in the bulkhead. There was only one minor problem – the tube was slightly too long, which made it impossible to center the blocks on the F-705 reference holes. A tubing cutter took care of that problem.

Latch tube drilled

I drilled the blocks to #10, and the F-705 holes to #12, to accommodate AN3 bolts that hold the blocks to the bulkhead. Here’s the tube bolted into place, and two parts of the latch linkage in place.

Latch linkage fitted

The only remaining part to be fabricated was the pushrod that connects the latch handle to the latch tube linkage. Nothing too difficult, just a lot of twisting with a 1/4″-28 tap.

Latch linkage with tube

And here’s the final product…everything works smoothly.  Cool.

Starting the canopy

Although I still have to finish up the elevator pushrods and mount the horizontal and vertical stabilizers, I’m moving on to the canopy frame while I decide what to do about Van’s horizontal stabilizer service bulletin. I haven’t decided yet whether to mod my horizontal stabilizer per the bulletin, or just build a new one…

First steps on the canopy are fabricating the alumunum and Delrin spacers that accommodate the canopy hinges.  Nothing too complicated here…

Canopy hinge spacers

Fitting them to the forward subpanel was slightly tricky, since Vans tells you to predrill holes in the spacers that they tell you later to match-drill in place with the subpanel. Fortunately, the hole locations called out in the plans are spot on, so I didn’t have much trouble fitting the spacers.

I didn’t take any pictures of the fitting process, but here’s the finished product on the left side…

Left hinge spacers…and on the right side.

Right hinge spacers